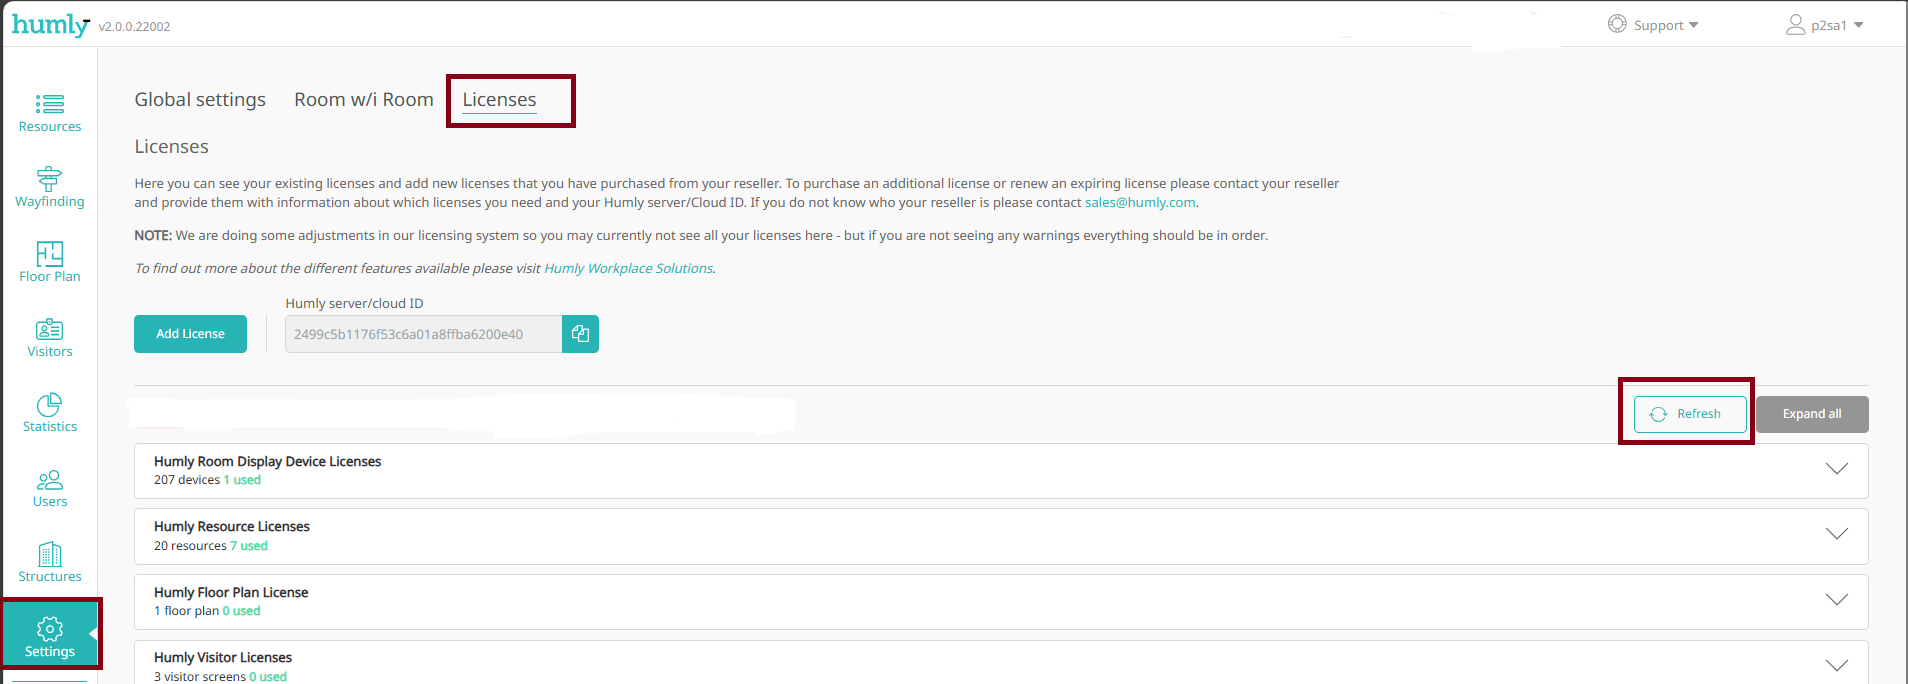
After importing the resources in the Humly control panel wizard you will need to upload the license files to get the solution to work. Go to Settings > Licenses and follow one of the two steps below.
1) Press the add license button and upload the license files that were sent to you.
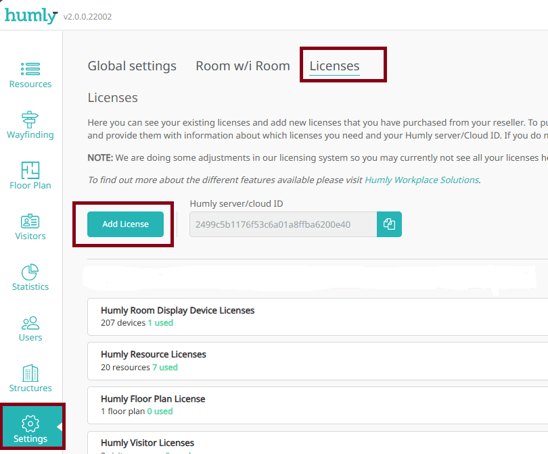
2) Click the refresh button to fetch the licenses directly from our cloud portal
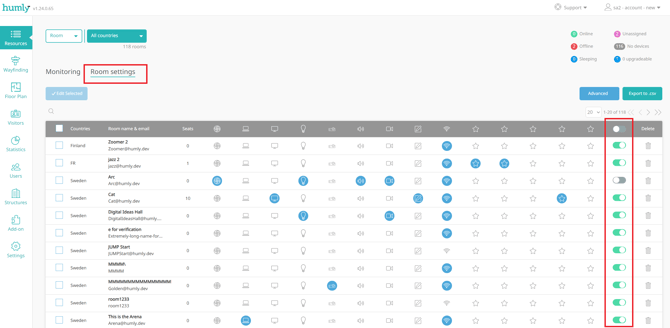
Newly added resources in Humly are automatically deactivated, so next step is to activate these resources.
When a resource is deactivated it will not sync any meetings.
Press Resources in the top left corner, then Room settings. Here, on the right side of the screen, you can see all the resources and whether they are activated or not. Press each resource you want to activate, or press the one on top, and all resources will be activated.