This section will go through the necessary preparations needed in Exchange SE/2019/2016/ for HCP integration.
In this article you will find support for Exchange in how to:
- Create Service Account
- Grant the Service Account Impersonation rights with management scope
- Create Resource Accounts
- Create Room Lists using the Exchange Management Shell
Create Service Account
It is recommended to create dedicated service account for integrating Humly Room Display with the exchange server (e.g service-account@domain.com)
This account will be used for authentication and carrying out requests between the Humly Control Panel and Exchange SE /2019 /2016 / via EWS (Exchange Web Services).
In the below example, we will create the service account on Exchange 2019, the steps are the same for Exchange server SE/ 2016.
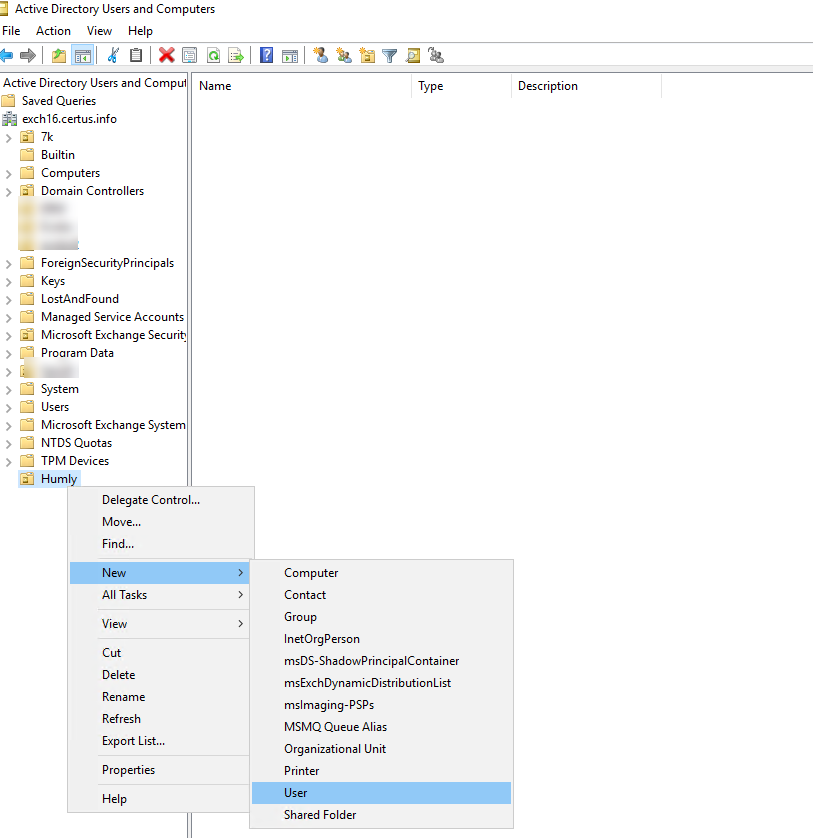
- Open "Active Directory Users and Computers" and create a user. This is typically done by navigating to the desired Organizational Unit (OU) >, right click >, "New" >, "User".
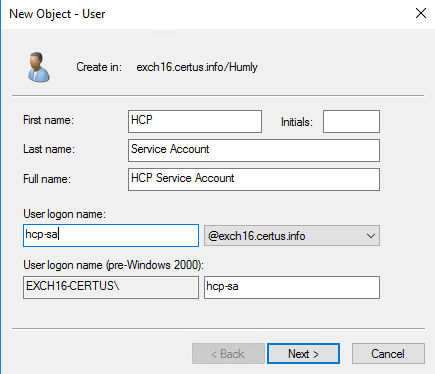
- Fill in the required information for the account creating
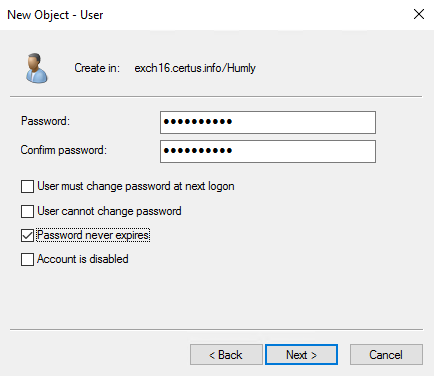
- Setup the password and confirm it, we recommend ticking the "Password never expires" for the service account to avoid service interruption because of the password expiry.
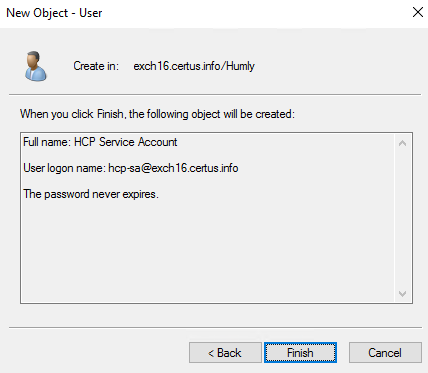
- Review the data and click “Finish” to create the user in Active Directory.
- Next go to https://<,Exchange server>,/ecp/ and login with your Exchange admin account.
- In the Exchange admin center navigate to "recipients" >, "mailboxes", Click add and select "User mailbox".
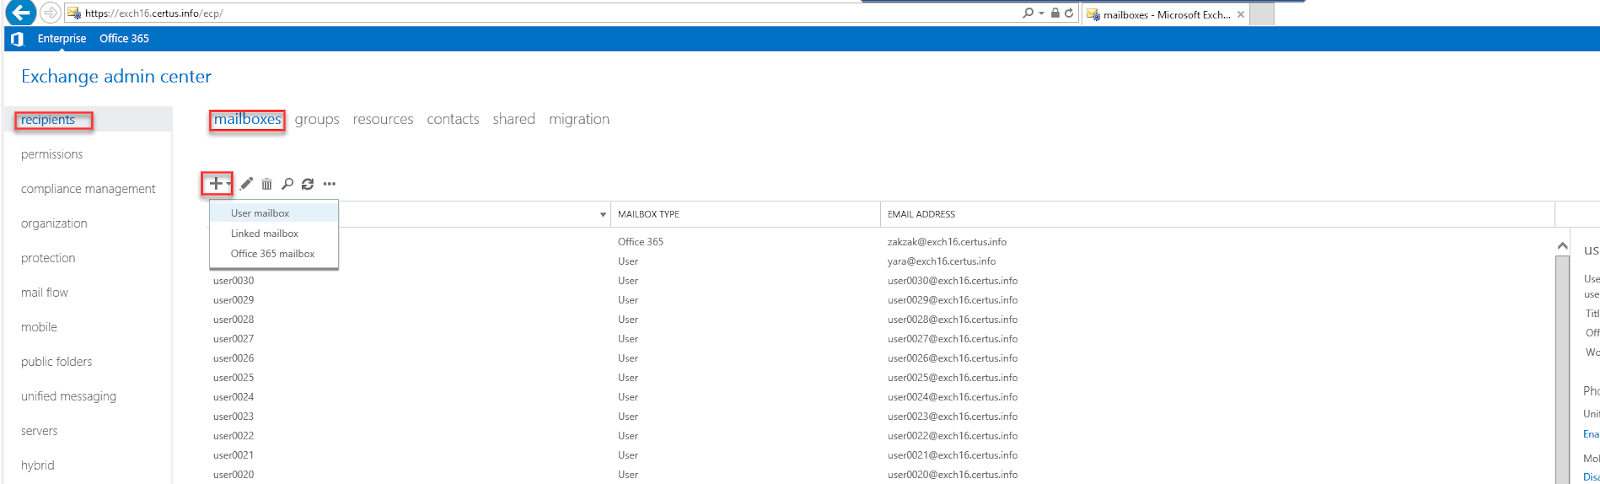
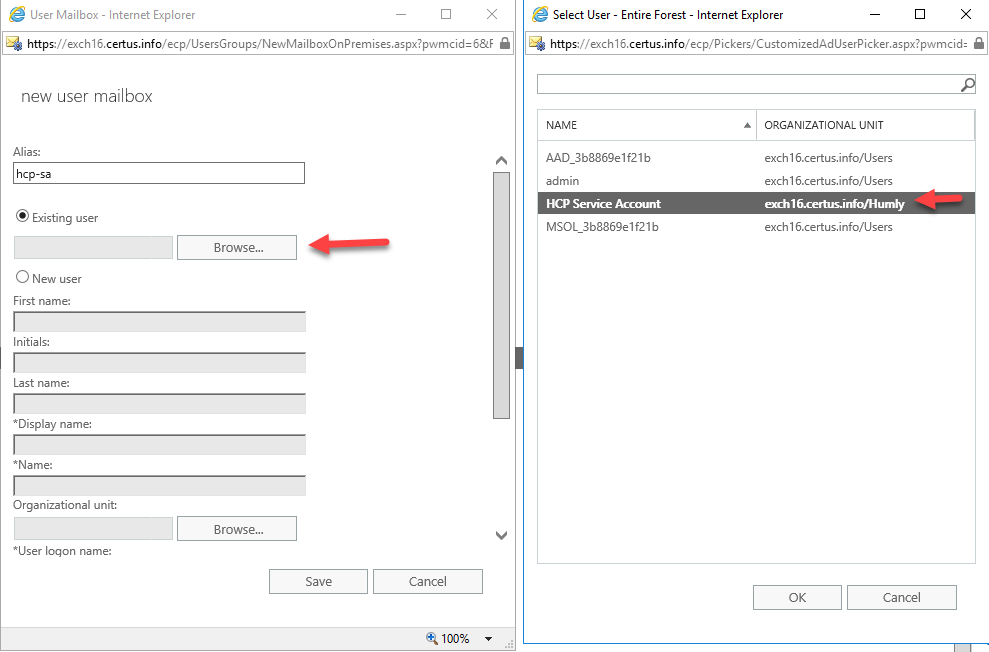
- Fill in the alias and browse toward the account created in the Active Directory
- Click “Ok” then “Save”, now you should see the created mailbox

Grant the service account Impersonation rights with management scope
The below method will grant your service account with impersonation permissions restricted only to resources (room and equipment mailboxes) by applying a “management scope”/“Write scope”.
- Start of by launching the Exchange Management Shell on the Exchange server.
- Create a management scope which will be used in the next step to restrict the impersonation right. The below command will limit the scope to resources (room and equipment mailboxes):
New-ManagementScope -Name "ResourceMailboxes" -RecipientRestrictionFilter { RecipientTypeDetails -eq "RoomMailbox" -or RecipientTypeDetails -eq "EquipmentMailbox" } - Grant the service account Impersonation using the management scope by executing the below command
New-ManagementRoleAssignment -Name "ResourceImpersonation" -Role ApplicationImpersonation -User service-account@domain.com -CustomRecipientWriteScope "ResourceMailboxes" - Confirm that impersonation has been granted to your service account
Get-ManagementRoleAssignment -Role "ApplicationImpersonation" -GetEffectiveUsers - The above command will display a table of accounts assigned with impersonation. Please make sure that in the Role column the value is ApplicationImpersonation, and in that same row under the EffectiveUsername is the name of your service account. If so, that means the setup of the impersonation was successful.
Create resource accounts
A "resource account" or "room mailbox" is the calendar used to book the room via e.g. Outlook and the calendar which HCP will synchronize meeting data with. One resource account per HRD is necessary unless you want two or more HRDs synchronizing with the same calendar.
If you already have all resource accounts properly setup you can proceed to the next section.
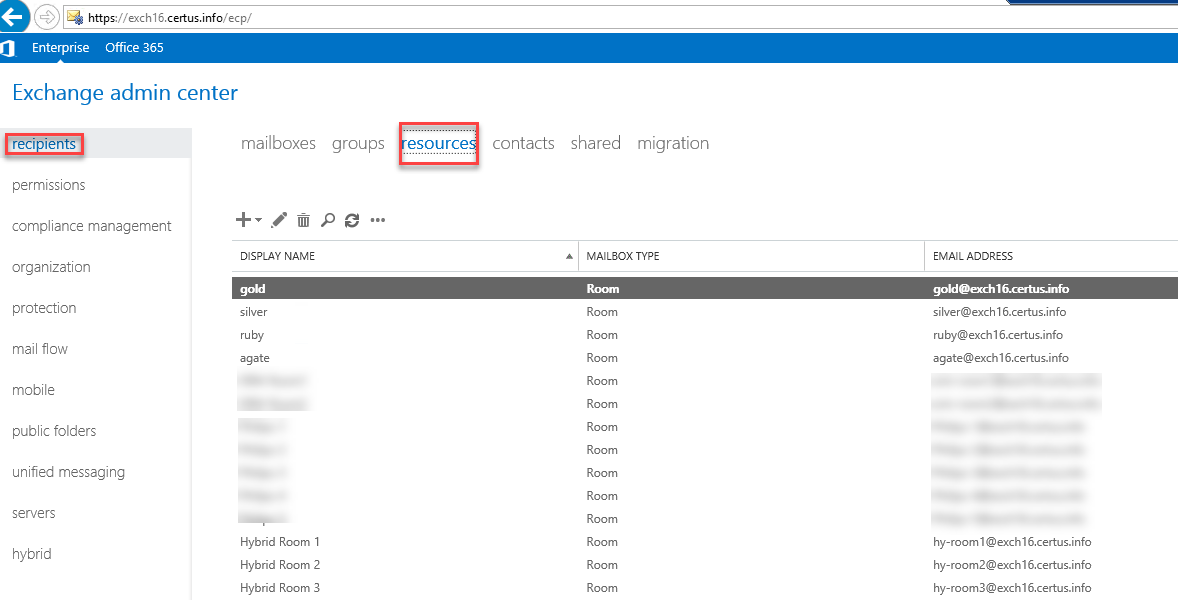
- Open Exchange admin center, and navigate to "Recipients" >, "Resources"
- Click the "+" and select "Room mailbox".
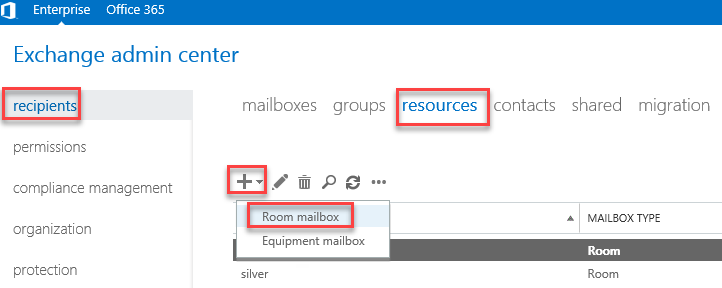
- Enter the "Room name" and specify the resource accounts "Email address". Optionally add a "Location" and enter the "Capacity" and continue by clicking "Save".
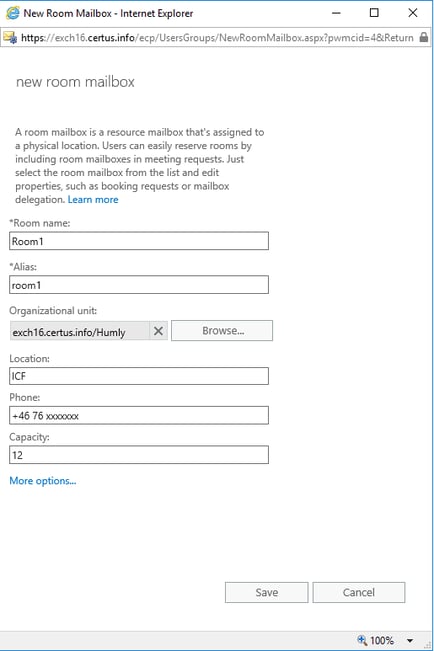
- The created resource account should now appear in the list of resources.

- We recommend you configure the resource account with the below cmdlet using the Exchange Management Shell:
Set-CalendarProcessing room1@domain.com -AutomateProcessing AutoAccept -AddOrganizerToSubject $False -DeleteComments $False -DeleteSubject $False -RemovePrivateProperty $false
Create Room Lists using the Exchange Management Shell
Room lists help you to organize your rooms. If your company has several buildings with rooms that can be booked for meetings, it might help to create a room lists per building or even per floor.
Room lists are specially marked distribution groups that you can use the same way you use distribution groups. In the Humly Control Panel you can import room lists which makes it a convenient way to add your rooms.
The below commands will help you to create a single room list and then add rooms, or create a single room list that holds all existing rooms in one go using the Exchange Management Shell:
- Creates a new room list named “My Rooms”.
New-DistributionGroup -Name "My Rooms" -RoomList - Add a resource account (room1@domain.com) to an existing room list (My Rooms).
Add-DistributionGroupMember -Identity "My Rooms" -Member room1@domain.com - Fetches all resources (room mailboxes) and puts them in a single new room list named My Rooms:
$RoomAlias = Get-Mailbox -RecipientTypeDetails RoomMailbox | select -ExpandProperty Alias New-DistributionGroup -RoomList -Name "My Rooms" -Members $RoomAlias - Displays a table of all room lists.
Get-DistributionGroup | Where { $_.RecipientTypeDetails -eq "RoomList" } | Format-Table DisplayName, Identity, PrimarySmtpAddress
Now the Exchange booking system preparation is done. You can use the service account and the resources you have created in the previous steps in HCP setup and move on to Step 2: Humly Control Panel Installation