Below are key steps needed to configure single sign on for Microsoft 365 groups and for members of the groups to enroll their RFID cards for room/desk booking.
- Introduction
- Configure Api Permissions
- RFID Card Enrollment for members of Microsoft Single Sign On Group
Introduction
Humly Control Panel administrators can restrict the users from accessing Humly Reservation, Humly Deskbooking, and Humly Floor Plan using the single sign-on function based on the security group membership.
Note: This feature works on Humly Control Panel v1.15 onward.
With this functionality, up to seven Microsoft 365 groups can be created in Azure Active Directory (Microsoft Entra), one group for each user type in the Humly Control Panel. You may choose to create fewer than seven groups if not all user types are required in your environment. Detailed information about each user type is provided in this guide. User Types and Roles
- HCP Global Admins
- HCP Local Admins
- HCP Statistics Users
- HCP Visitor Admins
- HCP Hospitality Managers
- HCP Users
- HCP Guests
Note: The Group type in Azure can be a Mail-enabled security group, Security, or Microsoft 365
Azure Active Directory(Microsoft Entra) Preparation
Follow the below steps to create the groups in Azure AD.
Create Security Groups
- Navigate to Microsoft Entra→ Groups
- Create new groups as needed, one group for each user type
- Take note of the group's names, the names will be used in Humly Control Panel global settings later
- Assign the members to the group as needed.
Configure API Permissions
The following permissions are required to log in using Microsoft's M365 user groups feature.
| Permission type | Permissions (both required) |
| Application | Group.Read.All && User.Read.All |
To add the required API permission, please follow the steps below:
- Navigate to Azure Active Directory→ App registration → select your HCP application
- Select API Permission and click Add permission → choose Microsoft Graph → Application permissions
- Search for "Group" in the search field, expand the group, and checkmark the Group.Read.All option.
- Do the same for User.Read.All
- Grant Admin Consent for the application if it is not already granted.
Humly Control Panel Configuration
After creating the groups and preparing the application in Azure AD, you are ready to configure Humly Control Panel.
In Global settings, under the M365 user groups section, add the user groups that match the names of groups you have created in Azure and save.

The users belonging to the above groups can log in to Humly Control Panel products using SSO.
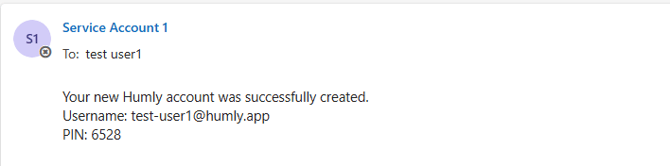
Members of the M365 user group above(SSO group) will have to sign in to the Humly Control Panel so that their user profile is created, and they receive their user pin needed for enrollment of their RFID card as seen below
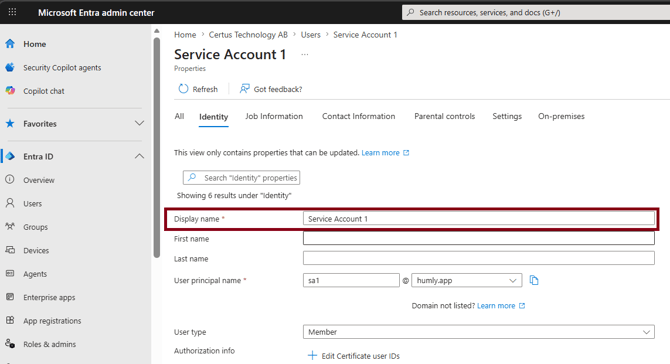
When a user signs in to the Humly Control Panel via SSO, the full name displayed is retrieved from the Display Name field in Microsoft Entra, not from the First Name and Last Name fields. The additional profile fields (Organization, Description, Phone Number, License Plates, and Type) are currently not synchronized and will remain empty.
RFID Card Enrollment for Members of M365 Groups
Members of these Microsoft groups have the possibility of enrolling their RFID cards by themselves so that they can making bookings on the devices using these cards. They can enroll their cards using the room display devices. There are 2 enrollment possibilities for this, Automatic RFID Enrollment and Requested RFID Enrollment
a) Automatic Enrollment
Several conditions have to be met for Automatic Enrollment.
1) In the settings > global settings, RFID enrollment should be set to Auto
2) Authentication type should be set to Pin or RFID

3) You must have require authentication enabled in the room settings of the room display device.

Once all these conditions are met, follow the steps below to enroll your RFID card.
Click the Book button on the device

Select Time slot and click book

Scan your RFID Card on the highlighted area of the Humly Room Display

Enter Your User Pin which you receive in your email the first time you login to the Humly Control panel via single sign on

Congratulations, your RFID card has been enrolled.
b) Requested RFID Enrollment
With this type of enrollment, the global admin would have to approve the request before the RFID card details become fully enrolled in the user profile. The key difference from Automatic Enrollment is that in the global settings, you should select the RFID enrollment type Requested.

Follow the same steps to enroll your card as in the automatic enrollment above. Once you are done, the admin user can accept the RFID request by going to your user account in the Humly Control Panel> edit user and accept the request as seen below.

Congratulations your RFID card has been enrolled.