Introduction
The Humly Room Display is not only a device for booking meetings, it can also be used to display signage content. Your organization can show a message, image, or webpage on any Humly Room Display. You can also schedule signage mode for a specific date range, for example to indicate that a room is under maintenance.
There are two types of signage mode available:
Standard Signage Mode — Displays a title, subtitle, footer, and optional logo image on top of the normal room display layout.
Full Screen Signage Mode — Replaces the entire display with a full-screen image or URL content.
Understanding Signage Mode
The Humly Room Display runs in one mode at a time. When signage mode is active, it replaces the normal booking view. Meeting information is not shown until signage mode ends or is cleared.
How it works: Signage mode is only active between the From Date and To Date you set. When that period ends or an administrator clicks Stop & Clear Signage Mode, the display automatically returns to the normal booking screen.
Table of Contents
- Setting Up Standard Signage Mode
- Setting Up Full Screen Signage Mode
- Removing Signage Mode
- Troubleshooting
1. Setting Up Standard Signage Mode
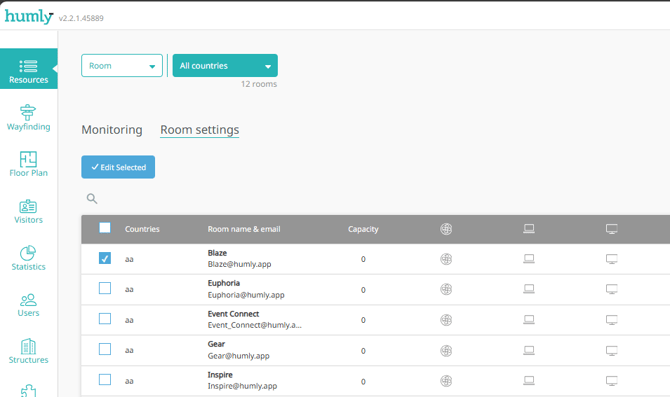
- Log in to the Humly Control Panel as a Global Admin and navigate to Resources → Room Settings.
- Select the structure or individual room(s) where you want to enable signage mode, then click Edit Settings for... or Edit Selected for individual rooms.
- Scroll down to the Signage Mode section.
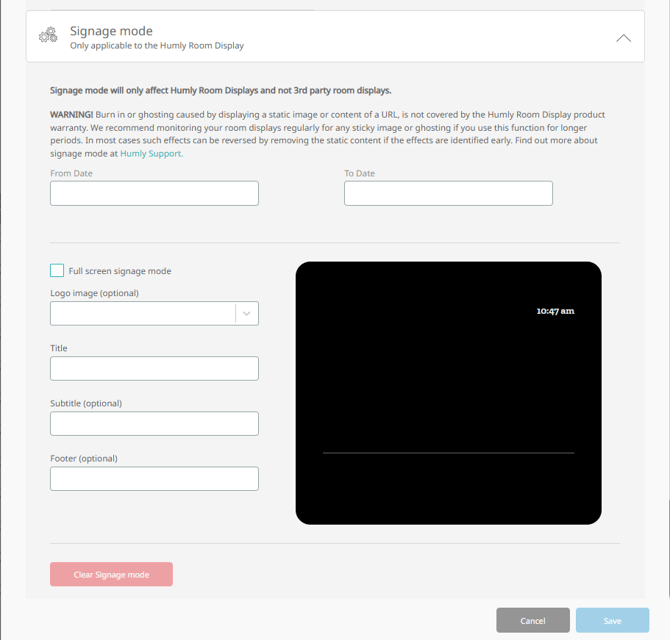
- Read the burn-in warning displayed on screen before proceeding.
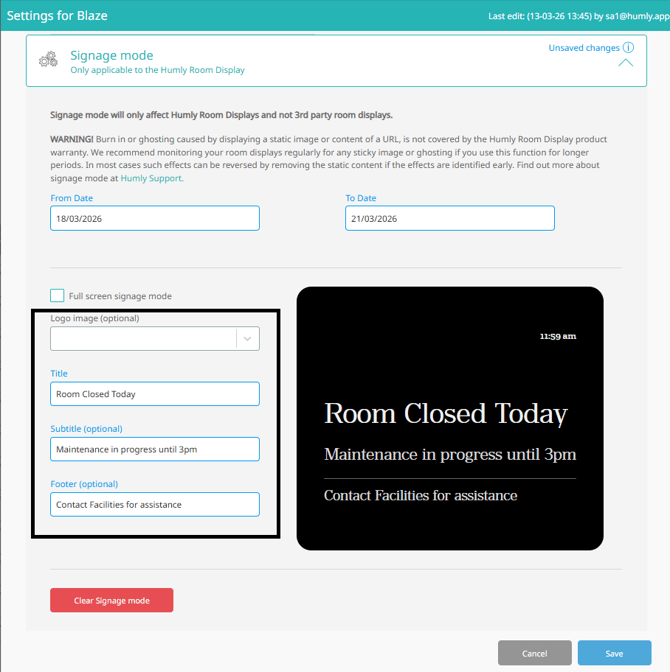
- Set a From Date (required) and a To Date (required) to define the period during which signage mode will be active.

- Fill in the following fields:
- Title (required)
- Subtitle (optional)
- Footer (optional)
- Logo image (optional) — upload a logo to display on the screen
- Click Accept to save your room settings.
Note on bulk editing: Editing Room Settings at a structure level (country, city, building, or floor) and clicking Save will overwrite all room settings for those rooms, not just signage. If rooms in a structure have different settings, edit them individually to avoid unintended changes.
Burn-in Warning: Signage mode supports displaying static images and URL content. Burn-in or ghosting caused by static content is not covered by the Humly Room Display product warranty. Monitor your displays regularly and remove static content at the first sign of ghosting. In most cases, early-stage effects can be reversed by removing the content promptly. To minimise risk, use images with transparent backgrounds where possible.
2. Setting Up Full Screen Signage Mode
- Log in to the Humly Control Panel as a Global Admin and navigate to Resources → Room Settings.
- Select the structure or individual room(s) where you want to enable full screen signage mode, then click Edit Settings for... or Edit Selected.
- Scroll down to the Signage Mode section.
- Read the burn-in warning displayed on screen.
- Set a From Date (required) and a To Date (required).

- Enable full screen mode by ticking the Full Screen Signage Mode checkbox.
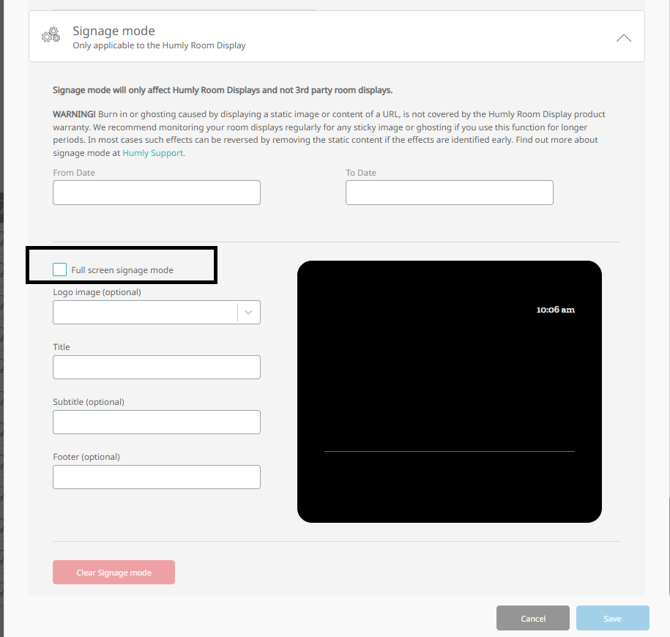
- Click Upload image to select the image you want to display in full screen.
Tip: To minimize the risk of burn-in or ghosting, use an image with a transparent background.
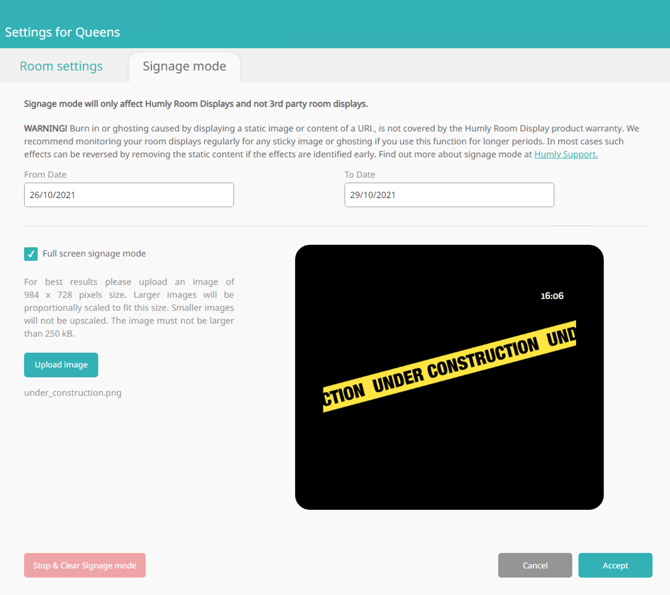
- Click Accept to save your room settings.
Note on bulk editing: Editing Room Settings at a structure level (country, city, building, or floor) and clicking Save will overwrite all room settings for those rooms, not just signage. If rooms in a structure have different settings, edit them individually to avoid unintended changes.
Burn-in Warning: Signage mode supports displaying static images and URL content. Burn-in or ghosting caused by static content is not covered by the Humly Room Display product warranty. Monitor your displays regularly and remove static content at the first sign of ghosting. In most cases, early-stage effects can be reversed by removing the content promptly. To minimise risk, use images with transparent backgrounds where possible.
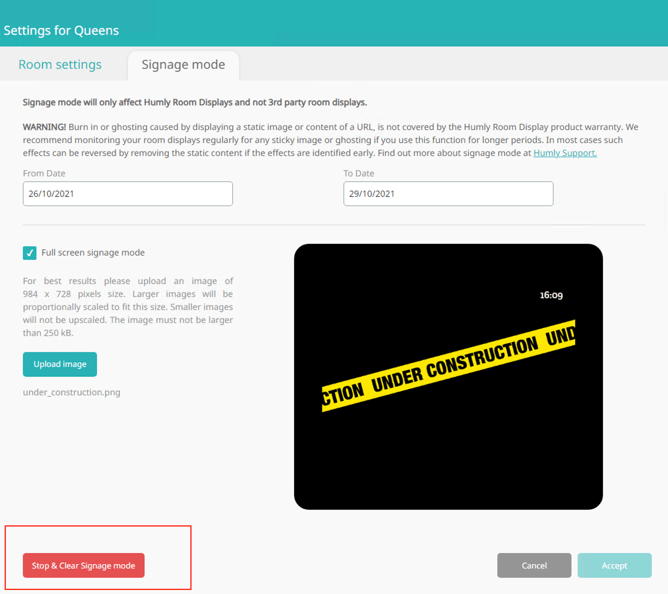
3. Removing Signage Mode
- Log in to the Humly Control Panel as a Global Admin and navigate to Resources → Room Settings.
- Select the structure or individual room(s) from which you want to remove signage mode, then click Edit Settings for... or Edit Selected.
- Scroll down to the Signage Mode section.
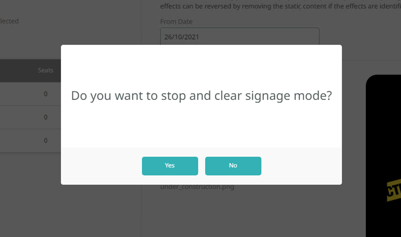
- Click the Stop & Clear Signage Mode button.
- A confirmation prompt will appear. Click Yes to confirm.
4. Troubleshooting
Signage mode is not showing on the device
- Confirm the From Date and To Date are set correctly and that today's date falls within the scheduled range.
- Verify that the settings were saved by clicking Accept navigating away without saving will discard changes.
- Check that the device is online and connected to the Humly Control Panel. If the device is offline, signage settings will not be pushed until it reconnects.
- Try restarting the Humly Room Display. Navigate to the device admin settings and perform a soft restart.
Signage mode is still showing after the To Date has passed
- The display may not have synced with HCP after the end date. Restart the device to force a settings refresh.
- If the issue persists, manually remove signage mode using the Stop & Clear Signage Mode button as described in Section 3.
Uploaded image is not displaying correctly
- Ensure the image file is in a supported format (PNG or JPG recommended).
- Check that the image resolution is appropriate for the display. Overly large files may fail to upload or render incorrectly.
- For full screen mode, use an image sized to match the Humly Room Display's native resolution for best results.
- Images with transparent backgrounds are recommended to reduce burn-in risk.
URL content is not loading in signage mode
- Confirm the URL is publicly accessible and does not require login credentials.
- Check that the device has a working internet connection and that the URL is not blocked by your network firewall or proxy.
- Some pages that use X-Frame-Options headers will block display within the signage iframe. Test the URL in a standard browser first to confirm it loads correctly.
Settings saved at structure level overrode individual room settings
Saving Room Settings at a structure level replaces all room settings for every room in that structure. If this occurred unintentionally:
- Re-apply the correct settings to each affected room individually.
- Going forward, always edit individual rooms if rooms within a structure have different configurations.
Signage mode not clearing after clicking Stop & Clear
- Ensure you confirmed the prompt by clicking Yes. Dismissing it without confirming will not remove signage.
- If the display still shows signage content after clearing, restart the device. The display should revert to normal room booking view after reconnecting to HCP.