From version 1.13 of HCP, Single Sign-On with AD FS is supported. To set this up you will need an AD FS server 2019 or later.
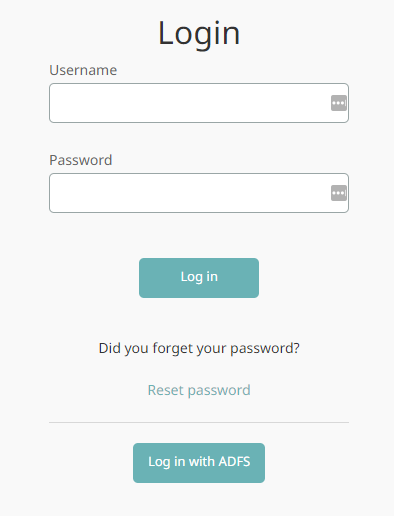
Once enabled, the end user will have an extra option on the login page to sign in using your company's AD FS server with their own organisational username and password.
Note: The user must be added in HCP as a user before they are allowed to log in via AD FS.
Table of Contents
- Common Use Cases
- Prerequisites
- AD FS Setup
- Set Up CORS Rules
- HCP Setup
- Best Practices
- Troubleshooting
Common Use Cases
- Your organisation uses Active Directory and you want HCP users to log in with their existing company credentials instead of a separate HCP password.
- You want to enforce centralised authentication policies (e.g. multi-factor authentication) for HCP access.
- You are onboarding a large number of users and want to avoid managing individual HCP passwords.
Prerequisites
- HCP version 1.13 or later.
- AD FS server 2019 or later.
- Administrator access to both the AD FS server and HCP.
- Users must be added to HCP before they can log in via AD FS.
AD FS Setup
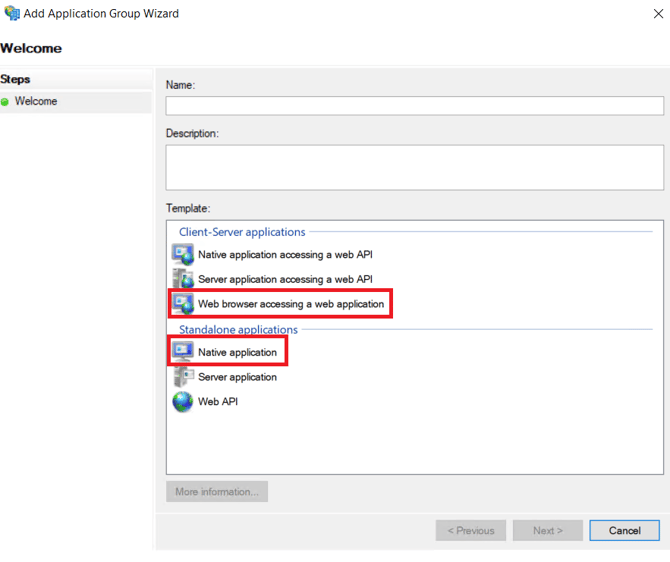
There are two ways to configure the Application Group in AD FS. Choose the variant that matches your environment:
- Native application – simpler setup, only requires the HCP redirect URL.
- Web browser accessing a web application – full configuration with identifier, access policy and permissions.
-
On your AD FS server, under Application Groups, add a new Application Group.

-
Choose your application type and enter a name, then click Next.
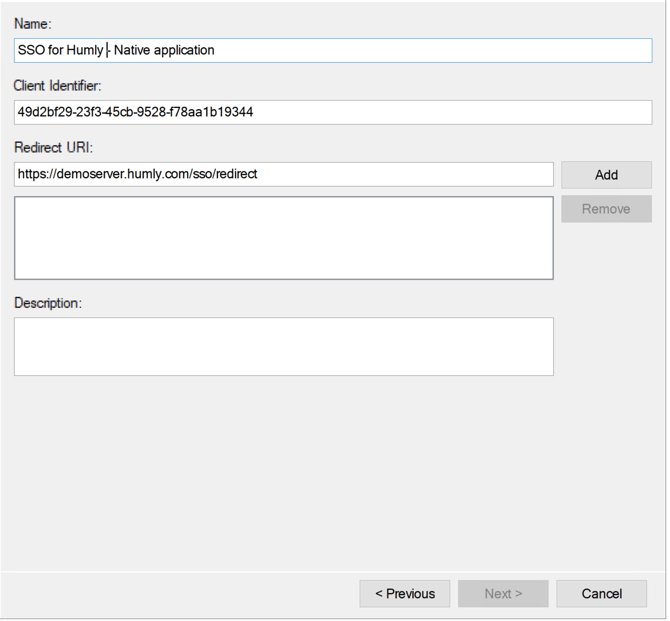
Option A – Native application
-
Enter the redirect URL to your HCP server in the following format and press Add, then Next:
https://<FQDN>/sso/redirectCopy the Client Identifier — it will be needed when configuring HCP.
-
Complete the wizard using the default values. No further configuration is required for Native application.
Option B – Web browser accessing a web application
-
Enter the redirect URL to your HCP server in the following format and press Add, then Next:
https://<FQDN>/sso/redirectCopy the Client Identifier — it will be needed when configuring HCP.
-
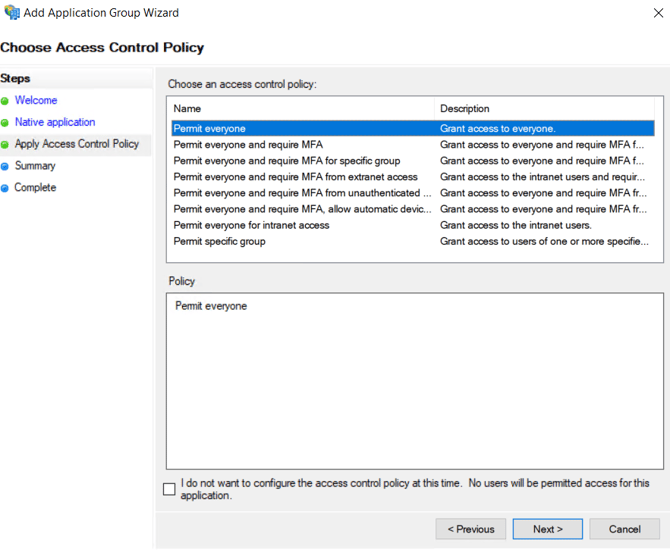
On the Access Policy screen, use the default values or adjust to your organisation's requirements.
-
On the Permissions screen, openid is the only required permission and is selected by default. Click Next to complete the setup.

-
For the Web application Relying party identifiers, enter your HCP URL and Client Identifier, for example:
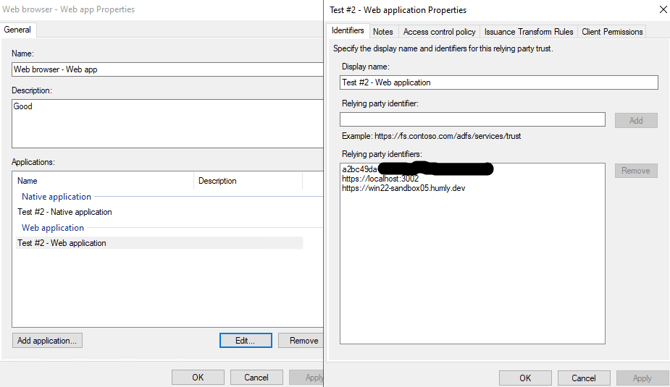
https://<FQDN>
Set Up CORS Rules
On the AD FS server, open a PowerShell command window as an administrator and run the following commands:
Set-AdfsResponseHeaders -EnableCORS $true
Set-AdfsResponseHeaders -CORSTrustedOrigins https://<your-hcp-FQDN>
Note: If you need CORS rules for more than one domain, comma-separate them:
Set-AdfsResponseHeaders -CORSTrustedOrigins https://test-server1.humly.com,https://test-server2.humly.comHCP Setup
- In HCP, navigate to the AD FS section under Global Settings.
- Enable the AD FS feature.
- Enter the URL of your AD FS server and the Client ID you copied during the AD FS server setup.
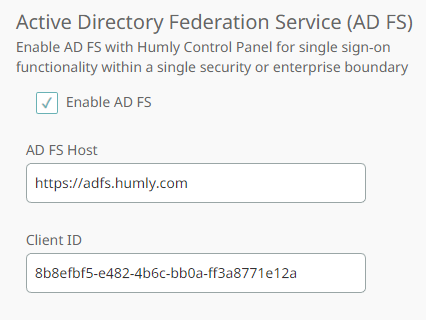
Save your changes. The AD FS login option will now appear on the HCP login page.
Best Practices
- Add users to HCP before enabling AD FS. Users must exist in HCP to be able to log in via AD FS.
- Test with a single user first. Before rolling out AD FS login to all users, verify the setup with one test account to confirm the redirect URL, Client ID and CORS rules are all working correctly.
- Use a dedicated HCP service account for AD FS. If possible, avoid using a personal admin account as part of the integration configuration to prevent disruptions if the account changes.
- Document the Client Identifier. Store the Client Identifier copied during AD FS setup in a secure location, as it will be needed if HCP is ever reinstalled or reconfigured.
- Keep AD FS server updated. AD FS 2019 or later is required. Ensure your server stays within a supported version to maintain compatibility with HCP.
Troubleshooting
The AD FS login button does not appear on the HCP login page
- Confirm that the AD FS feature has been enabled in HCP under Settings → Global Settings → AD FS and that changes have been saved.
- Verify that the AD FS server URL and Client ID are entered correctly in HCP.
Users receive an error when attempting to log in via AD FS
- Confirm the user has been added as a user in HCP. AD FS authentication will fail if the user does not exist in HCP regardless of their AD credentials.
- Check that the redirect URL configured on the AD FS server exactly matches
https://<your-hcp-FQDN>/sso/redirect— any mismatch will cause a redirect error. - Verify that the openid permission is selected in the AD FS Application Group permissions.
- Check HCP logs for troubleshooting
Login fails with a CORS error in the browser console
- Ensure CORS has been enabled on the AD FS server with
Set-AdfsResponseHeaders -EnableCORS $true. - Verify that the HCP domain is listed in
Set-AdfsResponseHeaders -CORSTrustedOrigins. If multiple domains are needed, confirm they are comma-separated without spaces. - Restart the AD FS service after making PowerShell changes for them to take effect.
AD FS was working but has stopped functioning after an HCP update
- Re-check the AD FS settings in HCP after an update to confirm the configuration has been retained.
- Verify the redirect URL on the AD FS server still points to the correct HCP address.
- Check that the CORS rules on the AD FS server are still active by running
Get-AdfsResponseHeadersin PowerShell.