To connect HCP and TOPdesk, you must register the basic data of your own and external organizations (suppliers) to support your TOPdesk processes.
To register the basic data, you must have a global admin account.
The registration process includes registering the following:
- Branches and their locations, so you can keep track of where your users and assets are located and so your users can make reservations for specific locations. You can register and maintain this information in the Supporting Files module.
- API accounts with the correct permissions, used by Humly Control Panel to communicate with TOPdesk.
Creating a Branch
To create a branch, follow these steps:
- Click on Modules settings on the Dashboard.
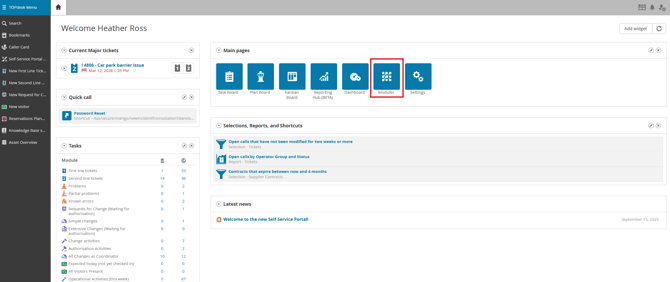
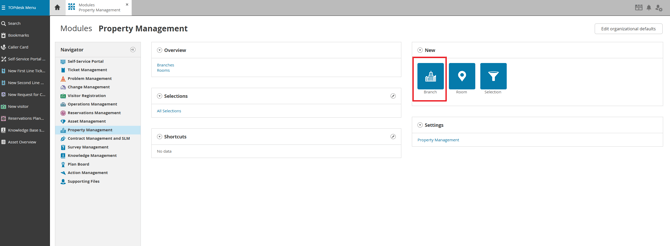
- Click on the Property Management option.
- Click on Branch settings.
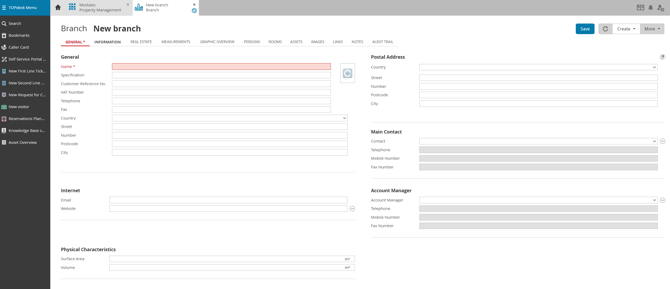
- Enter the branch details. Fields highlighted in red are required.
- Click the Save button.
Setting Up Custom Room Types in TOPdesk
Before adding rooms to your branch, you must first create the required resource types (Room and/or Desk) in the TOPdesk Reservations module settings. These types will appear in the type dropdown when creating a room in the next step.
To create a custom type, follow these steps:
- Go to Modules settings on the Dashboard.
- Open Property management -> Dropdown list -> Room -> Type
- Click New to create a new type.
- Enter the type name – use Room for meeting rooms or Desk for hot desks/flex desks.
- Save the type. Repeat this step for each type you need (Room and/or Desk).
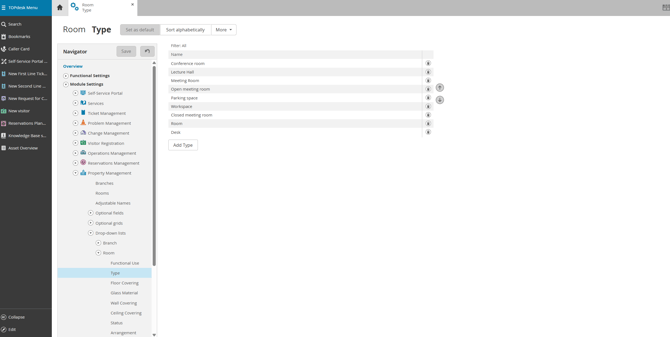
Note: These types must exist before you can assign them to resources. If the type dropdown is empty when creating a room in the step below, it means the types have not yet been created here.
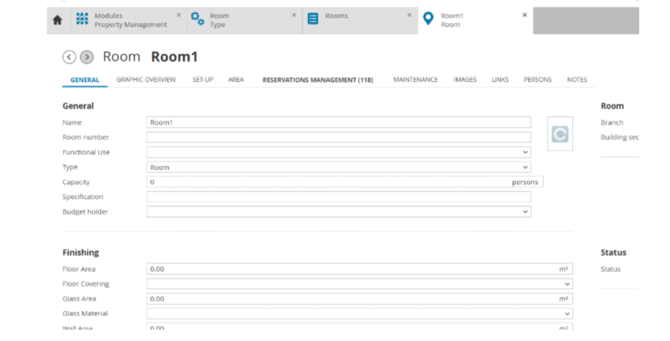
Adding Rooms to the Branch
Now that the branch is saved and the custom types are configured, you can add resources. These resources can later be imported into HCP.
- Click on the Rooms tab, then click New Room. Enter the room name and any other relevant details. Under the Type dropdown, choose Room or Desk depending on the resource type, then click Save.

Now that the branch and rooms are registered, you can create persons and API account.
Creating an API account
TOPdesk API accounts are dedicated service accounts designed for API integrations such as Humly.
To create an API account, follow these steps:
- Click on Supporting Files in Modules settings.
- Click on new API account.

- Enter the account details. Red-colored fields are required. The email is required and will be used in the Humly Control Panel Wizard.
The email must be unique – it must not be shared with any other operator or person. - From the dropdown, choose the branch you created in the Creating a Branch section above.
- Click on the icon to set up the TOPdesk login.

- Click the Save button.
Creating a Person
After saving the API account, the Person must be linked to it. This is done from the Person card:
To create a person, follow these steps:
- Click on Supporting Files in Modules settings.
- Click on Person settings.
- Enter the new person's details. The name should match the operator you created, and the email must be the same as the operator's email. Red-colored fields are required.
The email must be unique – it must not be shared with any other operator or person. - Choose the branch you previously created. Expand the Create operator section to link the API account, and choose the API account you created.
- Click the Save button.


Permissions and Tasks
A set of permissions and settings are required to allow the Humly Control Panel to integrate with TOPdesk.
Registering a Permission Group
- Go to the Supporting Files module page.
- Click on Permission Group.

- Enter a name for your permission group. We recommend a name that clearly describes the permissions (e.g., All permissions for first-line calls).
- Save the card. Note that enabling permissions is only available after the permission group has been saved.
-png.png?width=670&height=331&name=unnamed%20(3)-png.png)
- Expand Reservation Management and select create / read / update / delete.
-png.png?width=670&height=231&name=unnamed%20(4)-png.png)
- Expand API Access permissions and check mark all.
-png.png?width=670&height=334&name=unnamed%20(5)-png.png)
- Expand Supporting Files permissions and check mark all under read / write / create / delete / archive.
-png.png?width=670&height=656&name=unnamed%20(6)-png.png)
Assigning a Permission Group to an API account
- Open the Operators card via the Supporting Files page or search for the correct API account.

- Select Permission Groups on the card's Authorization tab and click Link Wizard.

- Search for the permission group you created earlier.
- Check the checkbox for the desired permission group.
- Click the Link button and save.
-png.png?width=670&height=387&name=unnamed%20(9)-png.png)
Creating the Application Password
The Application Token is used as the password when connecting HCP to TOPdesk. It is generated directly on the API account card.
- Open the API account card.
- Scroll down to the Application tokens section on the right side of the card.
- Click the Add button.
- Enter an application name (e.g. Humly) and set an expiration date.
- Click Save.

Important: Copy and securely save the token immediately – it will only be shown once. This token will be used as the password in the Humly Control Panel connection wizard
You can now proceed to the next step: Connecting Humly Control Panel to TOPdesk.
Troubleshooting
Use the sections below if you run into issues during TOPdesk preparation.
The Type dropdown is empty when creating a room
Possible cause:
- The custom resource types (Room / Desk) have not yet been created in the TOPdesk Reservations module settings.
Steps to resolve:
- Go to Modules settings on the Dashboard and open the Reservations module settings.
- Navigate to the Types section and create the types you need (Room and/or Desk).
- Return to the branch's Rooms tab and try creating the room again – the types should now appear in the dropdown.
Rooms created in TOPdesk do not appear when importing into HCP
Possible causes:
- The room was not assigned a type (Room or Desk) when it was created.
- The room belongs to a different branch than the one configured in HCP.
- The operator account used for HCP does not have the required permissions.
Steps to resolve:
- In TOPdesk, open the room record and confirm that the Type field is set to either Room or Desk. If not, edit the record and save.
- Verify that the room is assigned to the correct branch that is also configured in HCP.
- Confirm that the operator account linked to HCP has full permissions for Reservation Management, API Access, and Supporting Files (see Registering a Permission Group above).
Cannot save the branch – required fields are not highlighted clearly
Possible cause:
- One or more required fields (highlighted in red) have been left empty or contain invalid values.
Steps to resolve:
- Scroll through the entire branch form and look for any fields highlighted in red.
- Ensure all required fields are filled in with valid values before clicking Save.
- If the form still will not save after filling in all visible fields, try refreshing the page and re-entering the data.
Application Token is lost or expired
Possible cause:
- The token was not saved when it was generated, or it has passed its expiration date.
Steps to resolve:
- Open the API account card in TOPdesk.
- Scroll to the Application tokens section and remove the old entry.
- Click Add to generate a new token. Copy and save it immediately – it will only be shown once.
- Update the token in the HCP connection settings for TOPdesk.
HCP cannot connect to TOPdesk after completing preparation
Possible causes:
- The API account email, Application Token, or TOPdesk URL entered in HCP is incorrect.
- The API account does not have the required API Access permissions.
- A network firewall is blocking the connection between HCP and TOPdesk on port TCP/443.
Steps to resolve:
- Double-check the TOPdesk URL, API account email, and Application Token entered in the HCP connection wizard.
- Confirm that the API account's permission group includes full API Access permissions (see Registering a Permission Group above).
- Verify that port TCP/443 is open between the HCP server and the TOPdesk server.
Still need help?
If none of the steps above resolve your issue, please create a support ticket and include the following information:
- Your TOPdesk version
- The step in this guide where the issue occurred
- Any error messages or screenshots from TOPdesk or HCP
- The API account email and permission group name used for the HCP integration