Humly Desk Booking is available in the Humly Control Panel and allows users to book desks from Humly Reservations. It is a web application for desk booking in offices and collaborative spaces.
Humly Desk Booking is developed for use on a phone. Therefore, the interface has the design as a smartphone even though you are a using it on a tablet or in desktop.
To use this feature in the Humly Control Panel a license key is needed. The Desk Booking can be used as a compliment for setups with a booking system backend like Exchange and Office 365 or as a Standalone booking service using SMTP.
For now, this version of Humly Desk Booking only supports booking system backend Exchange and Office 365.
This user guide will cover:
- Log in
- Book a desk
- Show bookings/Delete bookings
- Sign out
- Save the desk booking as an app on your phone
- VIDEO: Basic User Guide
Log in
- Navigate to the web application.
- Log in with your username and password. You will receive your credentials by email when an administrator creates your account.
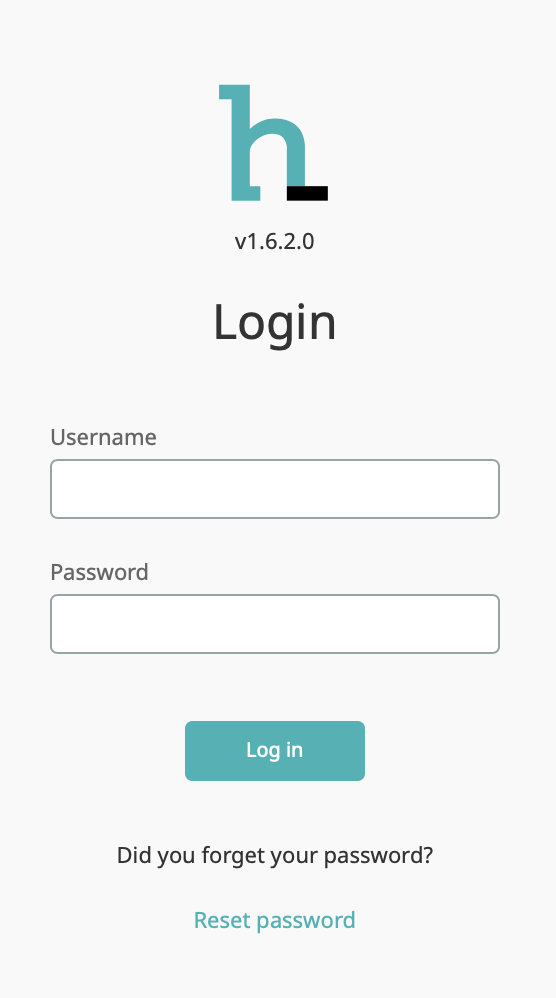
- Choose which language you want your desk booking to be in.

- Click on "Desk Booking".

- You will now see the main screen.
- You can select on which date and in which location you want to book a desk. By clicking on the date bar - a drop down calendar will appear. Choose a date and the calendar will disappear.
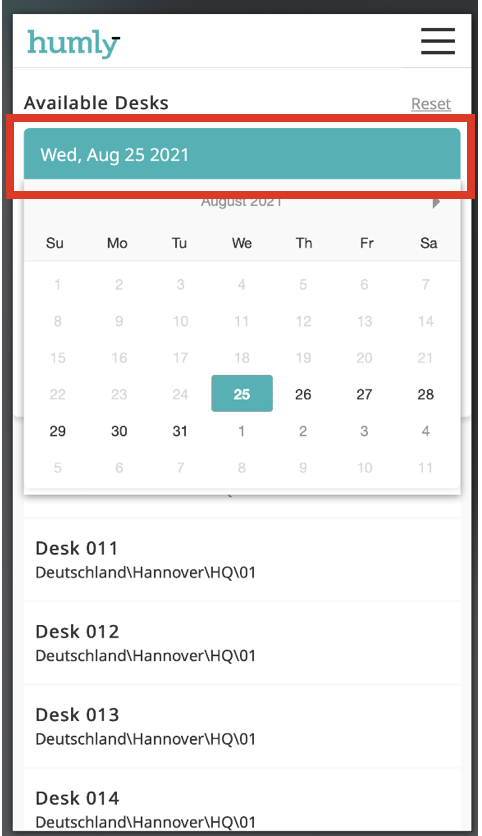
- You can also select your preferred desk location. You can choose between "Country/City", "Building" and "Floor".
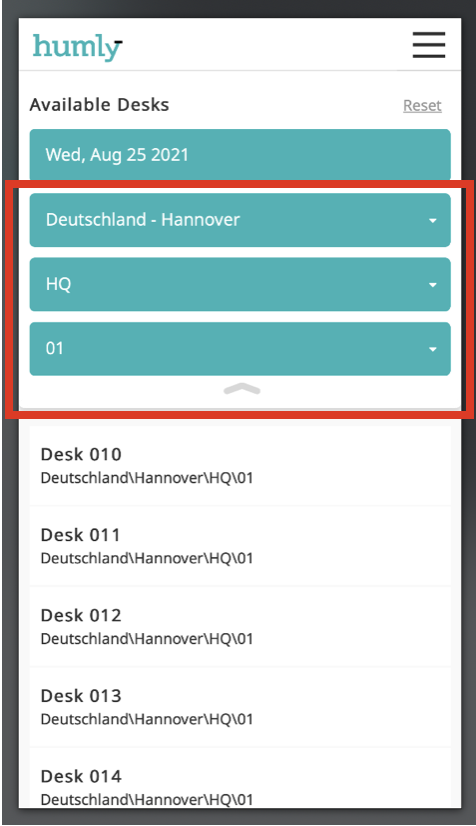
- An example:
Click on "Countries/Cities" and a drop down menu will appear - then click on "All buildings" and an other drop down menu will be visible and then click on "All Floors" and all the available desk alternatives will appear.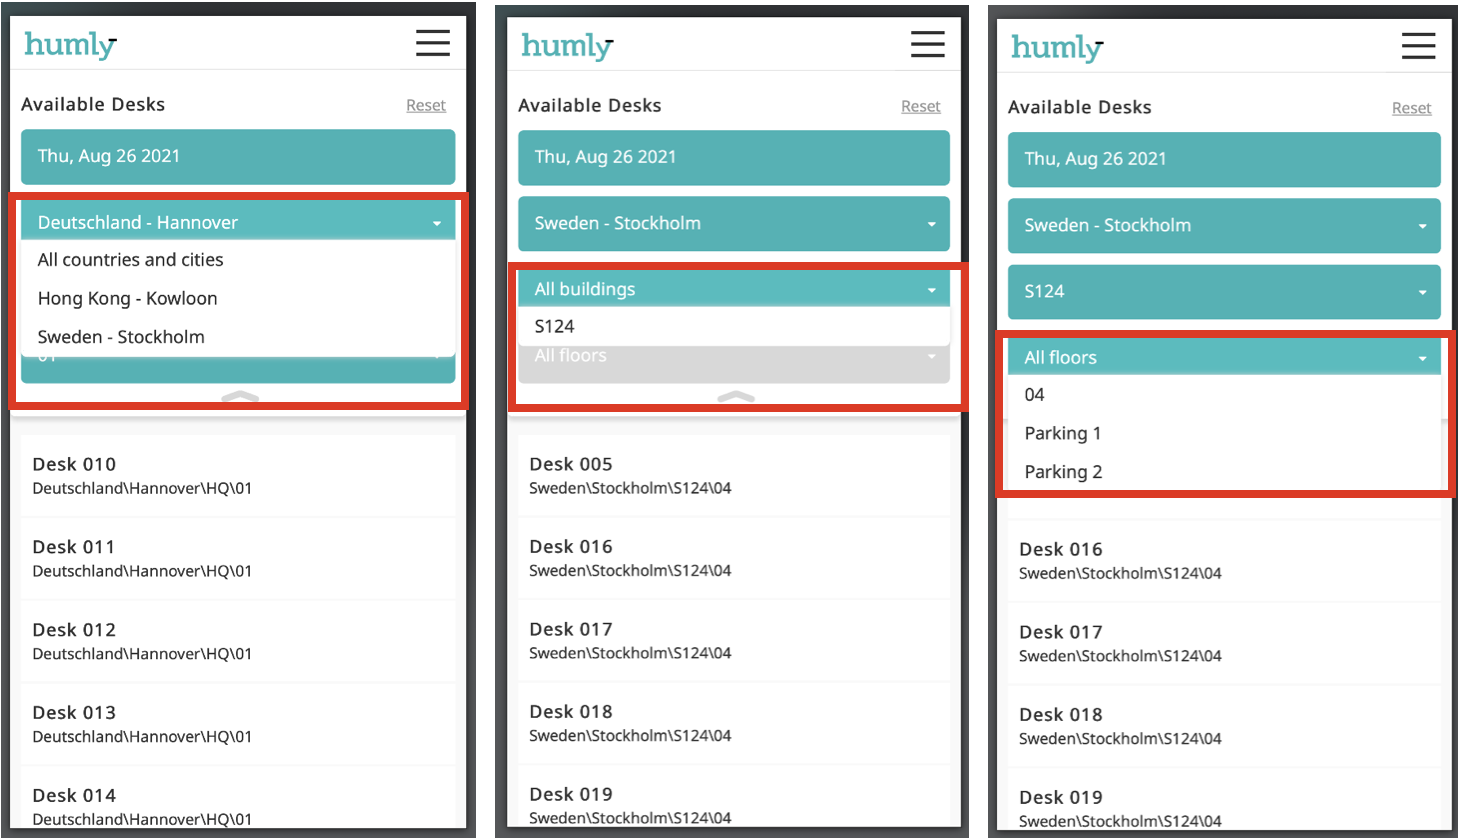
- Click on the desk you want to book and the "Book"-icon will be visible.
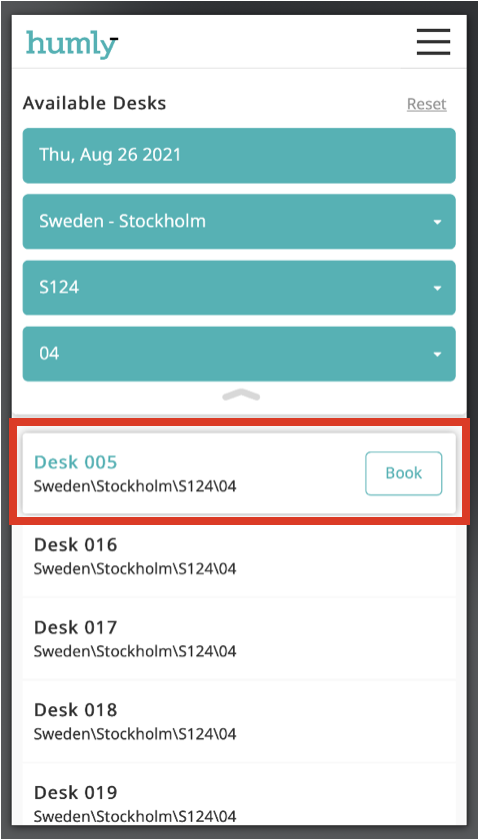
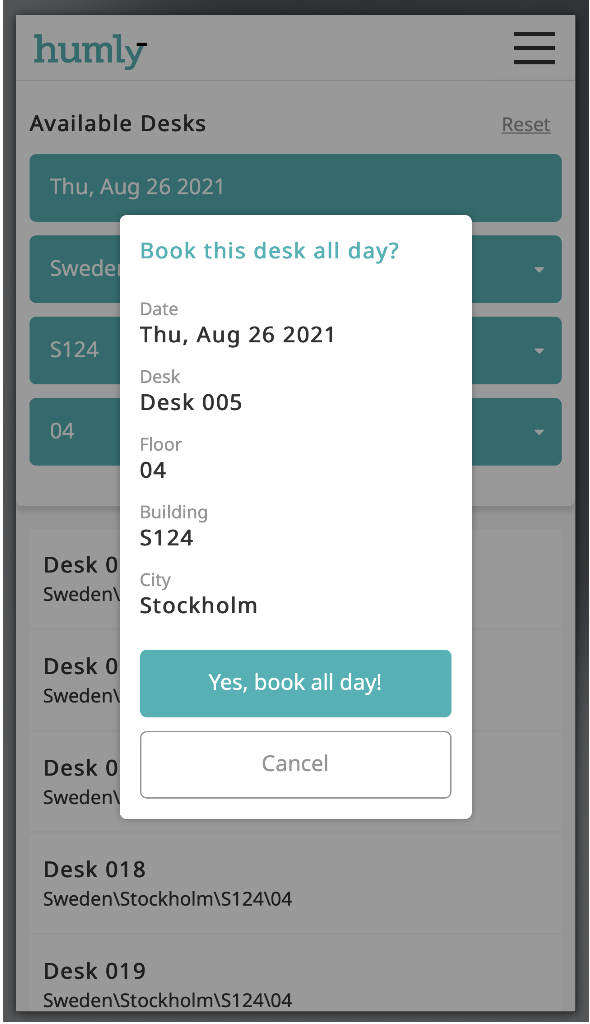
- Click on the "Book"-icon and the booking screen will appear. If you want to continue your booking choose "Yes, book all day!" or click on "Cancel".
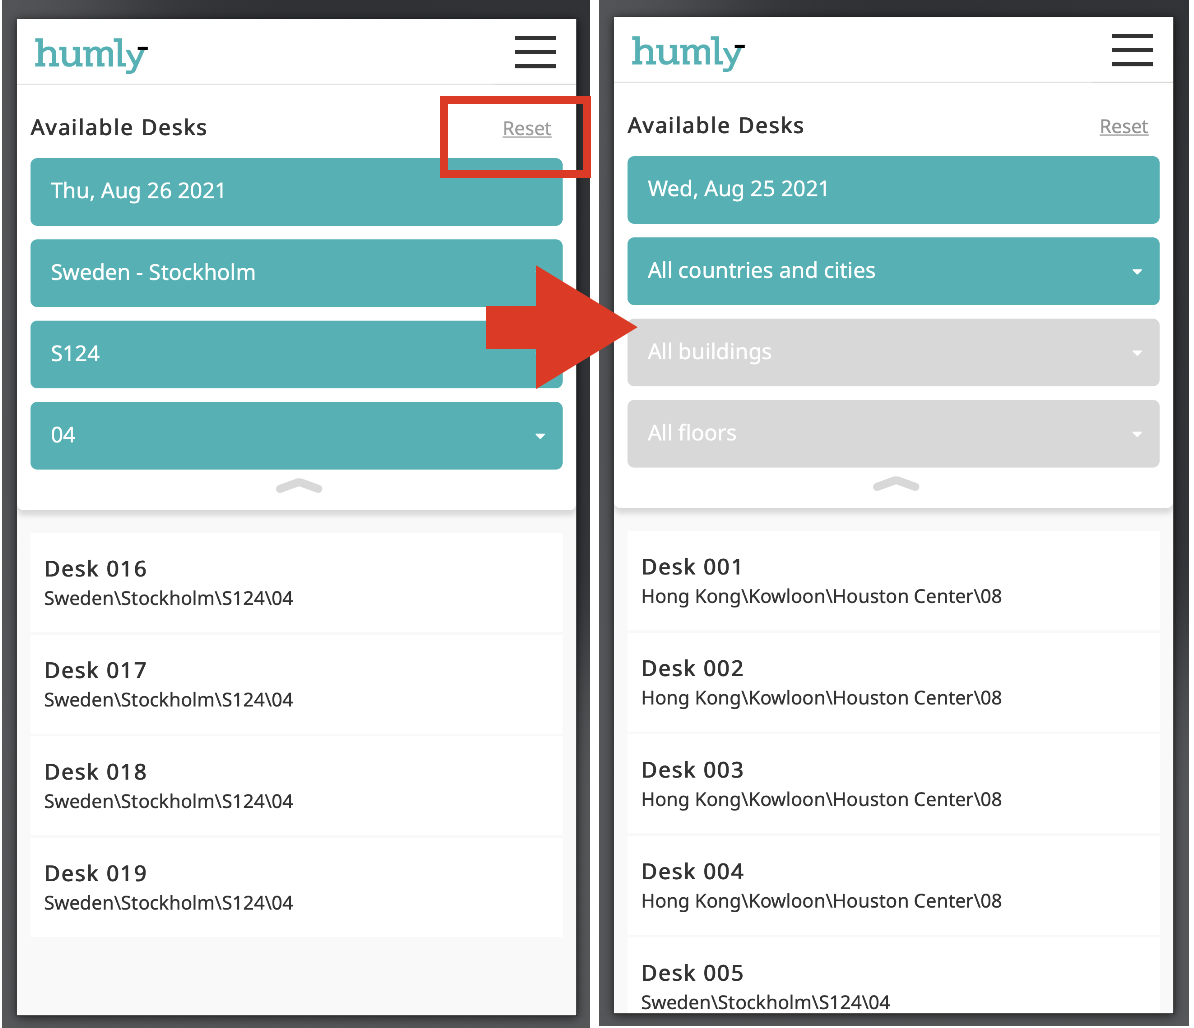
- If you want to reset all of your alternatives on both date and location. Click on the "Reset"-icon in the upper right corner.
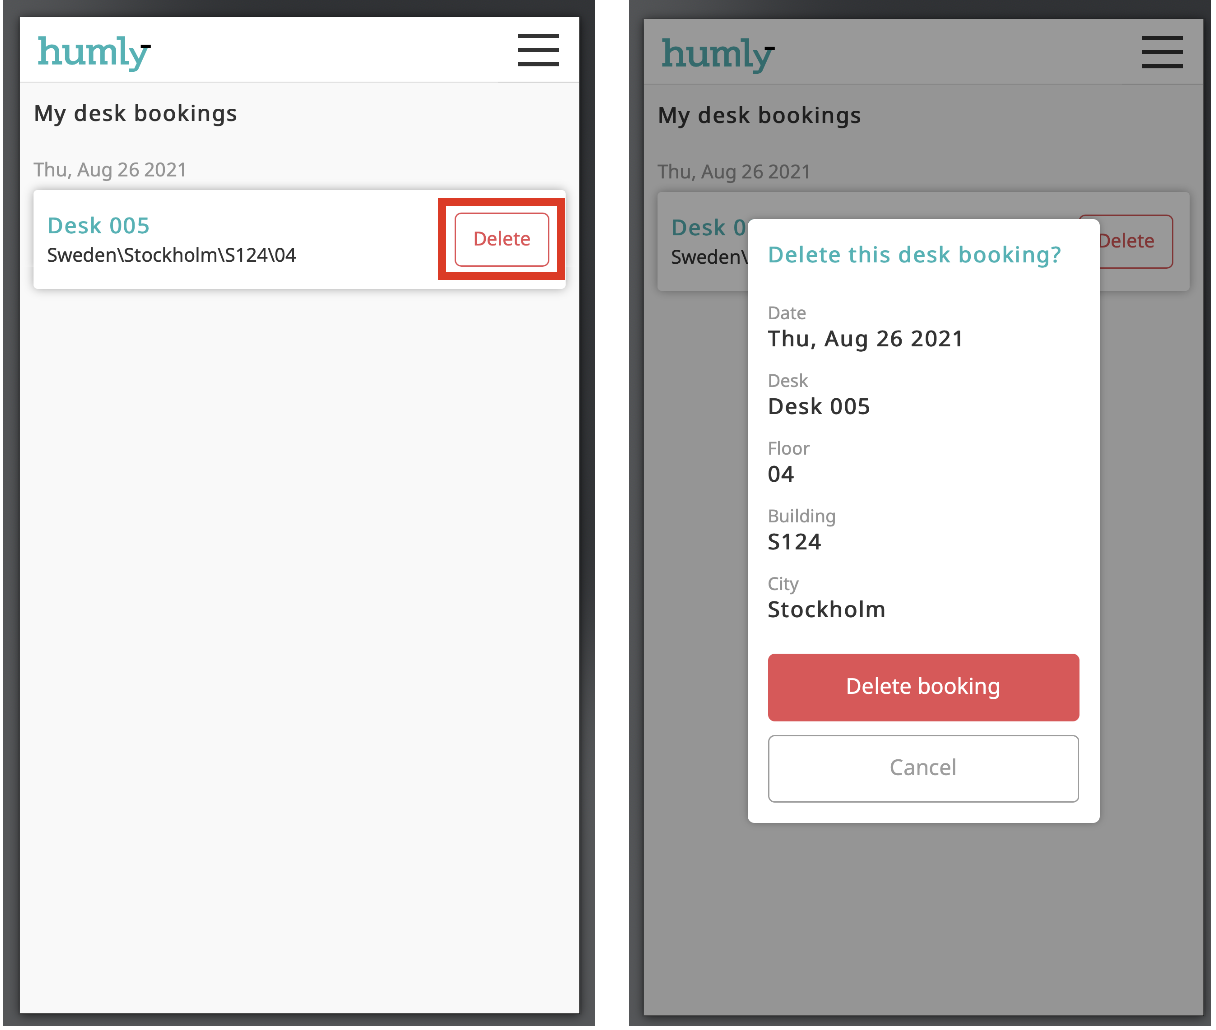
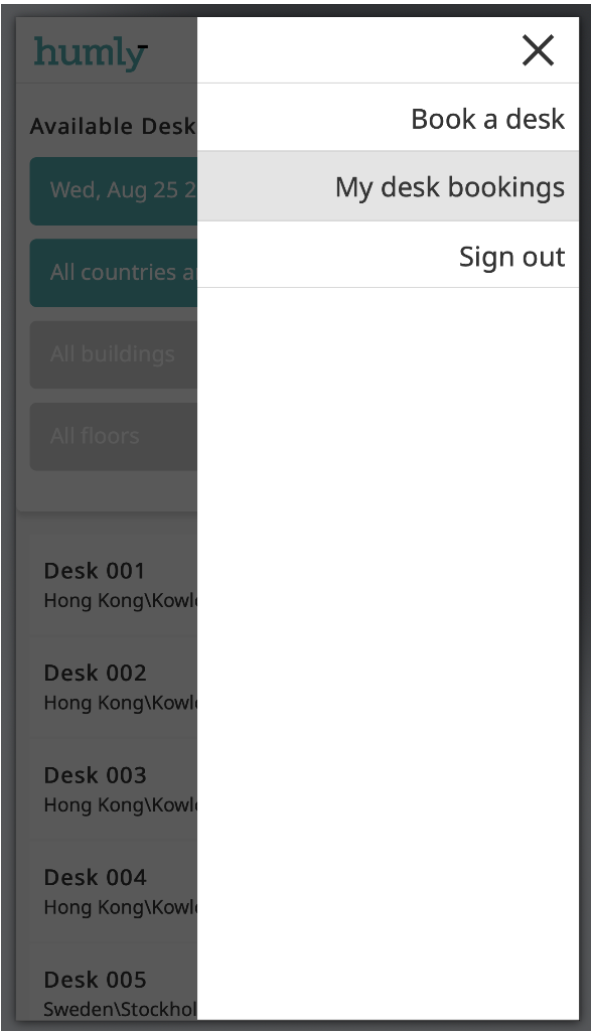
- If you want to be able to see all your current bookings you can click on the "Menu"-icon in the upper right corner.
- Then you will be able to choose "My desk bookings".
- All you current desk bookings will then appear.
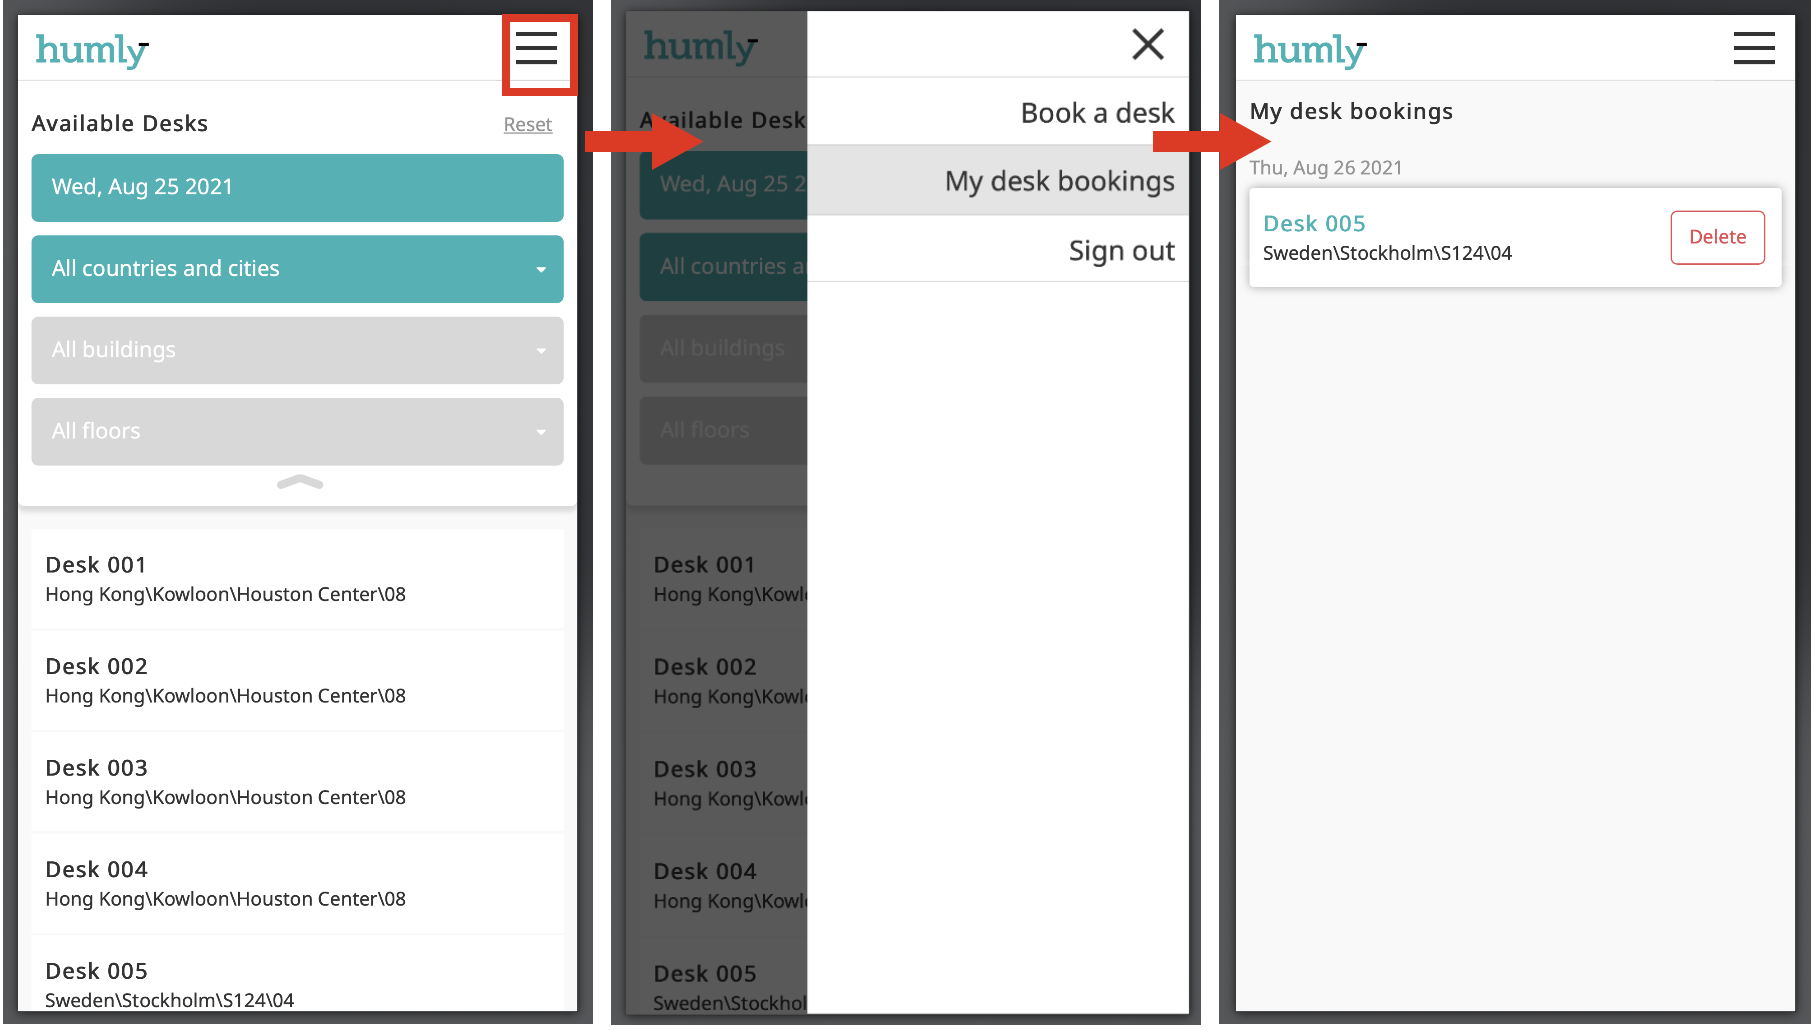
- If you want to delete one of your bookings click on the red "Delete"-icon.
- A delete message will appear. Continue to delete your booking by clicking on "Delete booking". And a message of a successful deletion will be shown.
Sign out
To log out - click on the menu in the upper right corner and choose "Sign out".
Save the desk booking as an app on your phone
If you want to have an easy access to your desk booking web application you can save it as an app on your home screen. This works on both iOS and Android.
iOS:
- Go to the website you want to save to the Home screen. In this case the Humly Desk Booking. Log in if you want it to remember your account.
- Tap the Share icon in the bottom bar.
- Tap Add to Home Screen.
- A window appears with the name of the site, the URL, and an icon. You can choose to enter your own name for the shortcut.
- Tap Add to complete.
- Done! Your Desk Booking is now appearing as an application on your home screen.
Android:
- Open the website or web page you want to pin to your home screen. In this case the Humly Desk Booking. Log in if you want it to remember your account.
- Tap the menu icon (3 dots in upper right-hand corner) and tap "Add to homescreen".
- You'll be able to enter a name for the shortcut and then Chrome will add it to your home screen.
- Done! Your Desk Booking is now appearing as an application on your home screen.
BETA - User Guide in video