Standard Walls
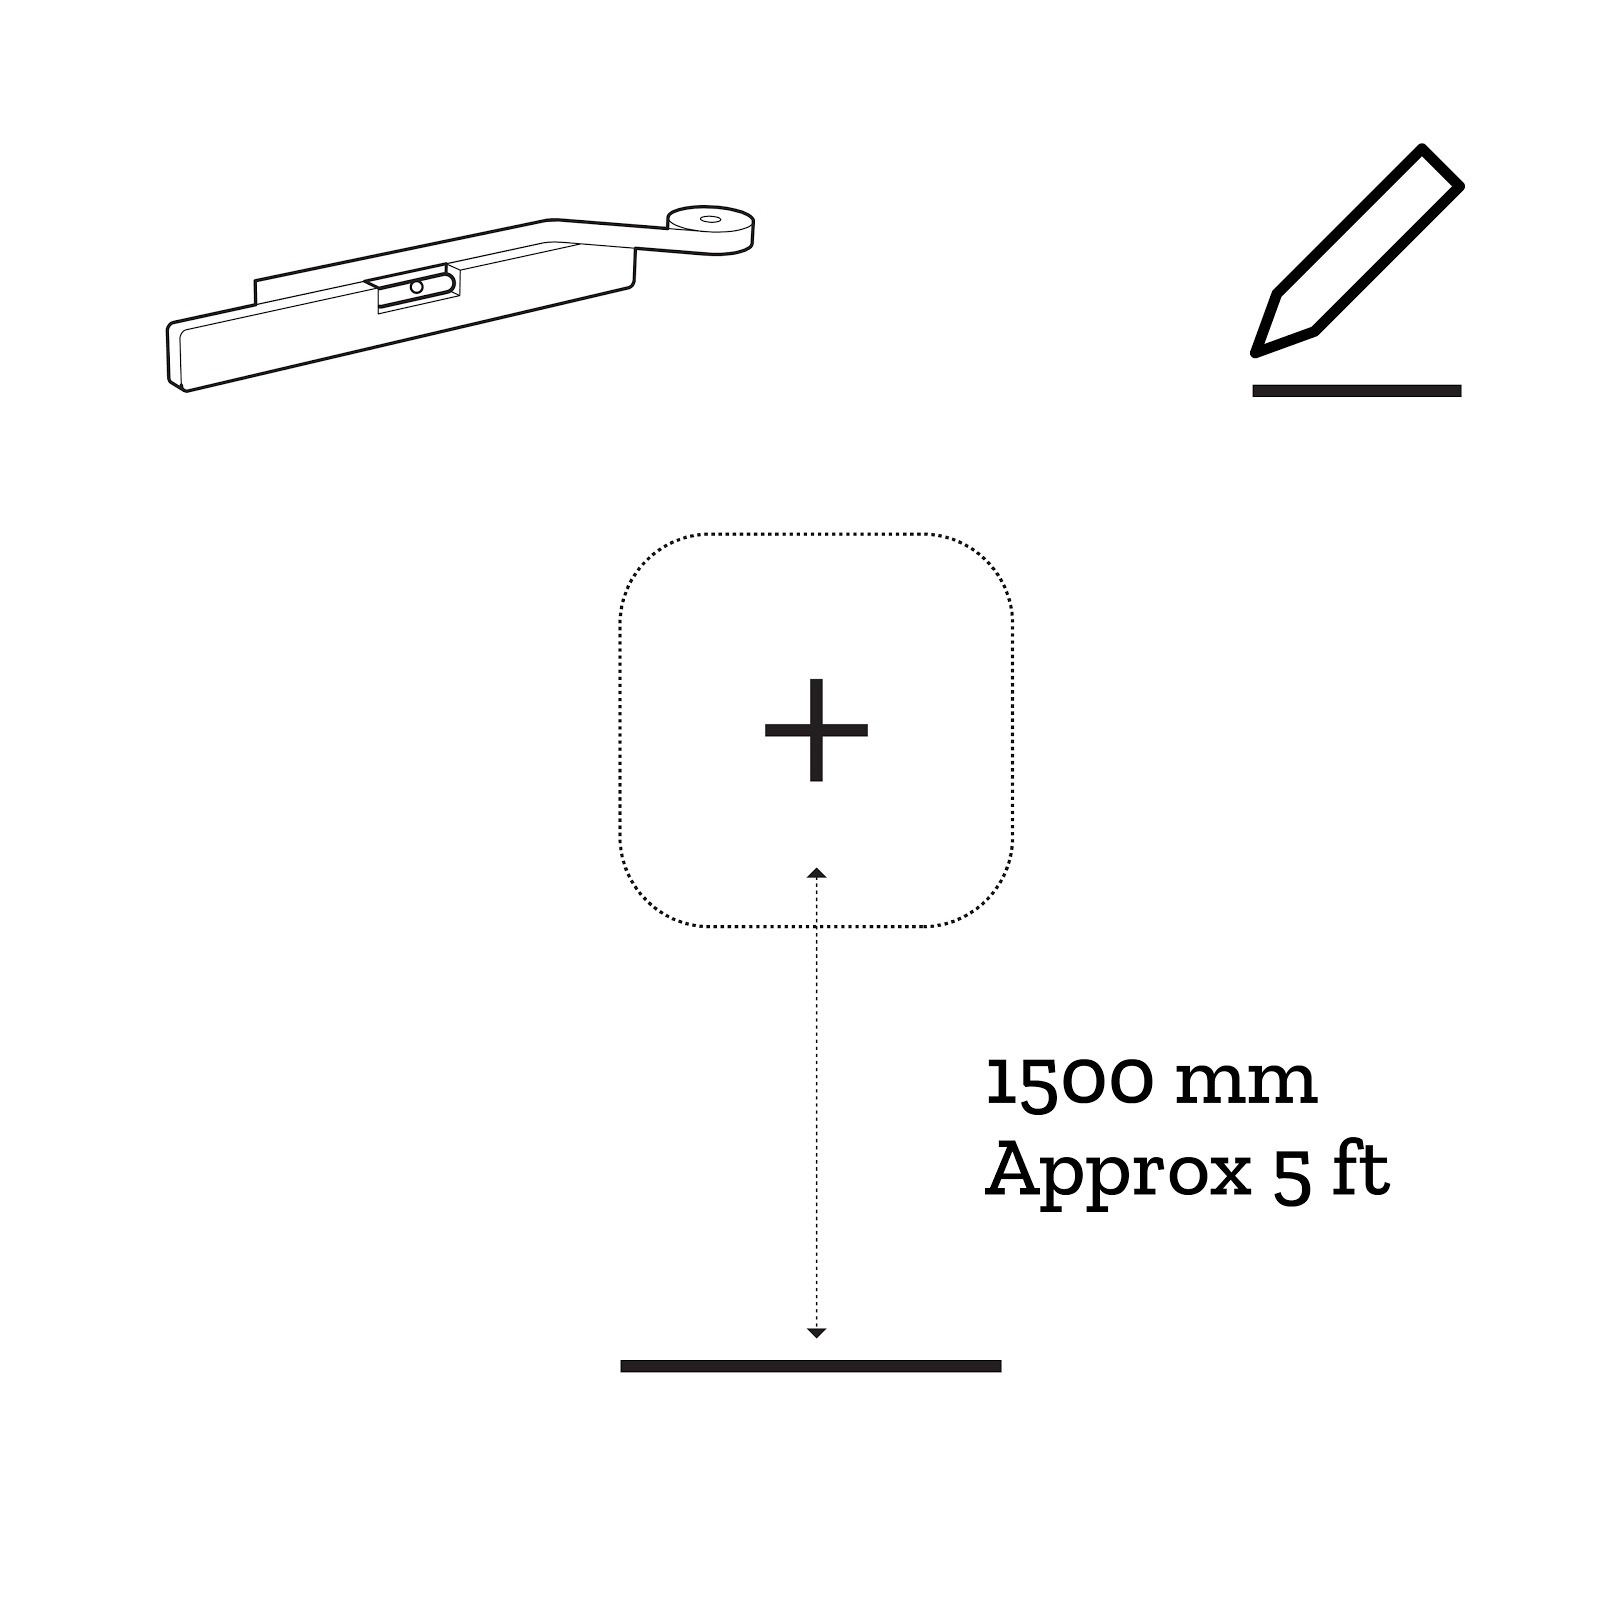
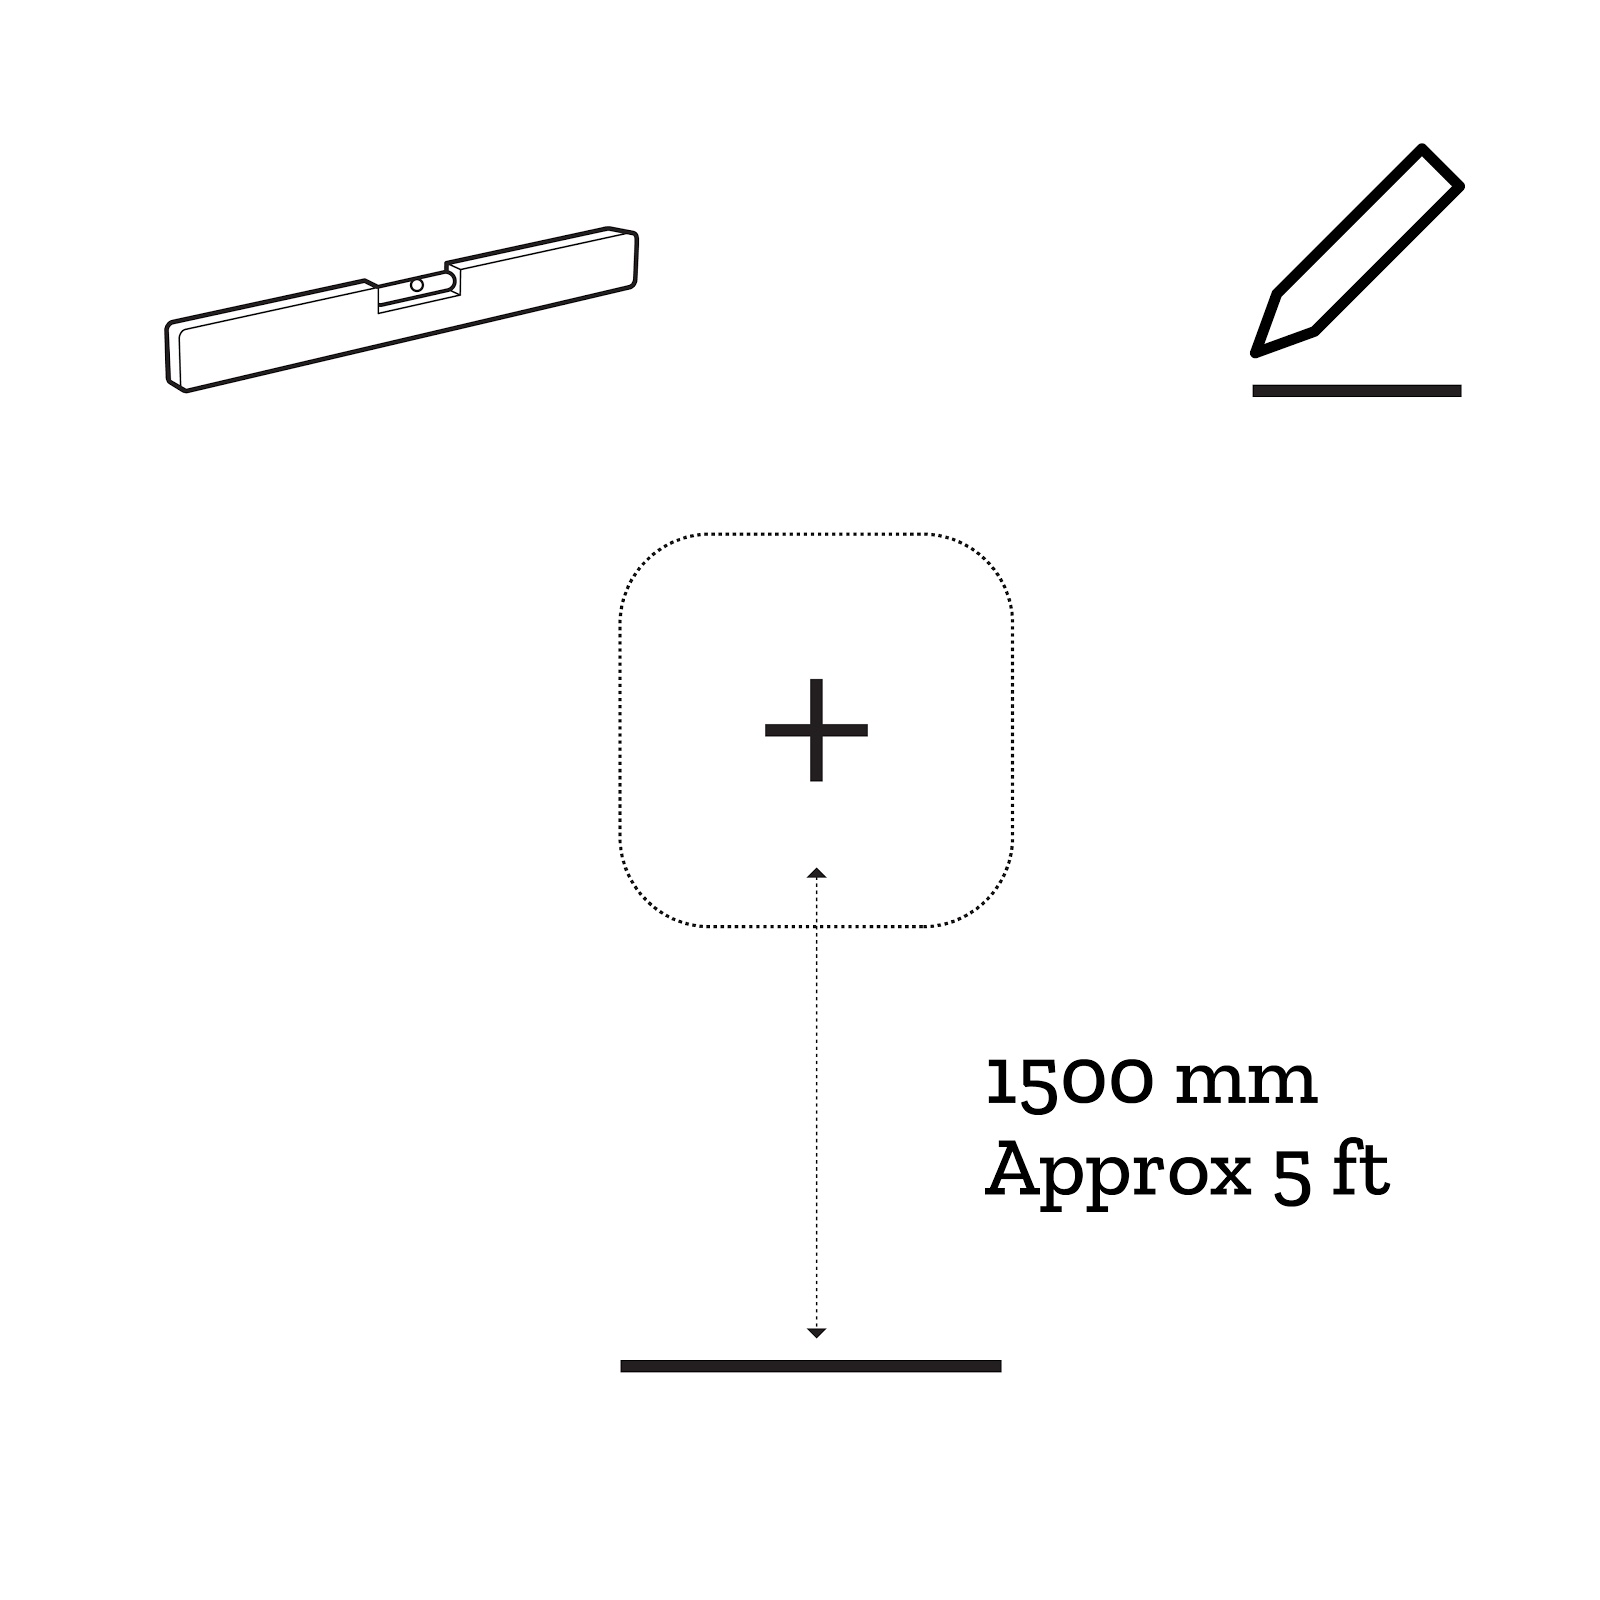
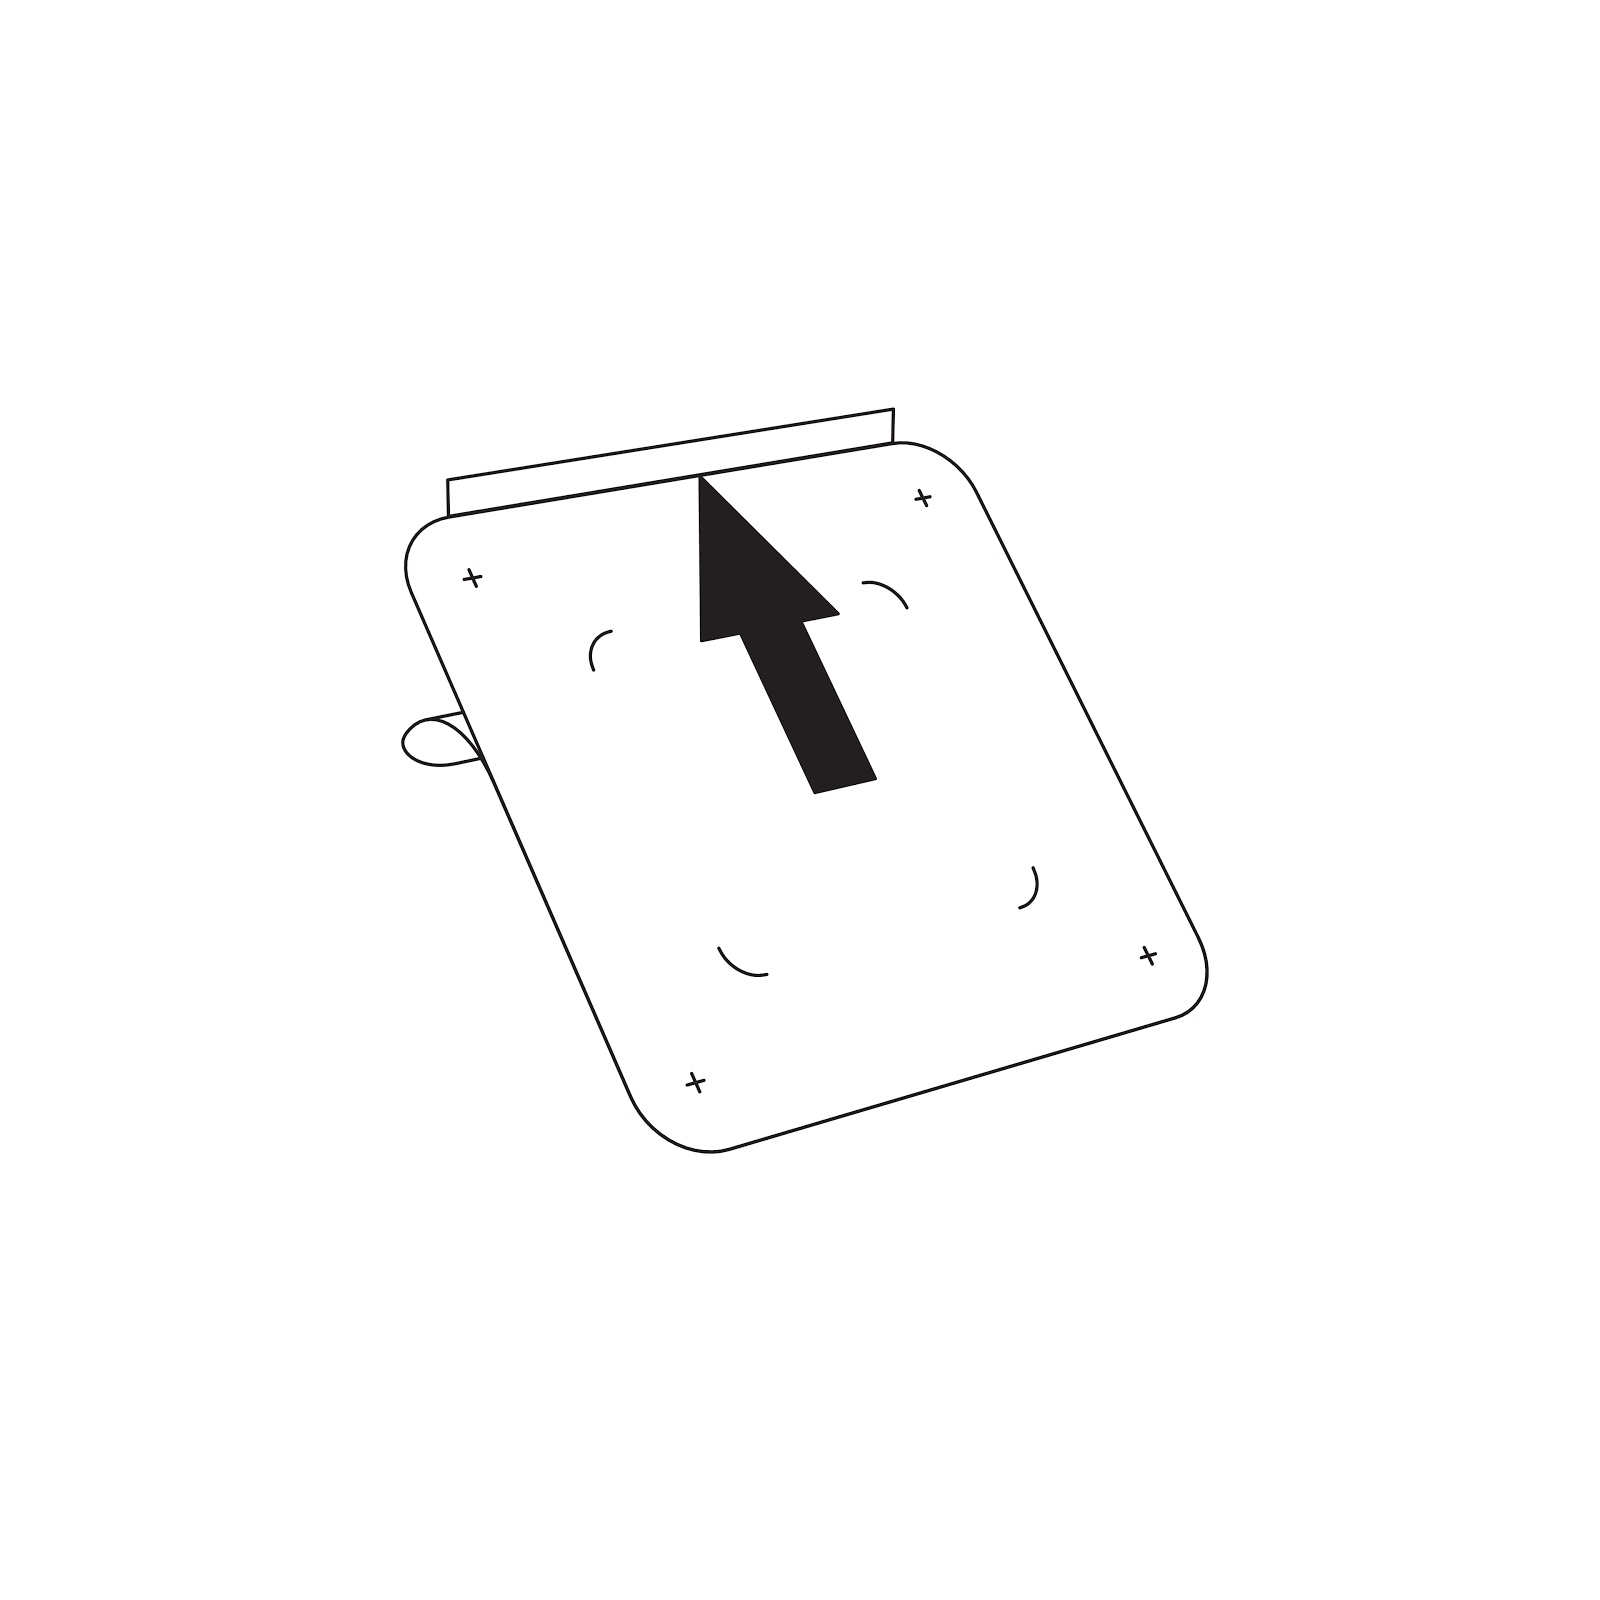
- Demount the back plate of the device, by carefully turning it counter clockwise. Use a spirit level to adjust it horizontally. Height from floor to center of device approximately 1500 mm / 5 ft.
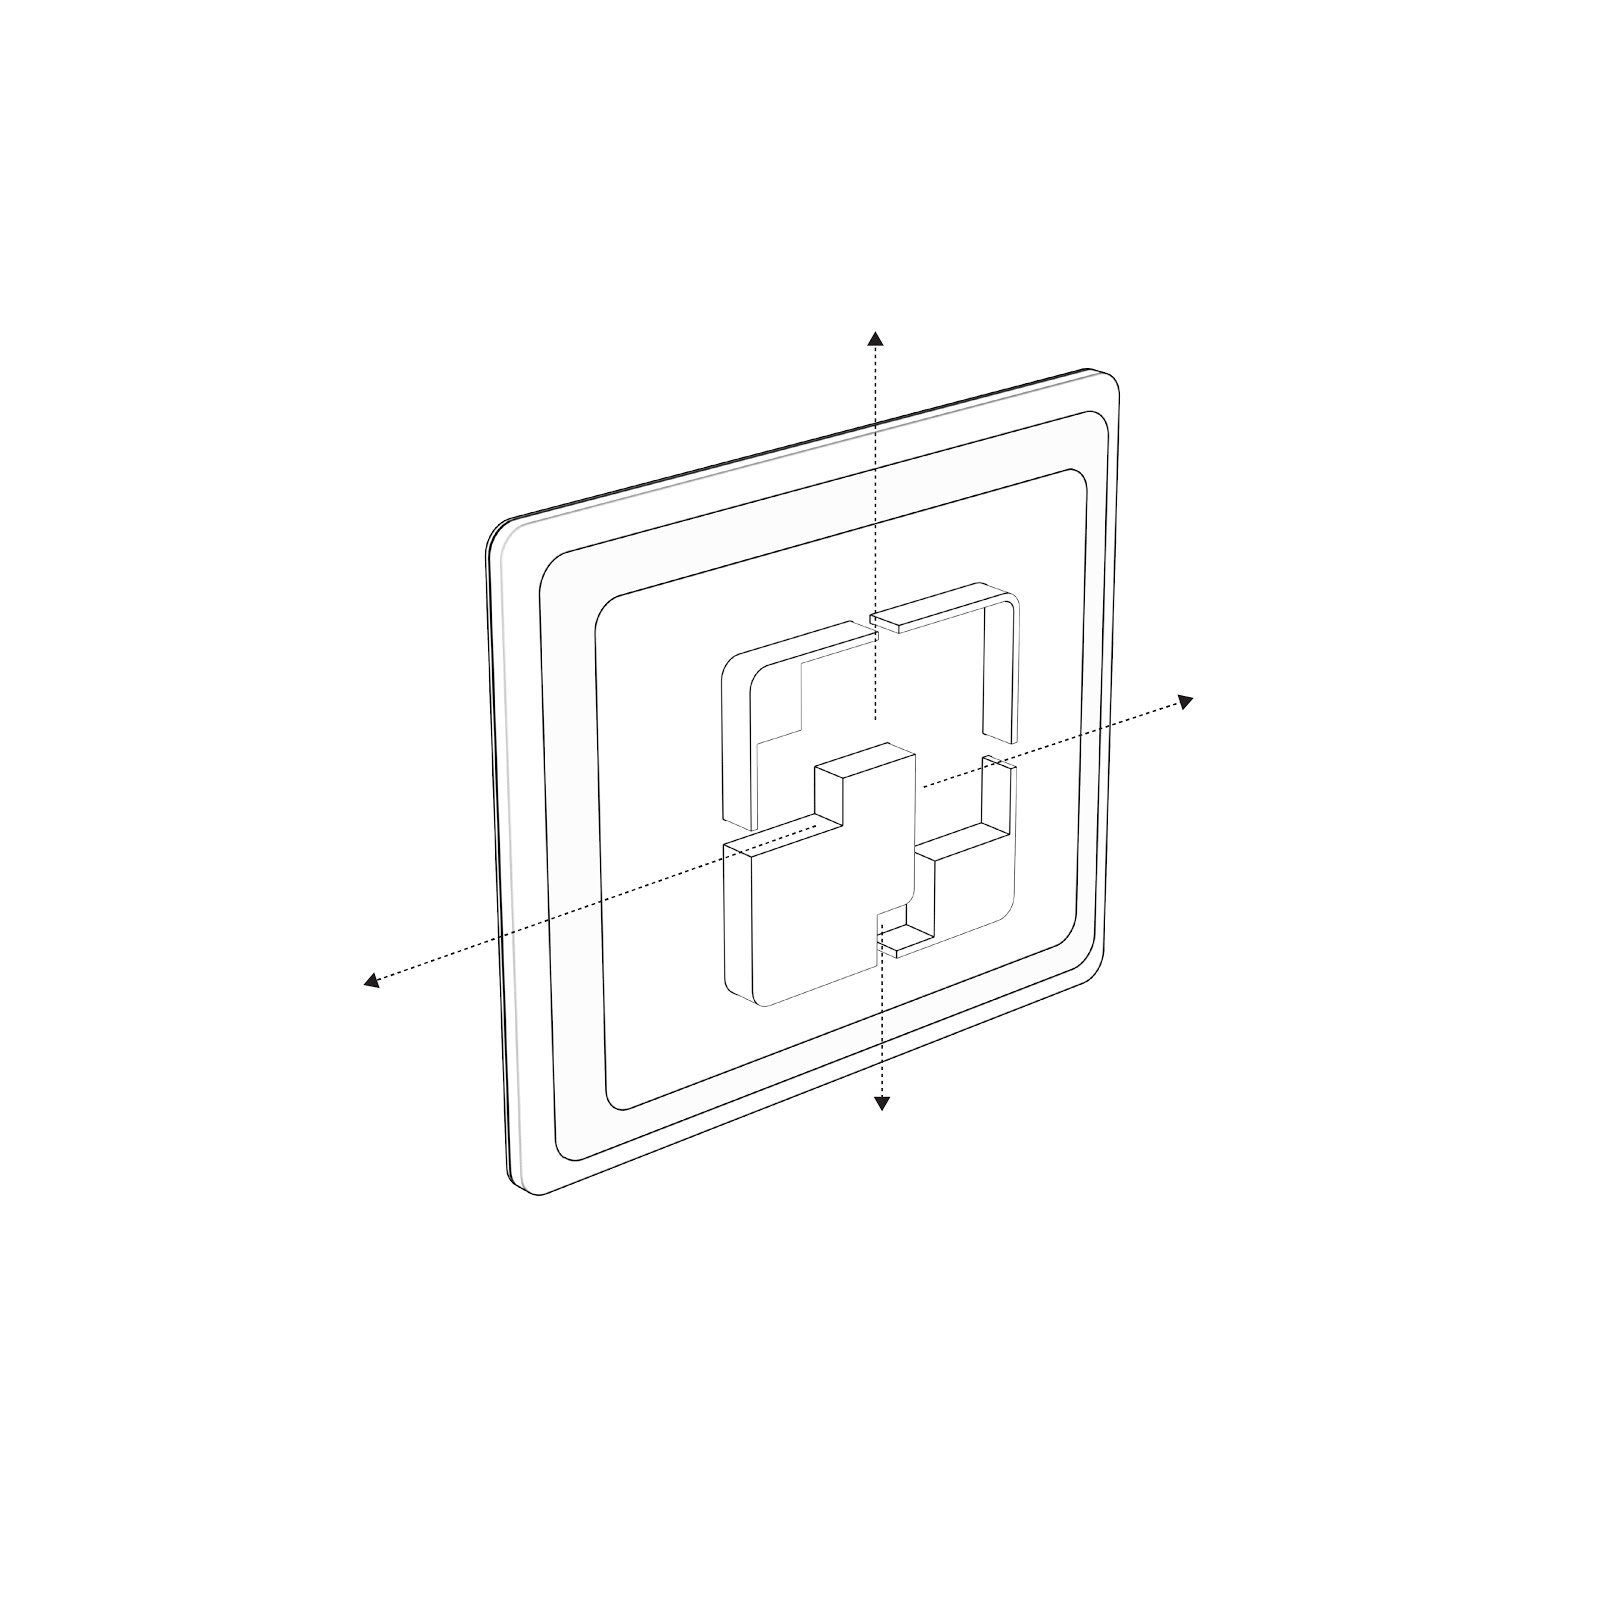
- Use the holes in the back plate to mark out hole positions on the wall. It is 75 mm from center to center of the screw-holes, horizontally and vertically (VESA 75 Standard).

- Decide on the direction you want to exit the cables and make sure the hole for the cable exit is facing that direction.
 Note! If you plan to route the cable into the wall using the open area in the middle of the back plate we recommend facing the cable hole upwards.
 - Make sure that the markings are leveled and drill the holes for the mounting bracket. Mount the back plate to the wall with the screws and route the cables through the appropriate channels on the device.
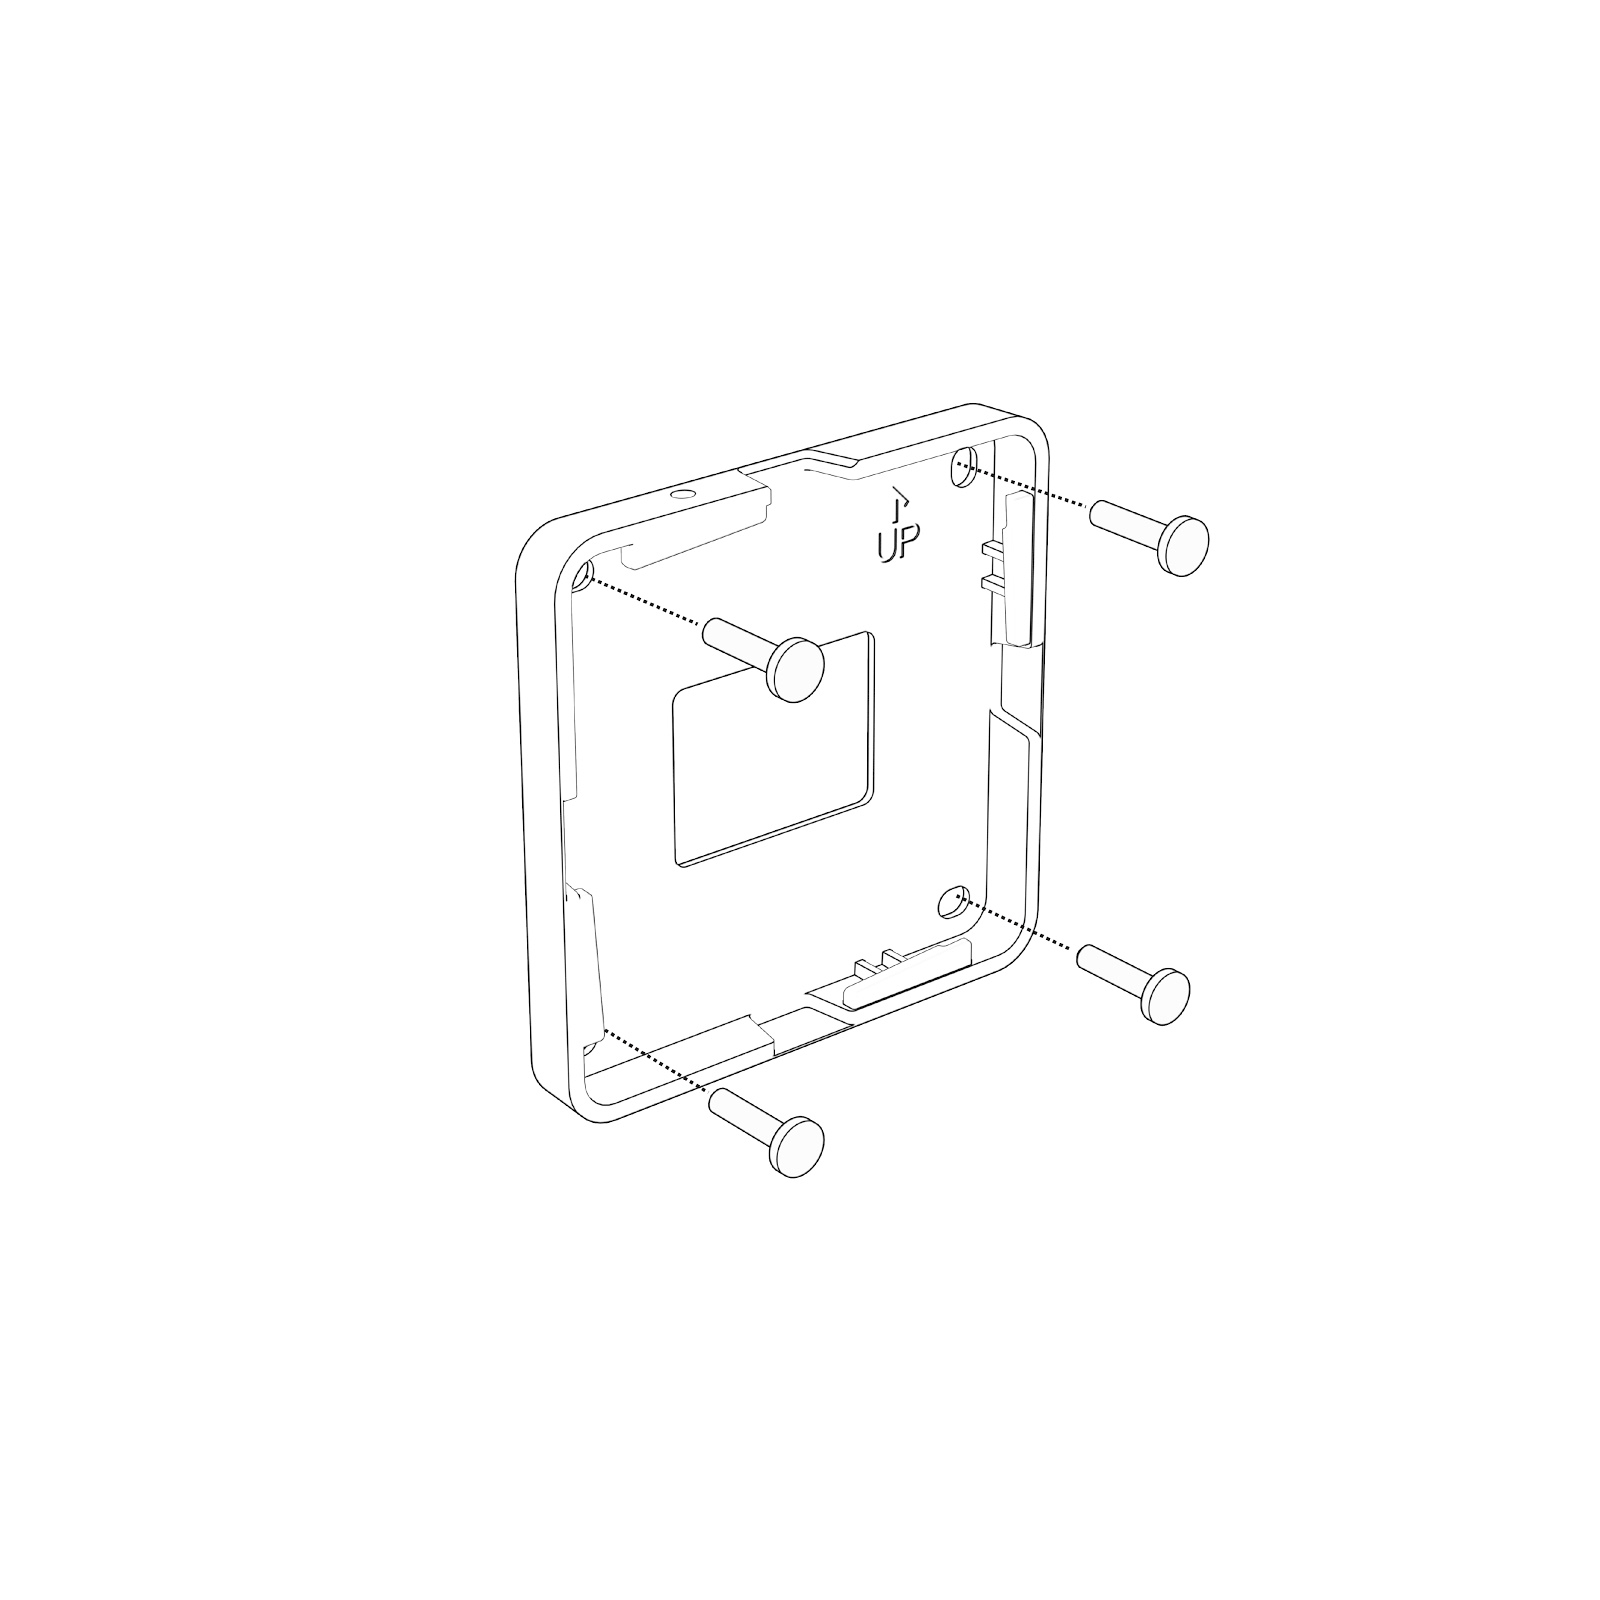 Note! Use 2 – 4 screws depending on the structural capacity of the wall. Always drill holes and use suitable plugs for wall types such as concrete, plaster etc. Choose a screw type that is suitable for the type of plug and wall concerned. Use screws with a diameter of 4 – 5 mm / gauge # 7 - 10 and minimum length of 35 mm / 1- 3 /8”. If uncertain, always contact a specialist or dealer for assistance with wall mounting.
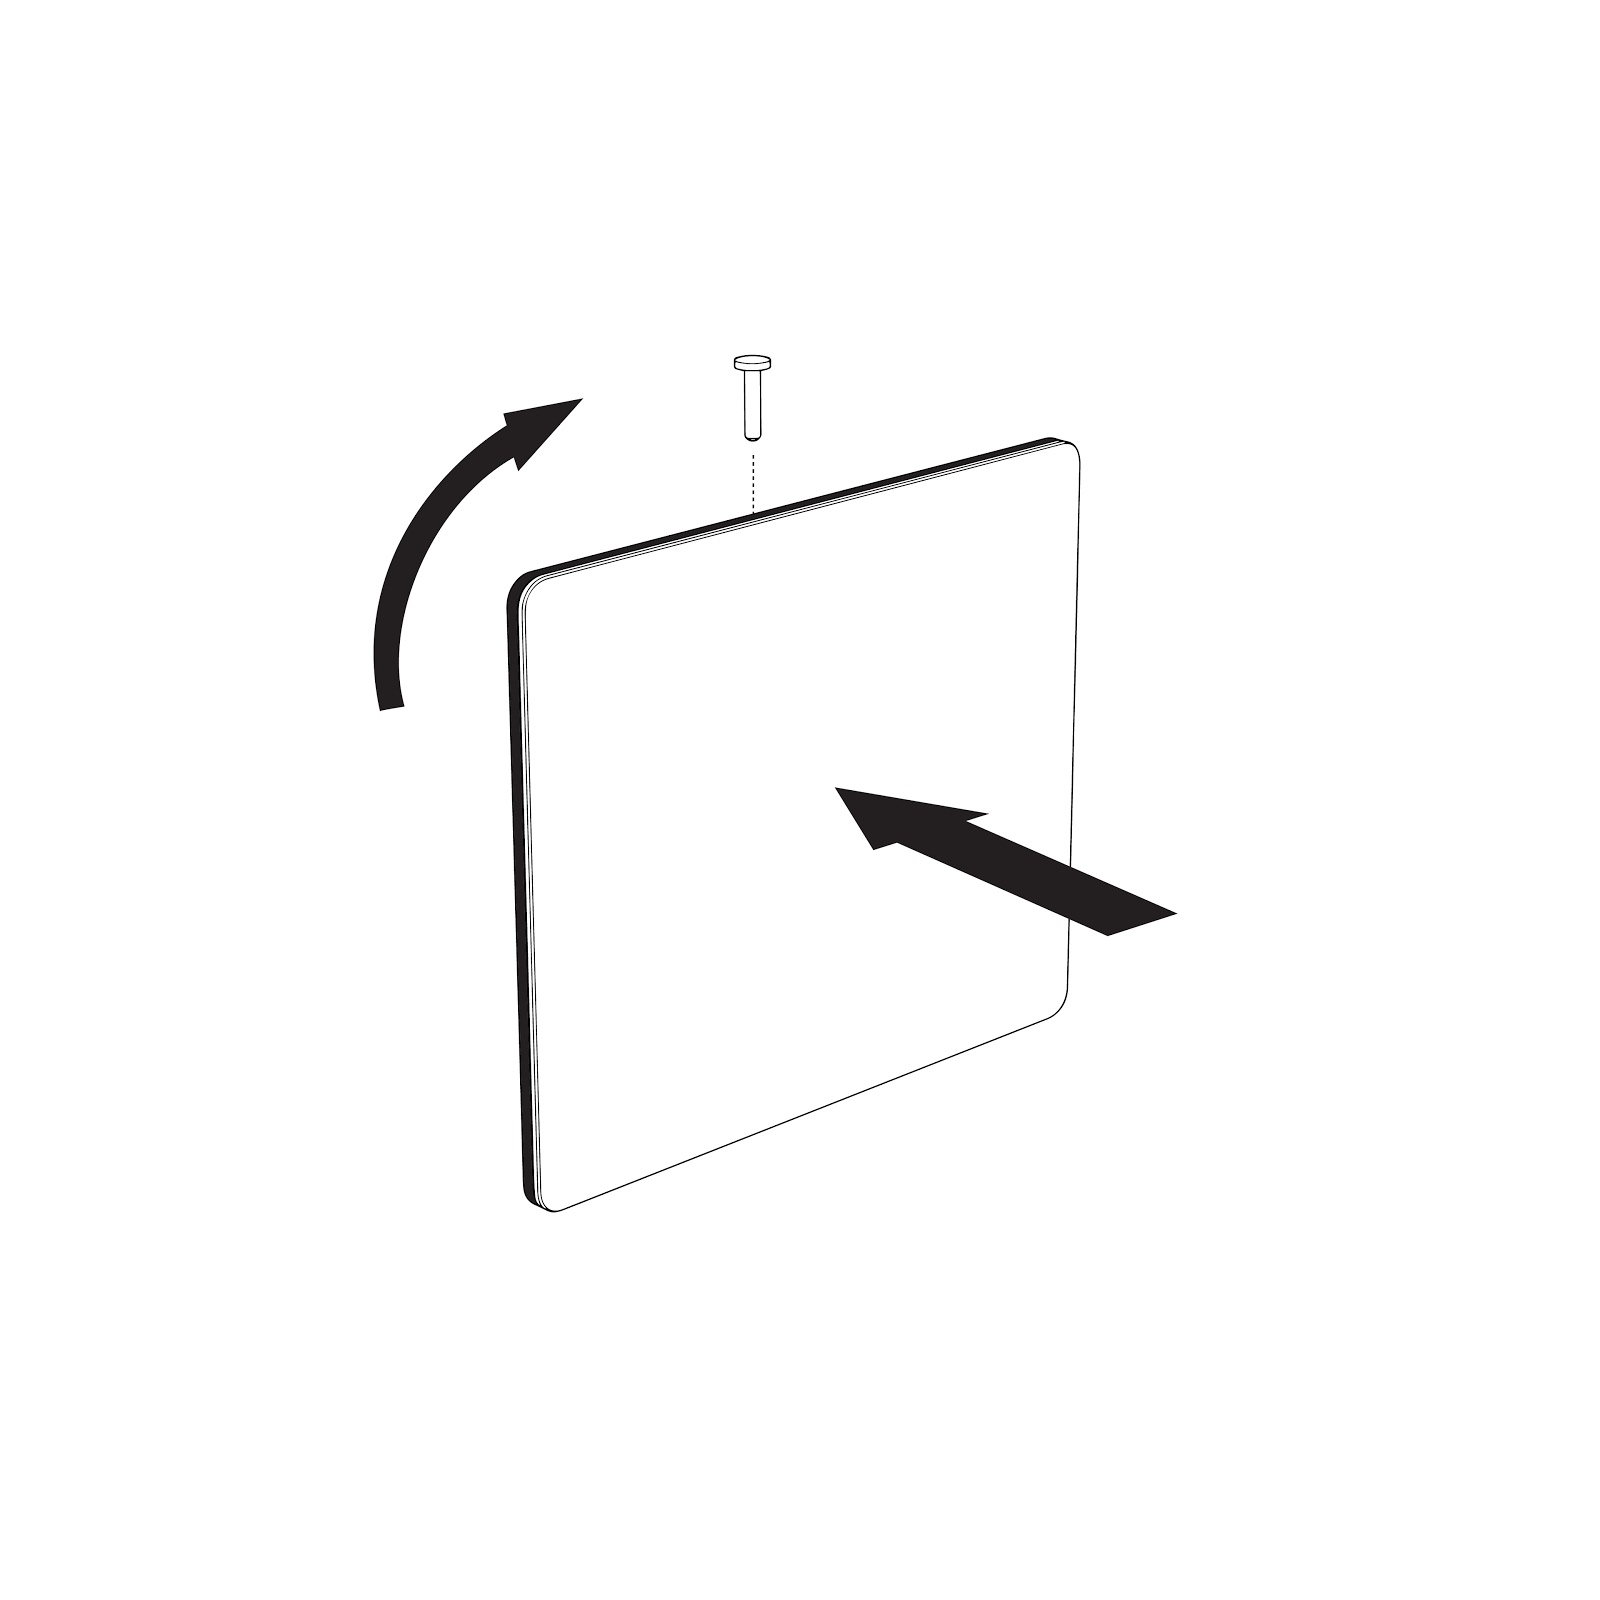
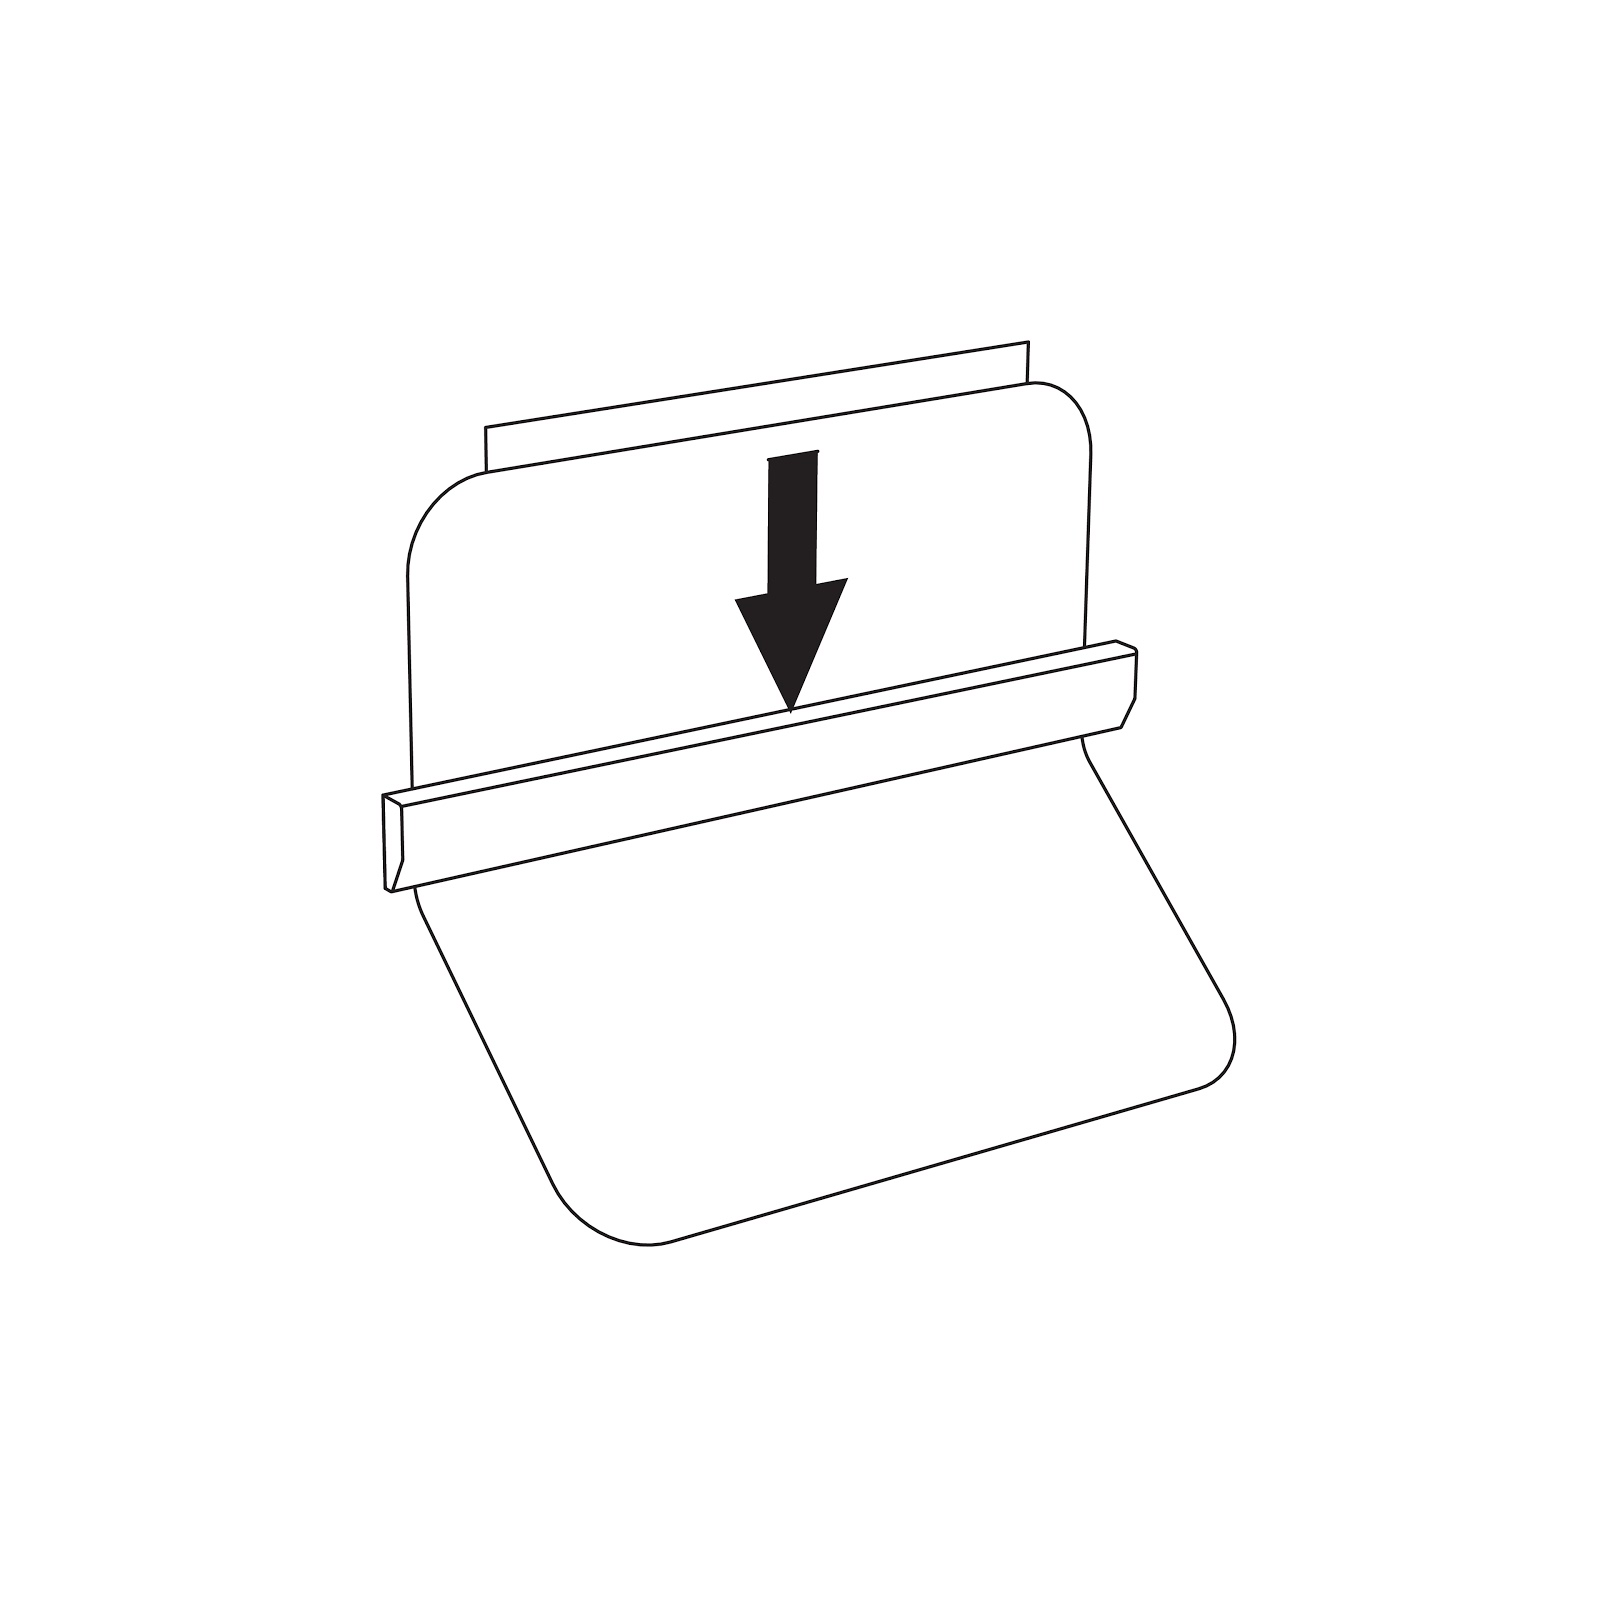
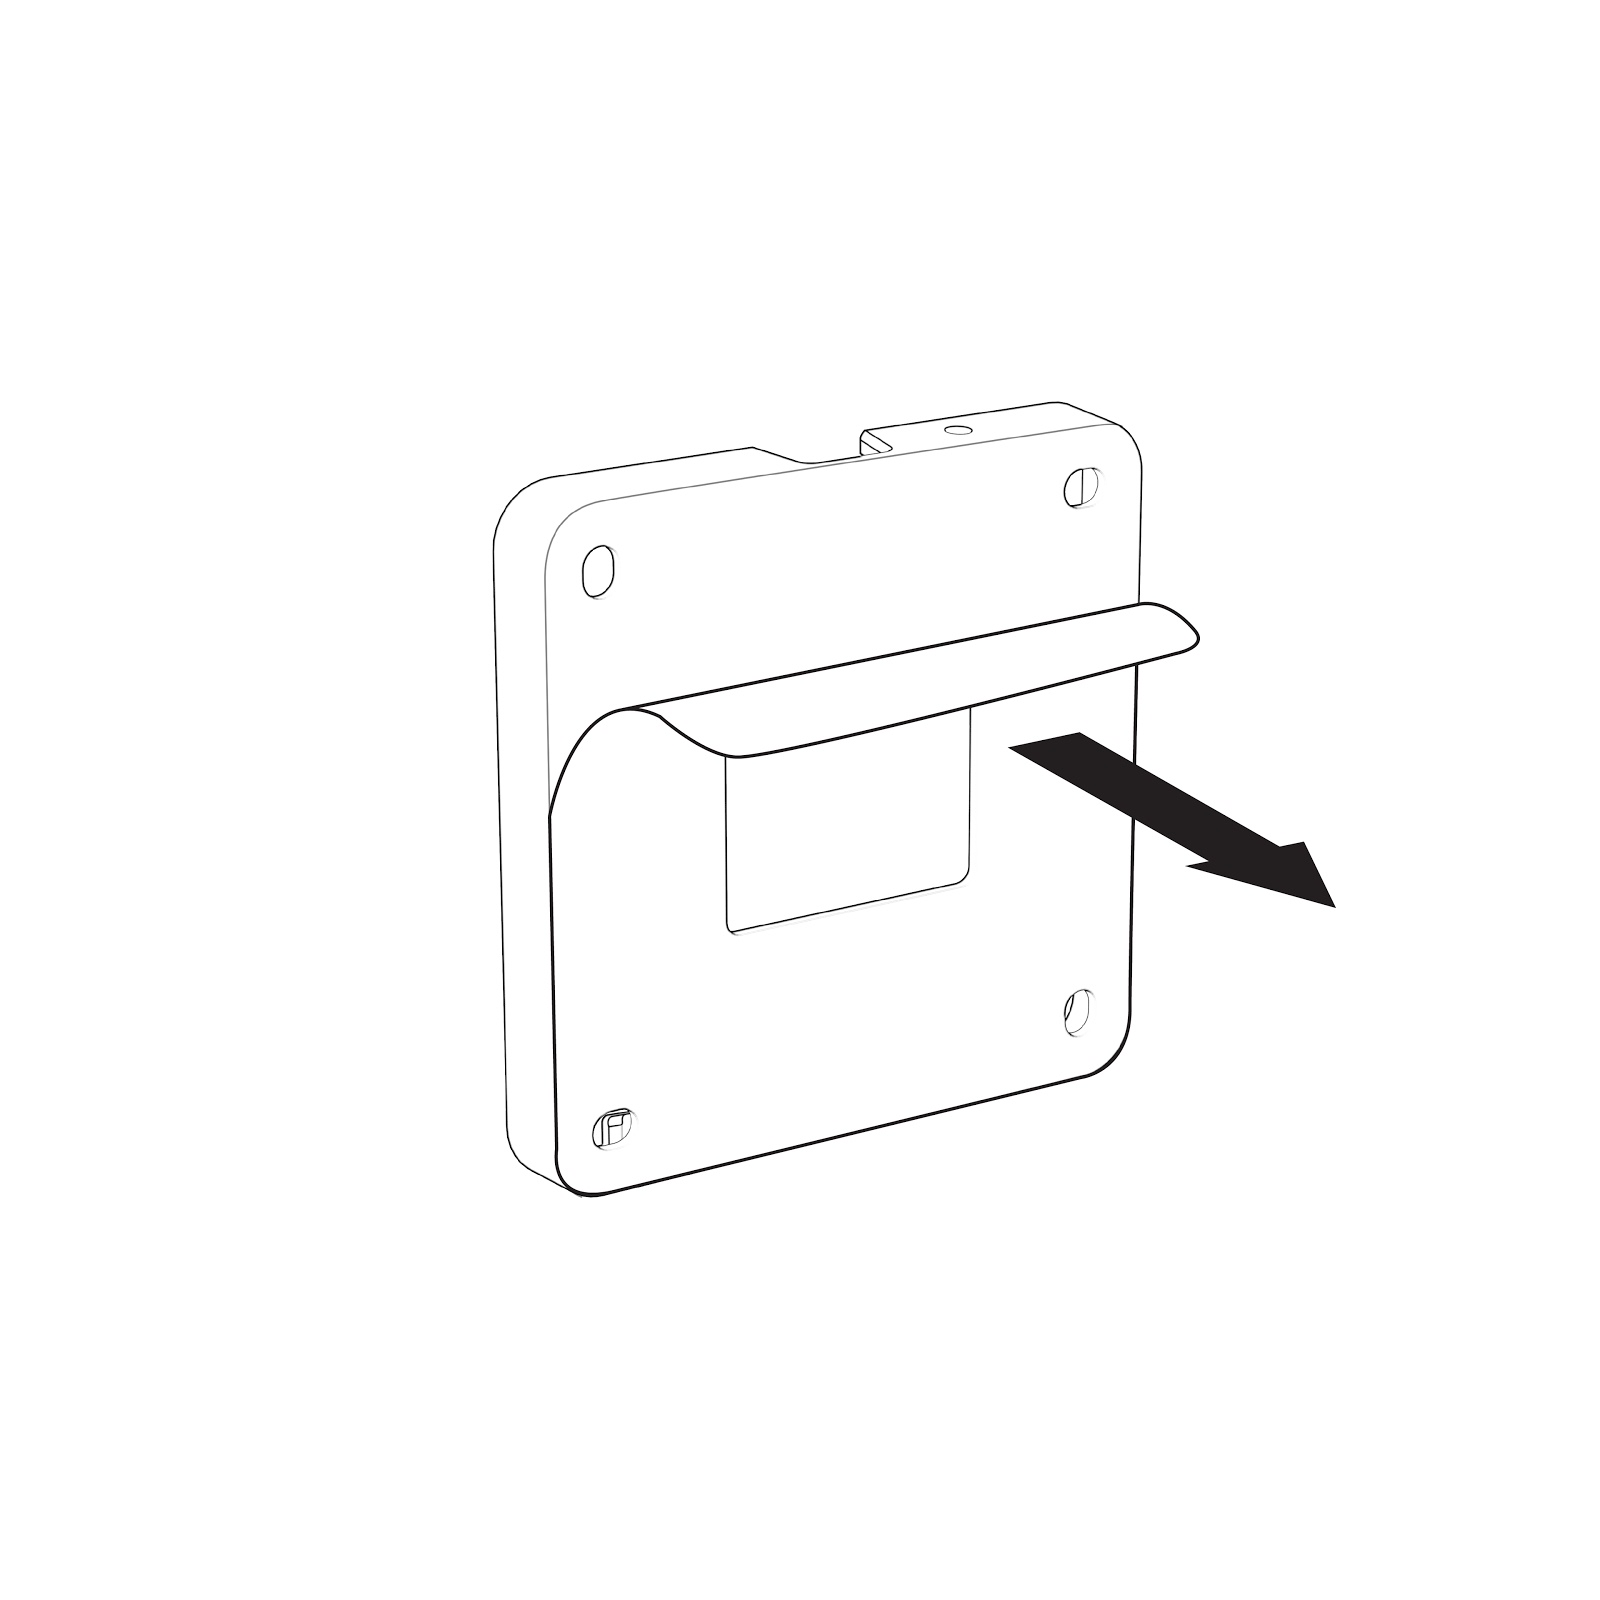
Note! Make sure not to tighten the screws too tight - the mount might bend. Also, do not remove the protective film on the back of the mounting bracket - the “sticky surface” should only be used for glass wall mounting. - Mount the device on the bracket by fitting the talons on the back plate with the holes in the device and gently turn it clockwise to snap it in place. Secure it with the safety screw.

IMPORTANT! Read the safety instructions carefully before using the mounting instructions.
For mounting on smooth glass surfaces only!
Make sure the surfaces are clean, dry and above 15°C / 59°F before mounting!
Avoid mounting it in direct sunlight!
Start by cleaning glass wall surface with alcohol or similar and leave surface to dry. Recommended room temperature during this operation is at least +15°C / 59°F.
- Apply a horizontal adjusted tape on the glass wall as a guide for the adhesive foil. Recommended height from floor to center of device approximately 1500 mm / 5 ft.
- Partly remove the protective film from the glass wall adhesive foil
- Press the foil on to the glass wall with a force of approximately 3 kgf. Use a rubber roller or scraper for this operation. Make sure to remove any trapped air bubbles.
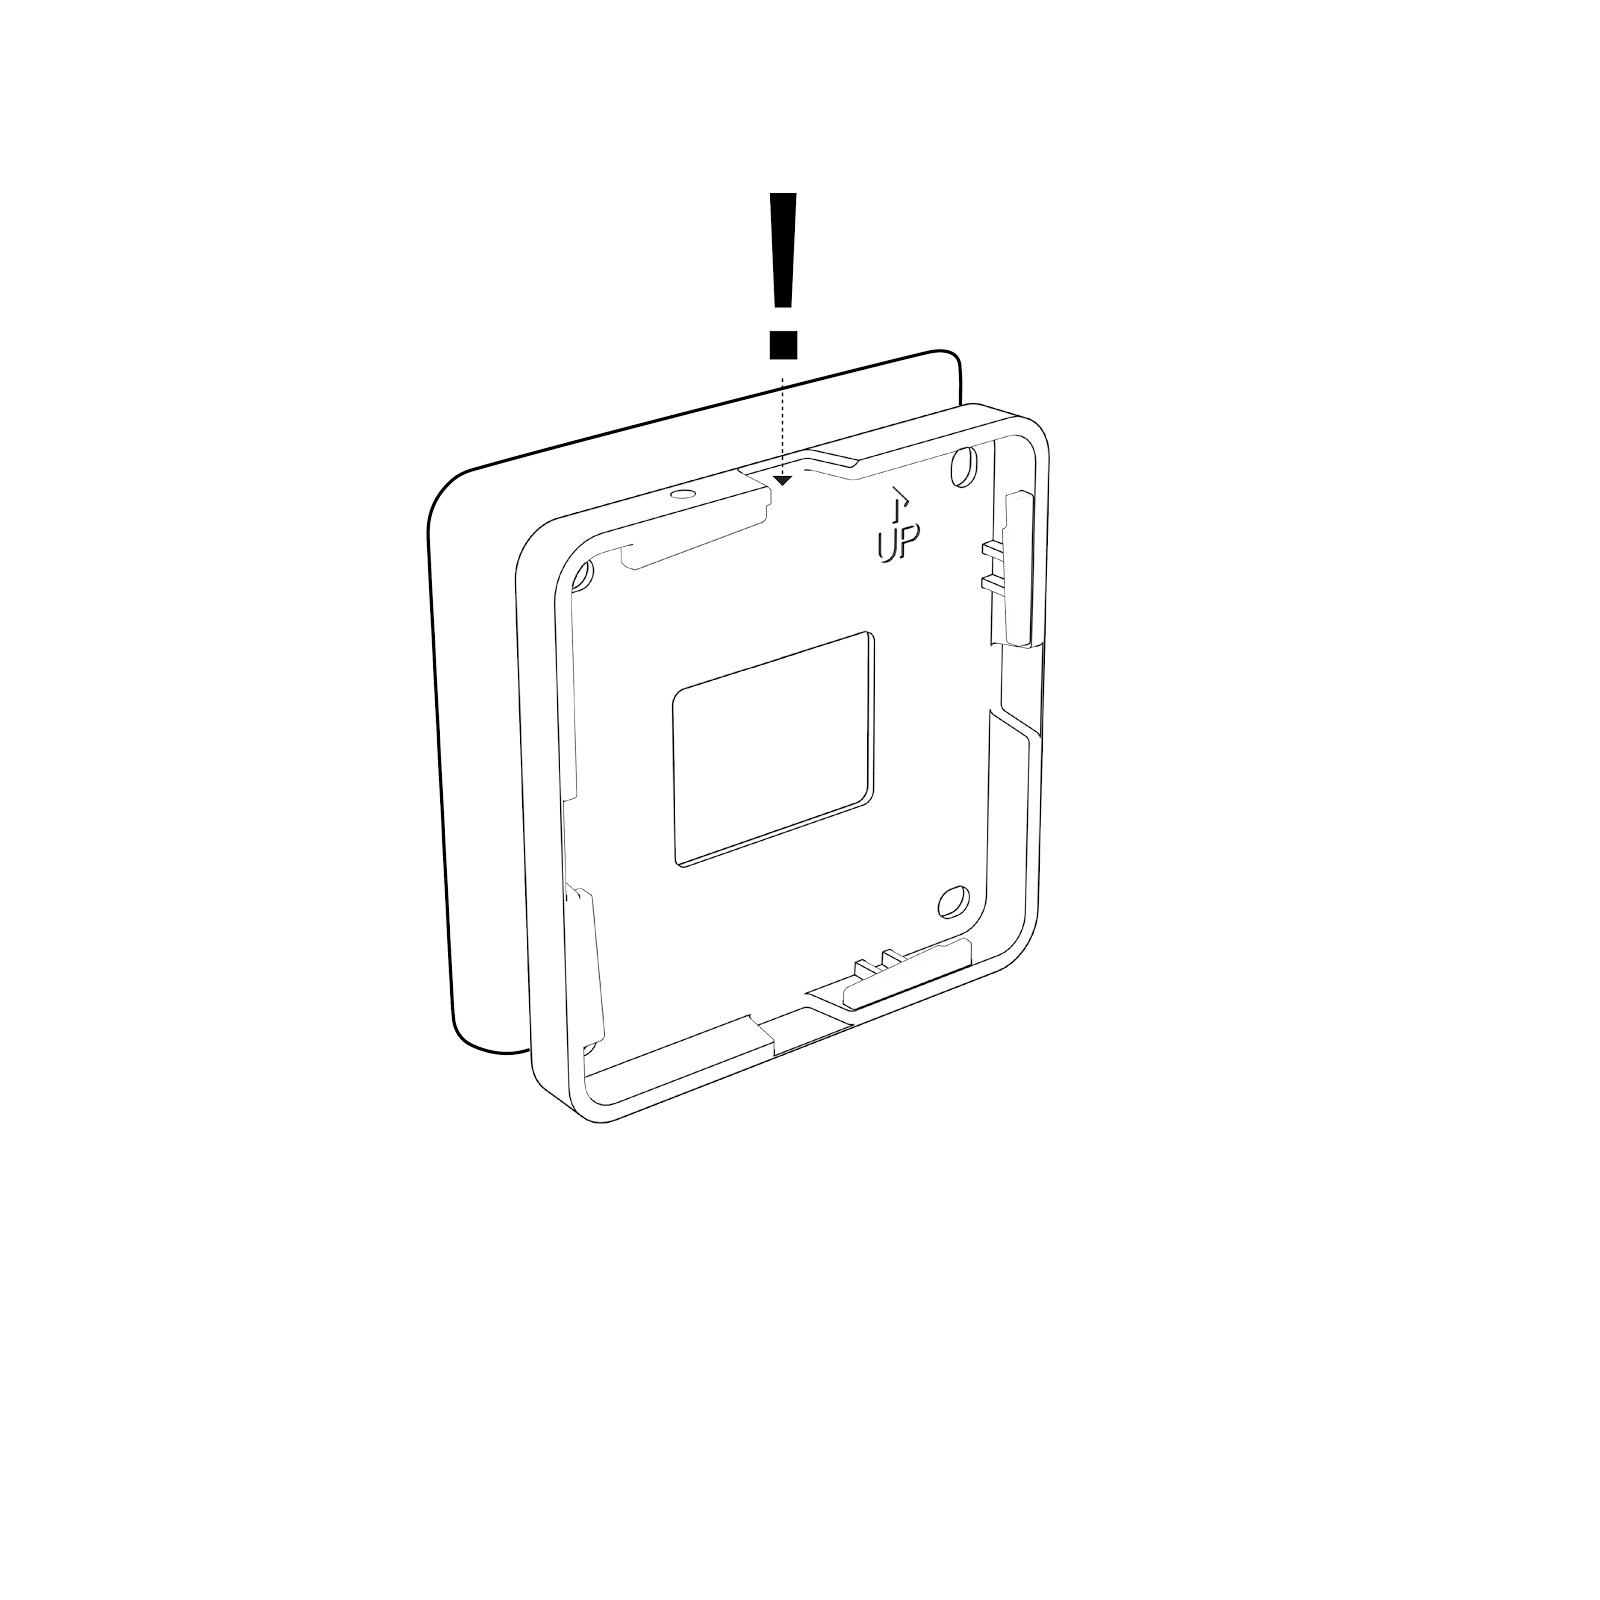
- Demount the back plate of the device, by carefully turning it counter clockwise. Remove protective film from the back plate
- Decide in which direction you want to exit the cables and make sure the hole for the cable exit is facing this direction. Use guides on foil to make sure bracket is in line with glass wall sticker.
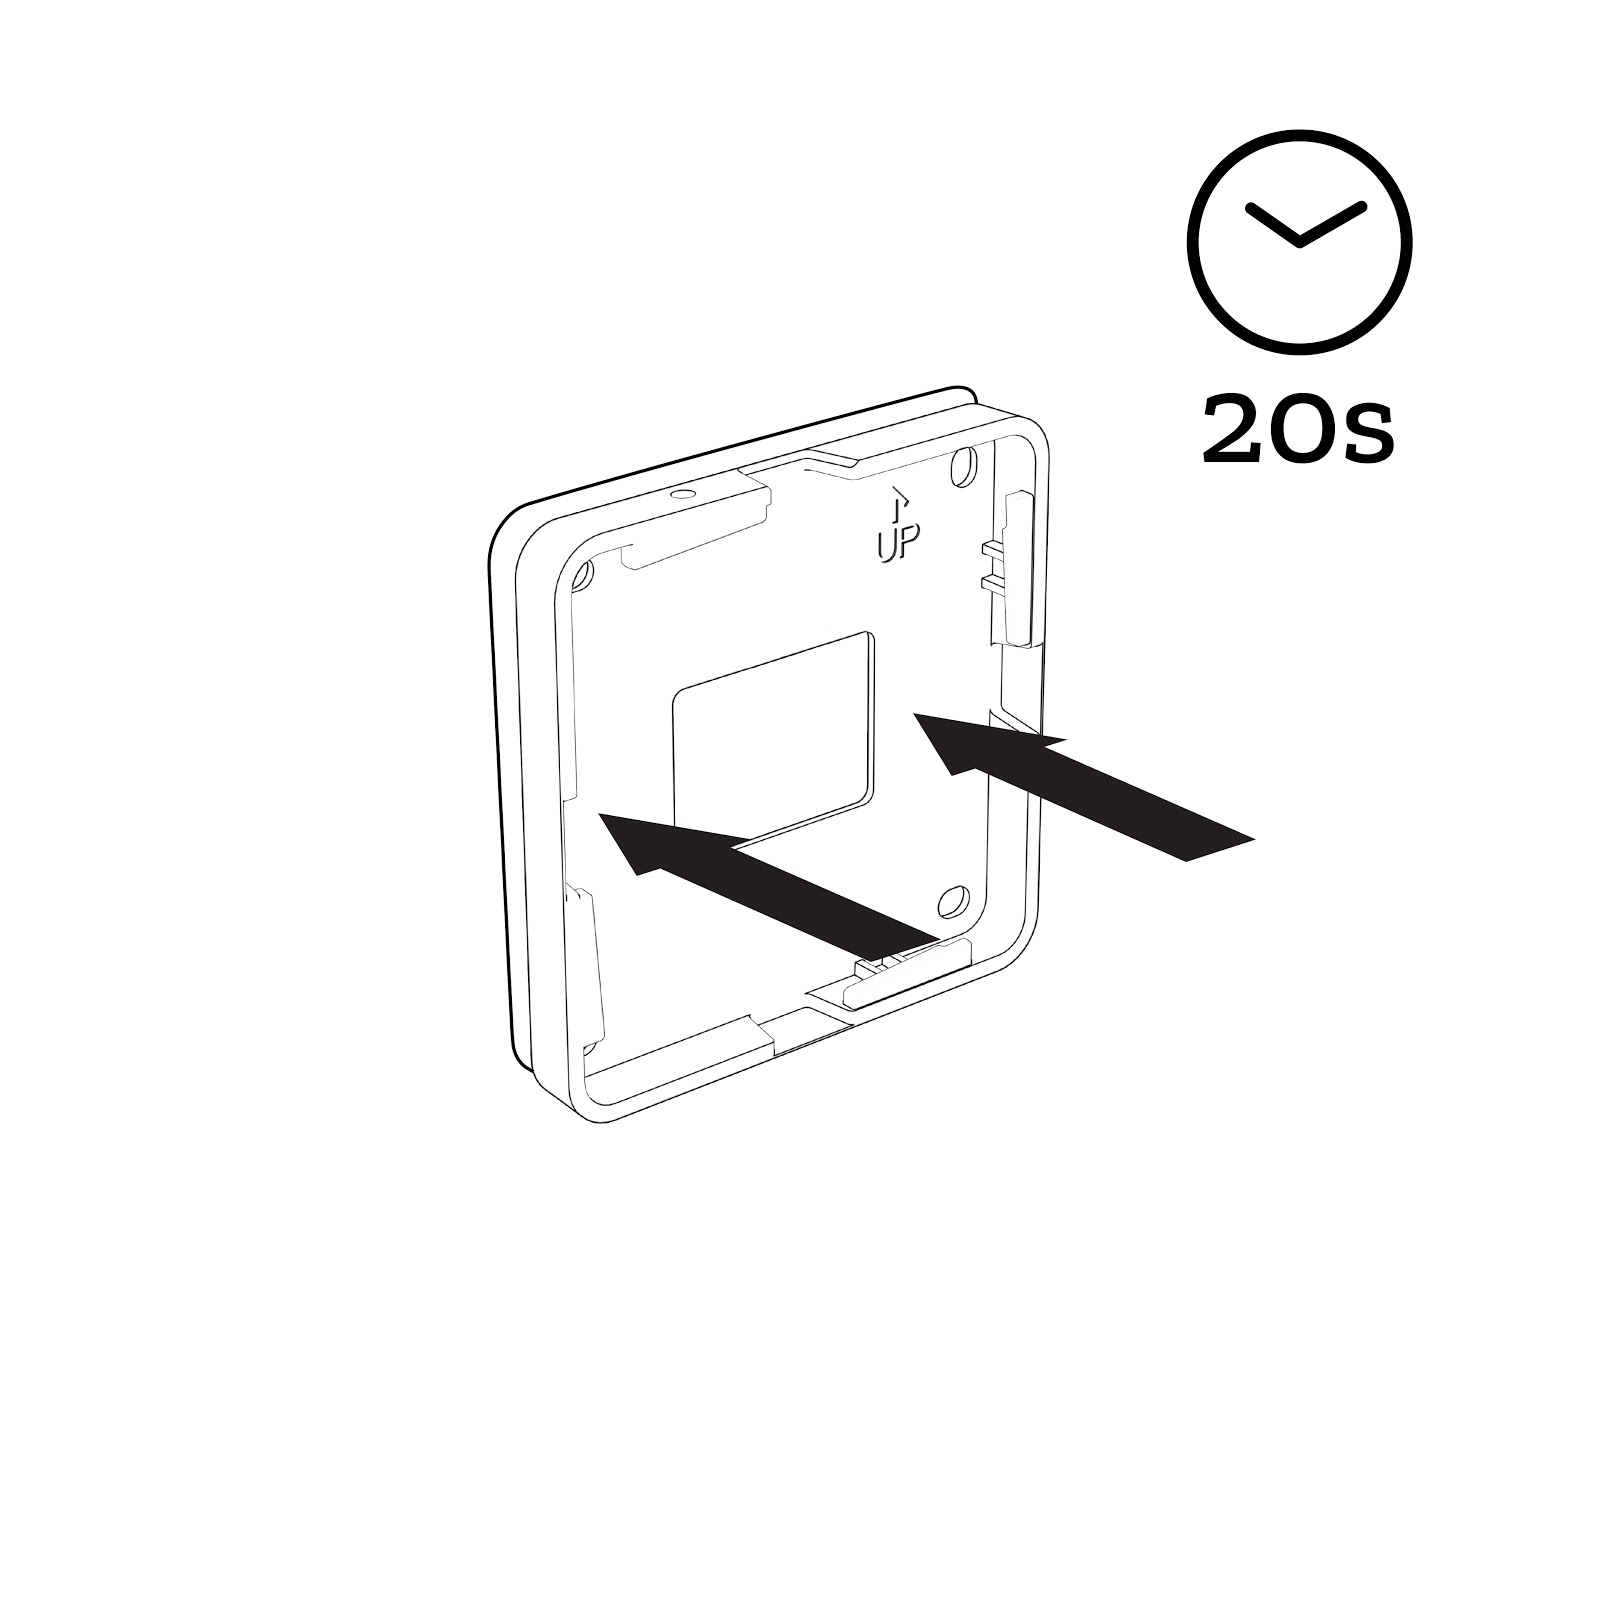
 Note! The glue will bond immediately, and cannot be remounted.
 - Press mounting bracket into glass wall foil for 20 seconds by a force of approximately 6 kgf. Leave bracket on glass wall for 20 min before final assembly.
- Route the cables through the appropriate channels on the device.

- Mount the device on the bracket by fitting the talons on the back plate with the holes in the device and gently turn it clockwise to snap it in place. Secure it with the safety screw.