The Humly Room Display can run in Appspace mode, which connects to the AppSpaces cloud instead of the Humly Control Panel Cloud.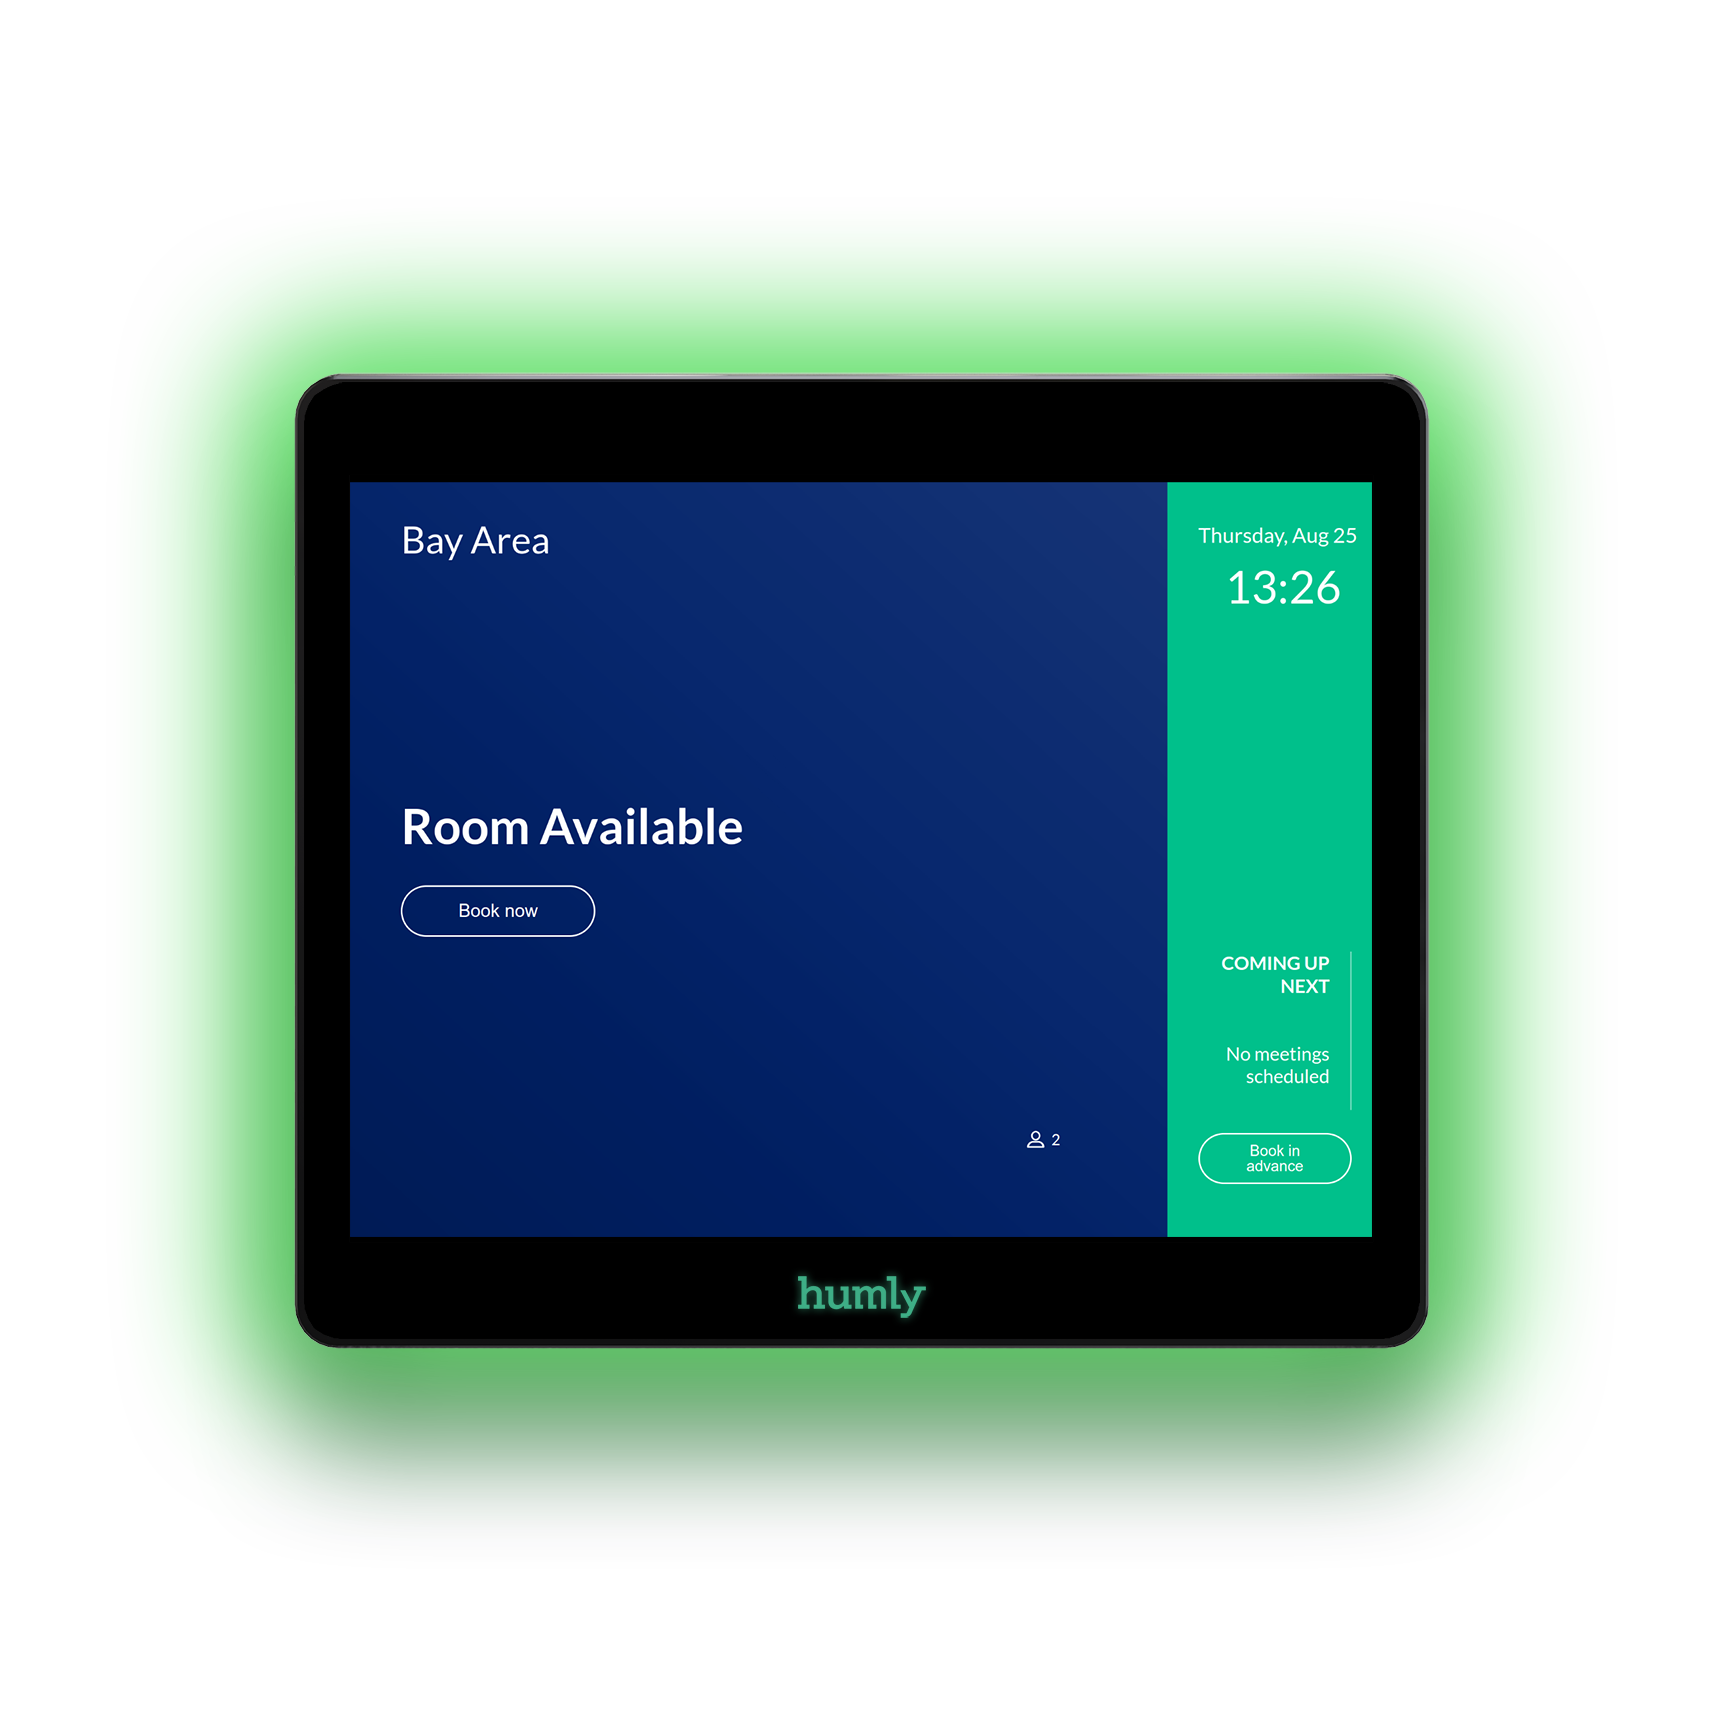
To do this you need to run an Appspace version of the firmware on the display which currently is version 1.21.0.72 The latest AppSpace firmware can always be found on our download webpage
Download the latest supported firmware (ending in .gz) and use a USB-stick to flash it. Detailed instructions for that is here.
After flashing, reboot the Humly device choose “Continue” after setting up the network (if needed) and then choose “AppSpace mode”.
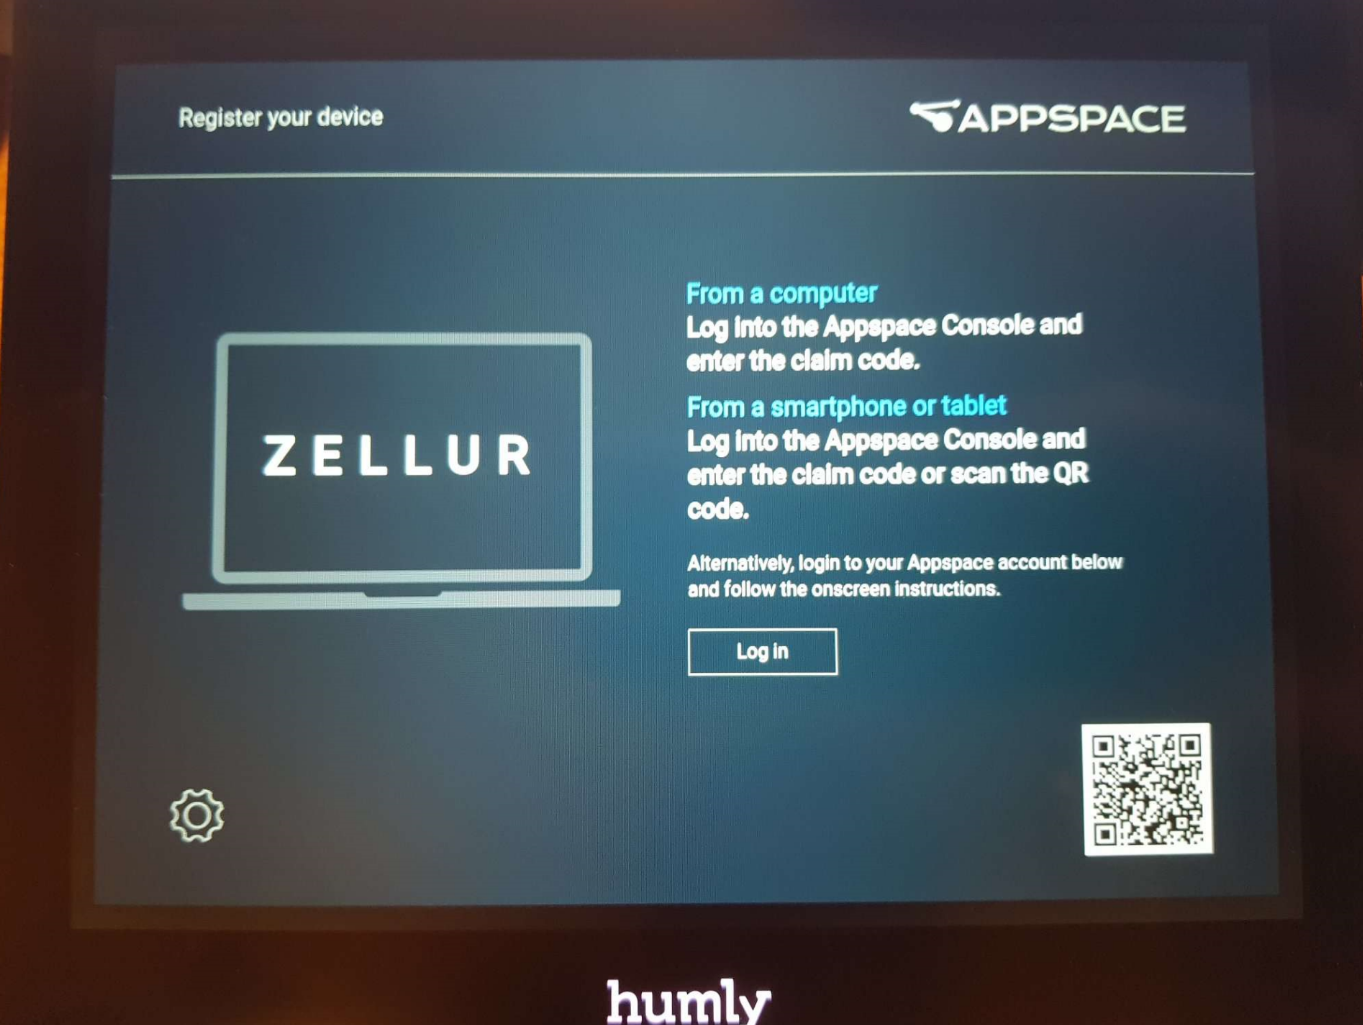
You will get the set up screen to connect to Appspace and follow the normal procedure. Guide on how to register a device to Appspace you will find here.
This concludes the device setup.
Note! It is possible to reach an admin panel by long pressing and tapping the top of the screen, the default Admin PIN is 0000.
Configuring the AppSpace cloud to use on Humly devices.
For AppSpace to be able to control the leds and show the correct information, we need to add some device tasks. They are available in this folder:
https://drive.google.com/drive/u/1/folders/16uJcwKBtopKkl1cixBsvOziE1nub7U-p
Download the two files, humly-device-settings.admpkg and new-humly-led-control.admpkg
Importing the task templates
- In the AppSpace cloud expand the hamburger menu. Device tasks will then be available under devices (not visible from icon view).
Go to the tab "Task Templates".
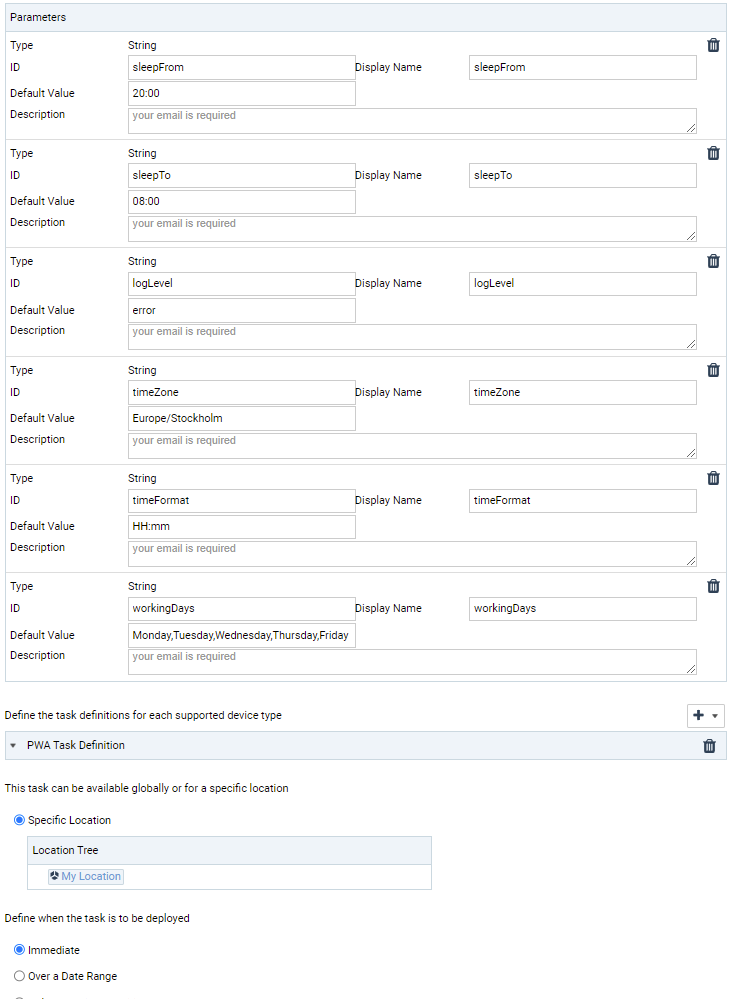
Press the little icon for "Import" and import the two files. - Edit the "Humly device settings" task template and change the settings as you want. The sleep hours is the time the Humly device will go into power save mode and turn off its screen.
- Also change the Time zone and time format to your liking. The valid Time Zone values are in the file TimeZones.txt.
The time format is defined like:
So a time format like: h:mm:ss a
will become a time like: 3:25:50 pm - Working days are the days the Humly device will be on, if you leave out Saturday and Sunday it will be in power save mode those full days.
The final result will look something like this:
Running Humly devices with AppSpace
- From the "Device Tasks" page click the "Advanced Tasks" tab and click the ADD button.
- Find the "Humly device settings" template you edited previously and select it.
- You will get all your default values from the template you edited, here you can do individual changes before applying to the Humly device.
- In the "Deploy to" section, press the Plus icon and locate your devices, select them and press select.
- Press Save to deploy the device task.
- Do the same for the "New Humly LED control" template.
- After applying the device tasks, the device requires a reboot, which can be done from the admin panel (see instruction above for how to reach it), for the LEDs to activate the first time after applying the device task. Also, the settings task can sometimes require a little time to be performed. But these are one-time setup tasks.
Publish to the Humly devices
Create a channel with a calendar in it.
Go to Channels, the "Publish" tab and click "Find devices". Select the device to publish to.
Press the "Add" button and in a few moments the Humly device is up and running.
This concludes the setup.