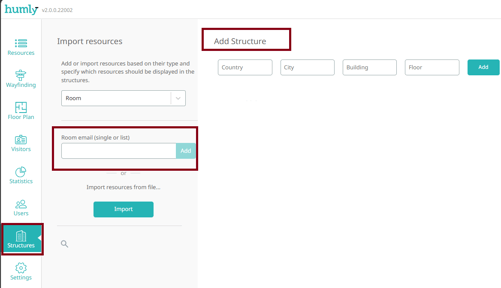
Create Structure
It is time to create structure, countries, cities, buildings and floors where the imported rooms, already created in your booking system, will be assigned. These structures can later be revisited and edited after the setup in Settings>,Buildings &, Structures.
You have to add some structure and at least one resource room to be able to proceed in your basic setup.
| Settings | Description |
| Add Structure |
Add a description of each structure level (i.e. country name, city name, building name, floor name) and click ‘Add’ to create a structure. If it’s only one country, you can create many cities, buildings and floors and they will all be sorted in the correct way |
Please note that the interface in the "Import room"-section is a bit different depending on which booking system you are connecting.
Import rooms
| Room list email | Enter the email address to your room list and click ‘Add’ to import them to Humly Control Panel. |
| Single room email | Enter the email address of a single room and click ‘Add’ to import it to Humly Control Panel. |
| ... or import rooms from .csv file |
Choose to "Import now" or "Schedule" if room lists will be imported from a .csv file.
|
| Imported Rooms | In the list of imported rooms you are able to select/deselect all rooms or individual rooms. To assign room(s) to a floor, select the room(s) and drag & drop to their respective floor. |
Template for Import Rooms
Add rooms in the left pane and assign to structures by drag-n-drop to the right floor. 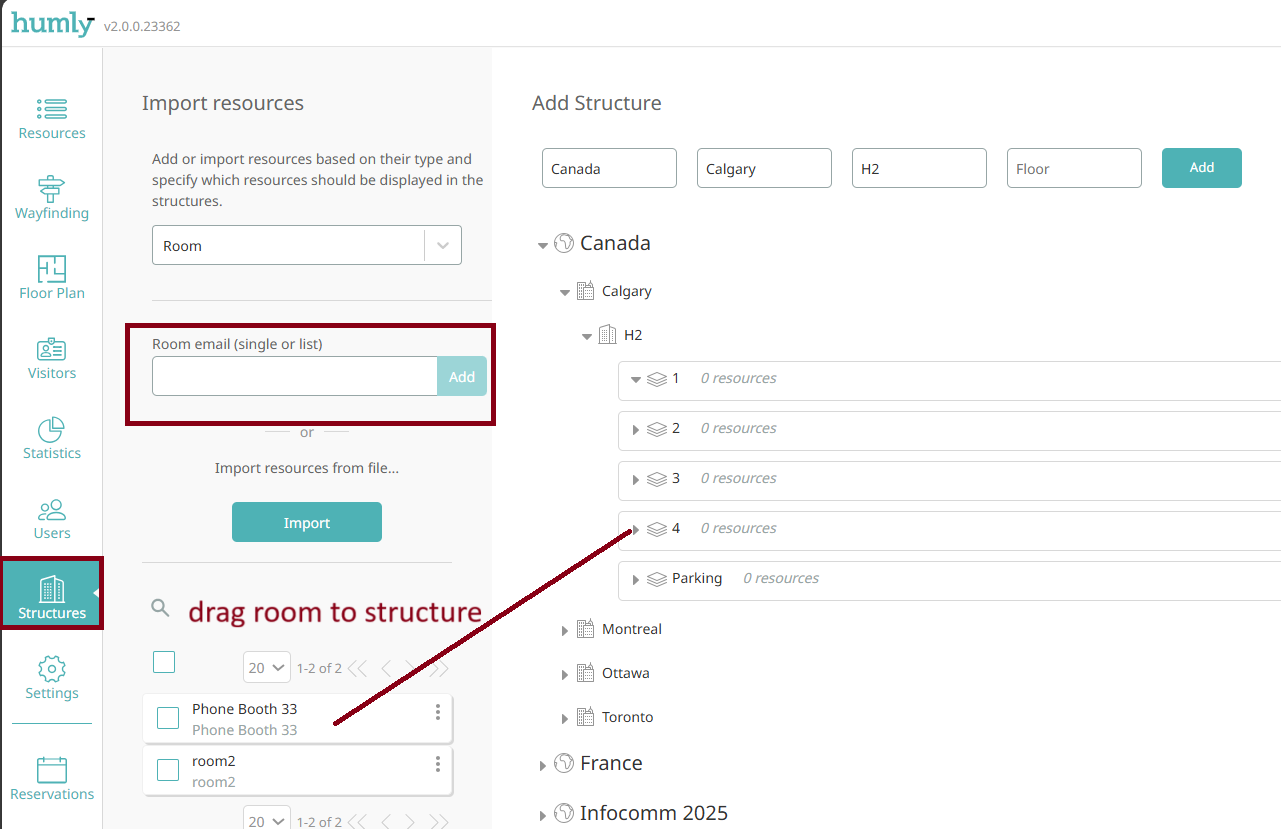
When you feel you are ready assigning rooms to different floors, click Finish to continue to the last step of the setup.
When you have configured the basics of your Humly Control Panel you are ready for the last step. Once you are done move on to Step 7: Connect a Humly Room Display to the HCP.