Booking System Preparation - Nexudus
When creating new users in Nexudus, please make sure to login to the Nexudus spaces and/or dashboard to confirm that the account has been fully activated. Unactivated accounts will not work properly with the Humly solution.

The setup to connect Humly control panel with Nexudus require two different Nexudus users.
The first one is an administrator account with API access that will do the communication and sync data between Humly control panel and Nexudus. It is a good idea to setup a service account for the Humly service and not a real user account.
Admin account
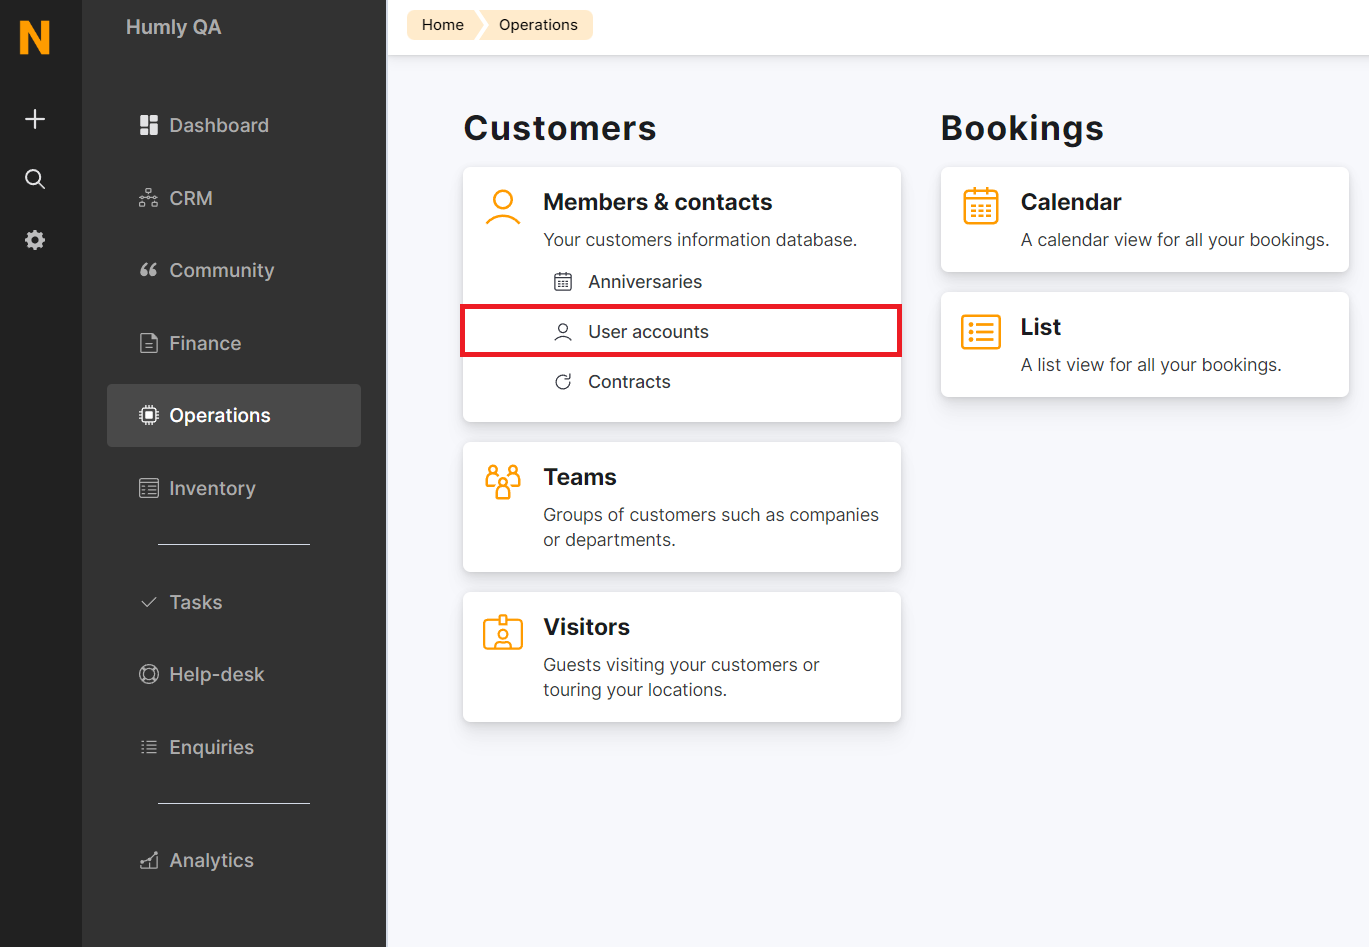
- Head over to the Nexudus dashboard and login as an administrator. On the left side, there is a button called Operations, press that one and then User account under Customers.

- Press Add user.

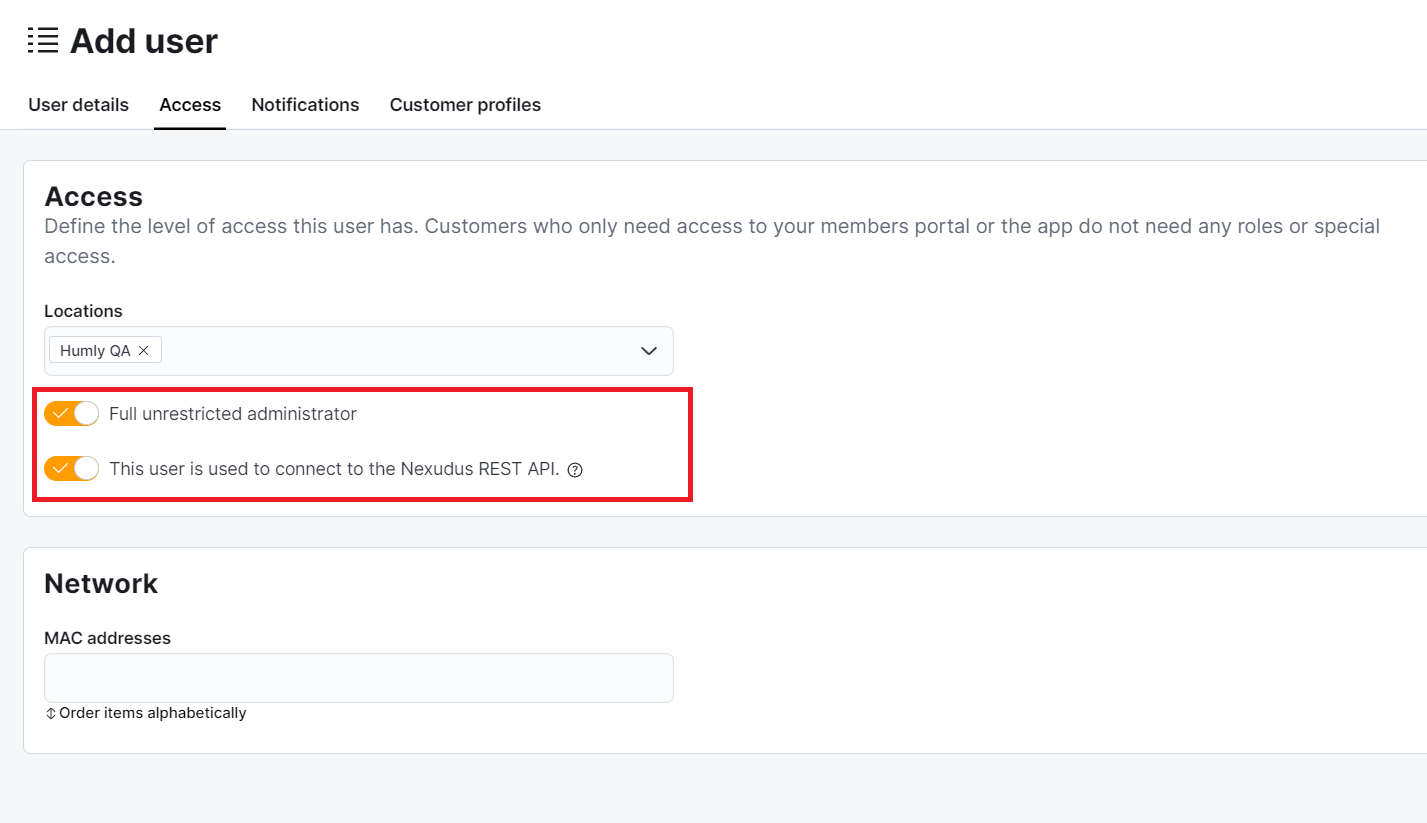
- Type in the user details and then head over to the access tab to enable both Full unrestricted administrator and Nexudus REST API. When finished press Save changes.

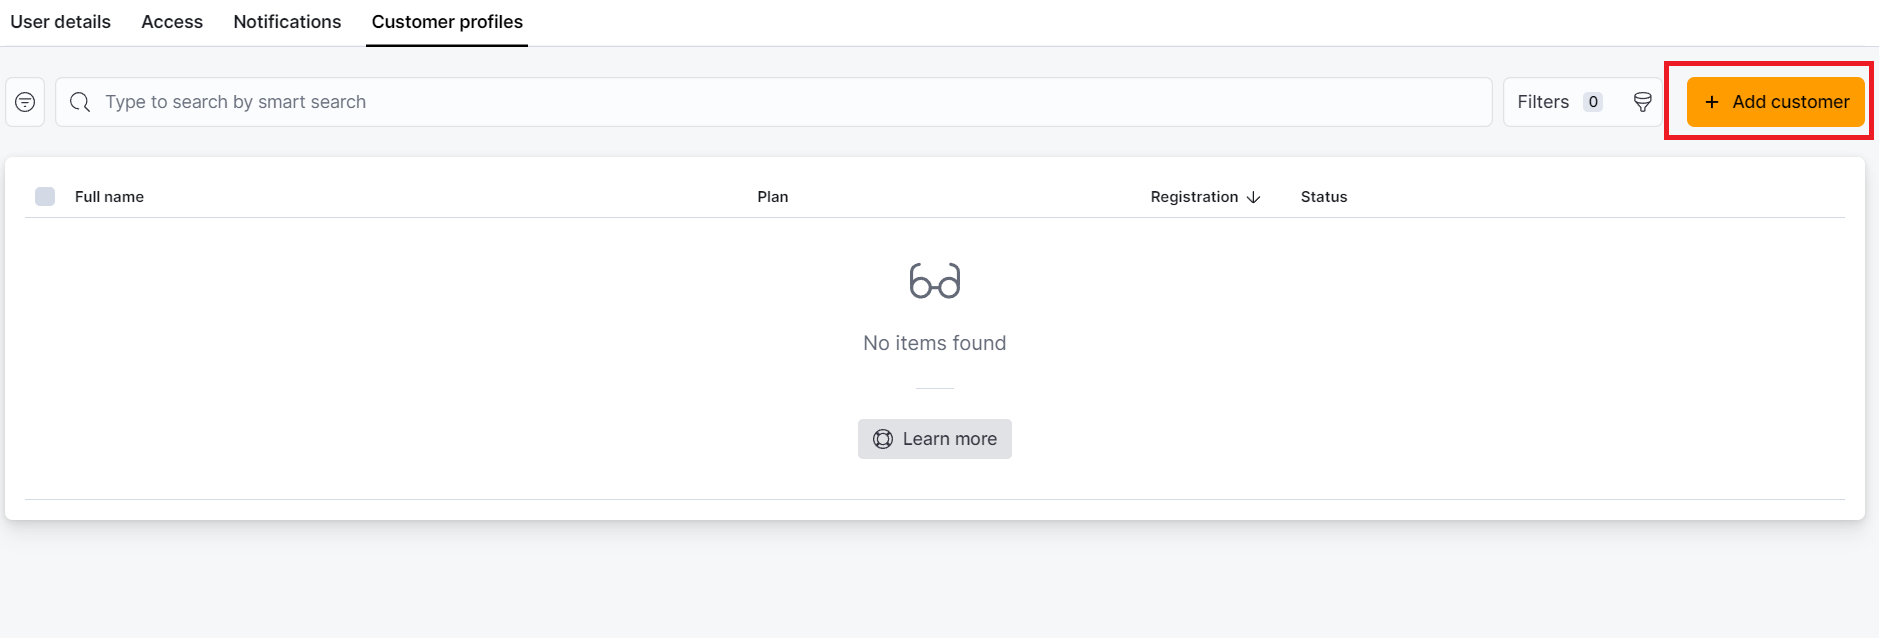
- Add a customer profile that will be reflected to the account by pressing Add customer. If you want to learn more about what a customer is then you will find more information here.


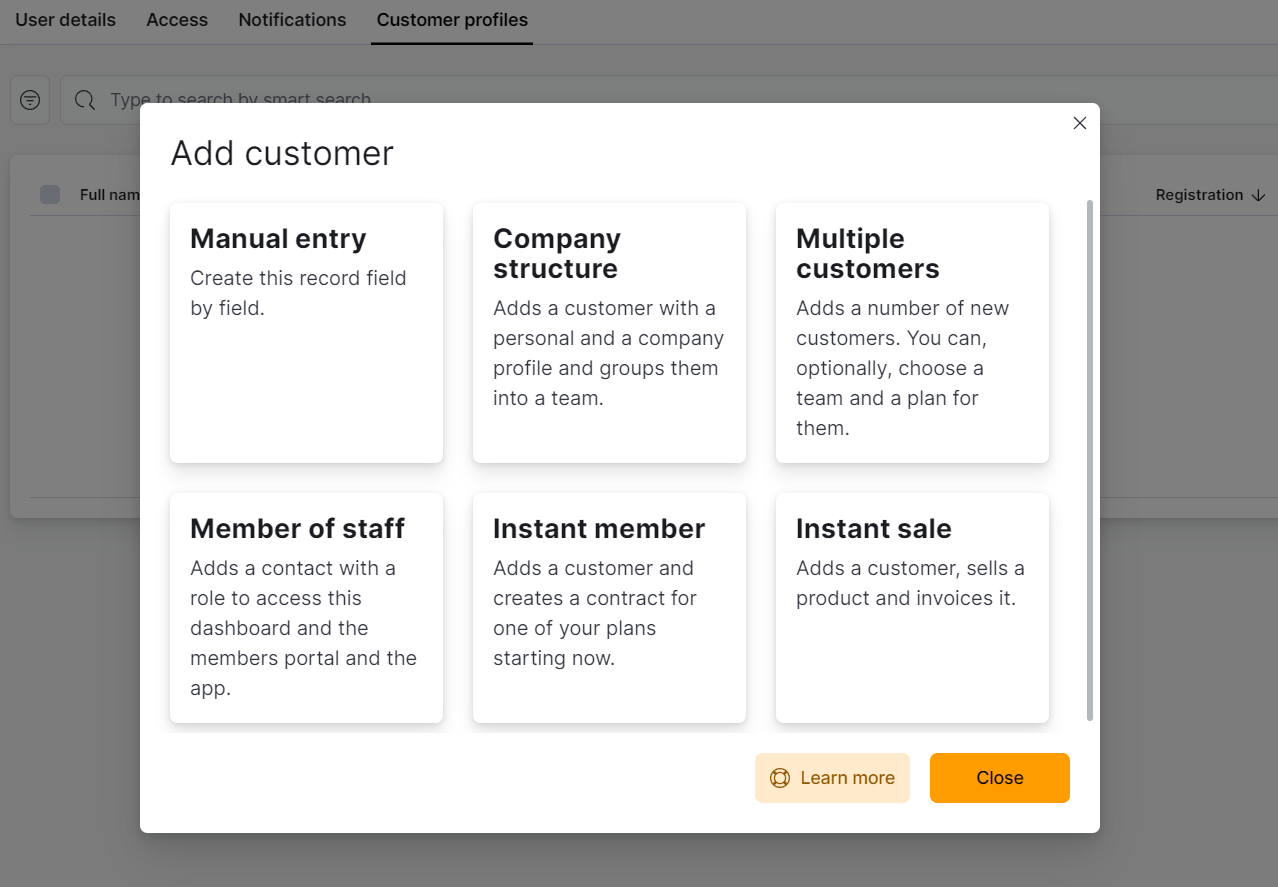
- Add a customer depending on your environment, when finished and ready, go ahead and save the user by pressing Save changes.

Coworker account
The second one is a so-called coworker account. It is just a normal customer account in Nexudus that will be used as a global administrator for accessing Humly control panel. This is the email that will be used to login to the Humly control panel in the future and manage the devices.
- Head over to the Nexudus dashboard and login as an administrator. On the left side, there is a button called Operations, press that one and then User account under Customers.

- Press Add user.

- Type in the user details and then head over to Customer profiles. Add a customer that will be reflected to the account by pressing Add customer. If you want to learn more about what a customer is then you will find more information here.


- Add a customer depending on your environment, when finished and ready, go ahead and save the user by pressing Save changes.

You are now ready to connect Nexudus with Humly. Procced to the next documentation.
To learn more about how you can book a meeting on the Humly room display with Nexudus - visit Using Humly Room Display with Nexudus