No matter which booking system backend you are using for Humly Control Panel (Office 365, Google Workspace, Exchange 2013-2019, Domino, Standalone) you have the possibility to add Guests.
A Guest is its own user type in Humly Control Panel and can be added in two different ways:
-
Add Manually - Add a Guest by filling out a form in Humly Control Panel
-
Import (Direct/Scheduled) - Import Guests by using the CSV template for importing users
For the Guest to receive an email when their account is added, updated or deleted, Email Notifications must be enabled in Settings>,Global Settings in Humly Control Panel.
Scheduled CSV import of users runs every night. With every scheduled import Humly Control Panel does a comparison between already existing users and the users in the CSV and adds, updates or delete them accordingly. Find out more on how scheduled CSV import of users work by following this guide.
Add a Guest Manually
- Go to Users and click Add User.
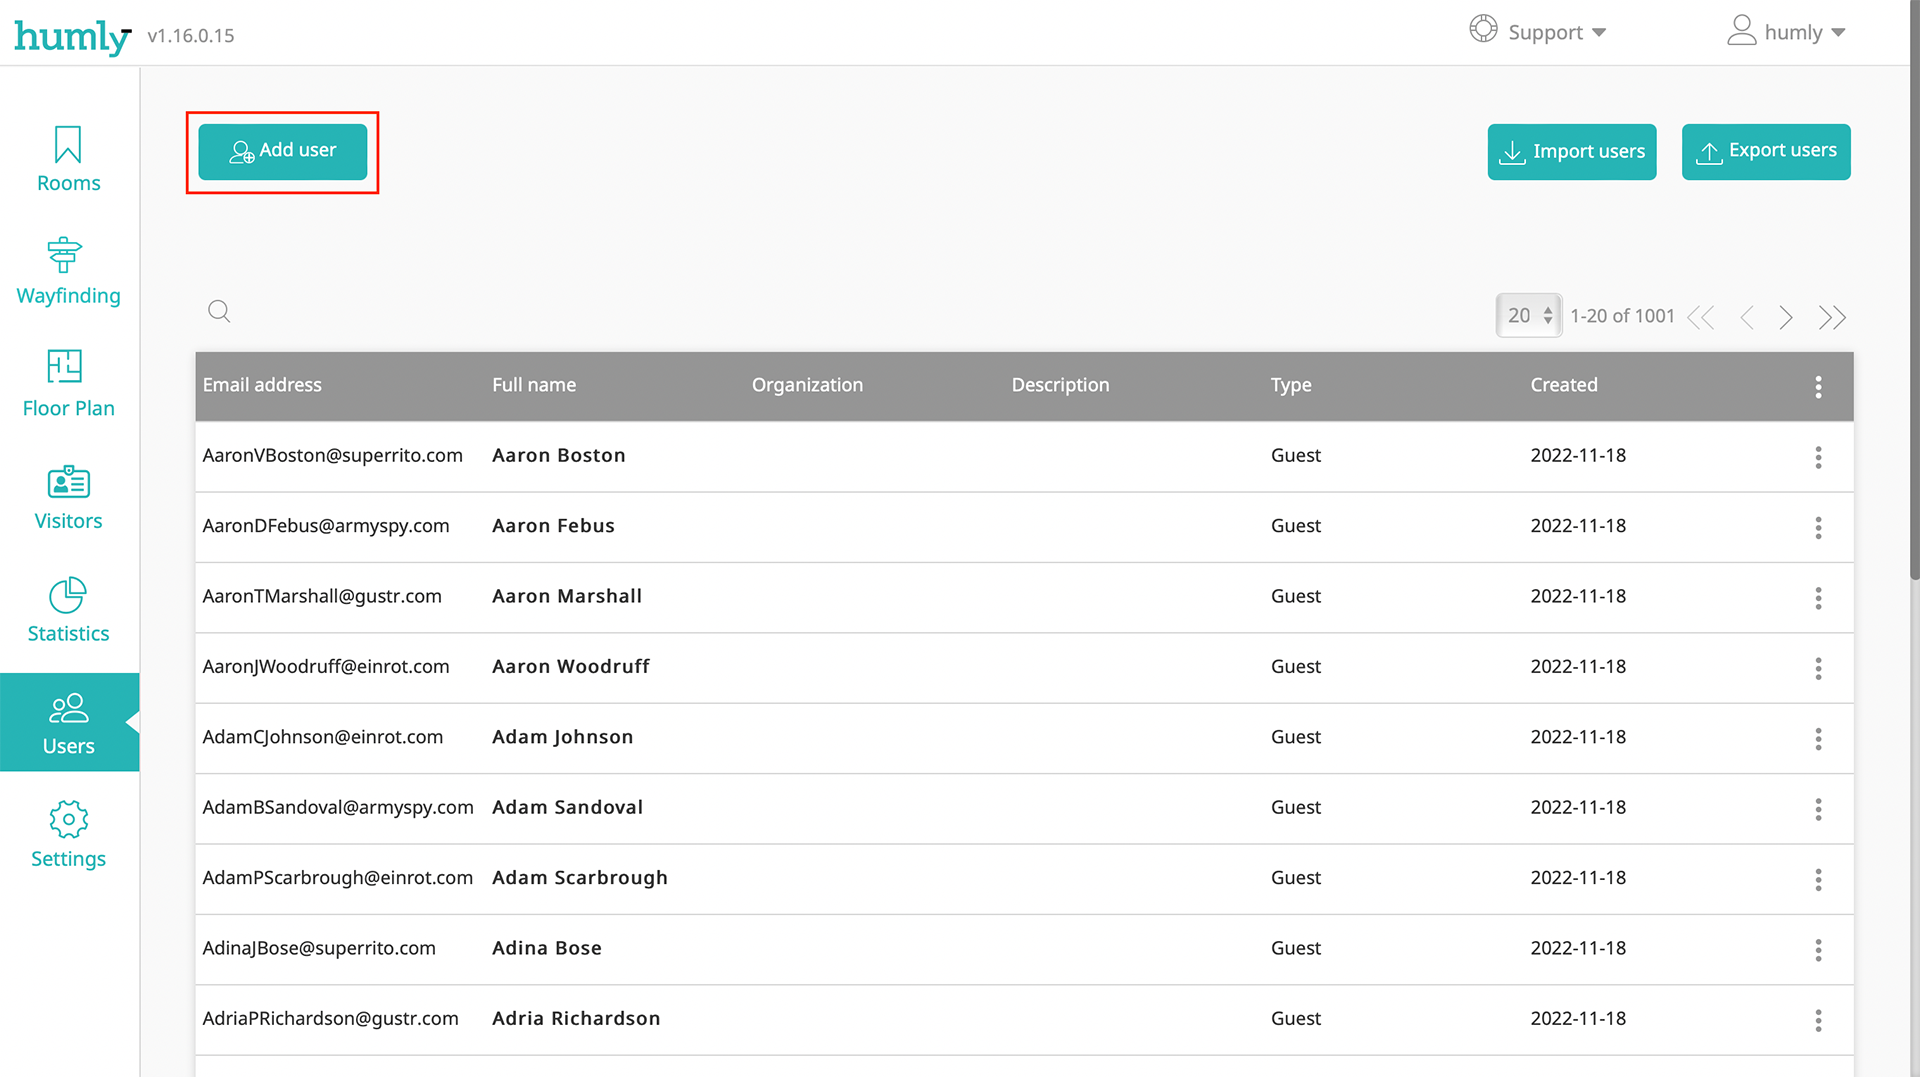
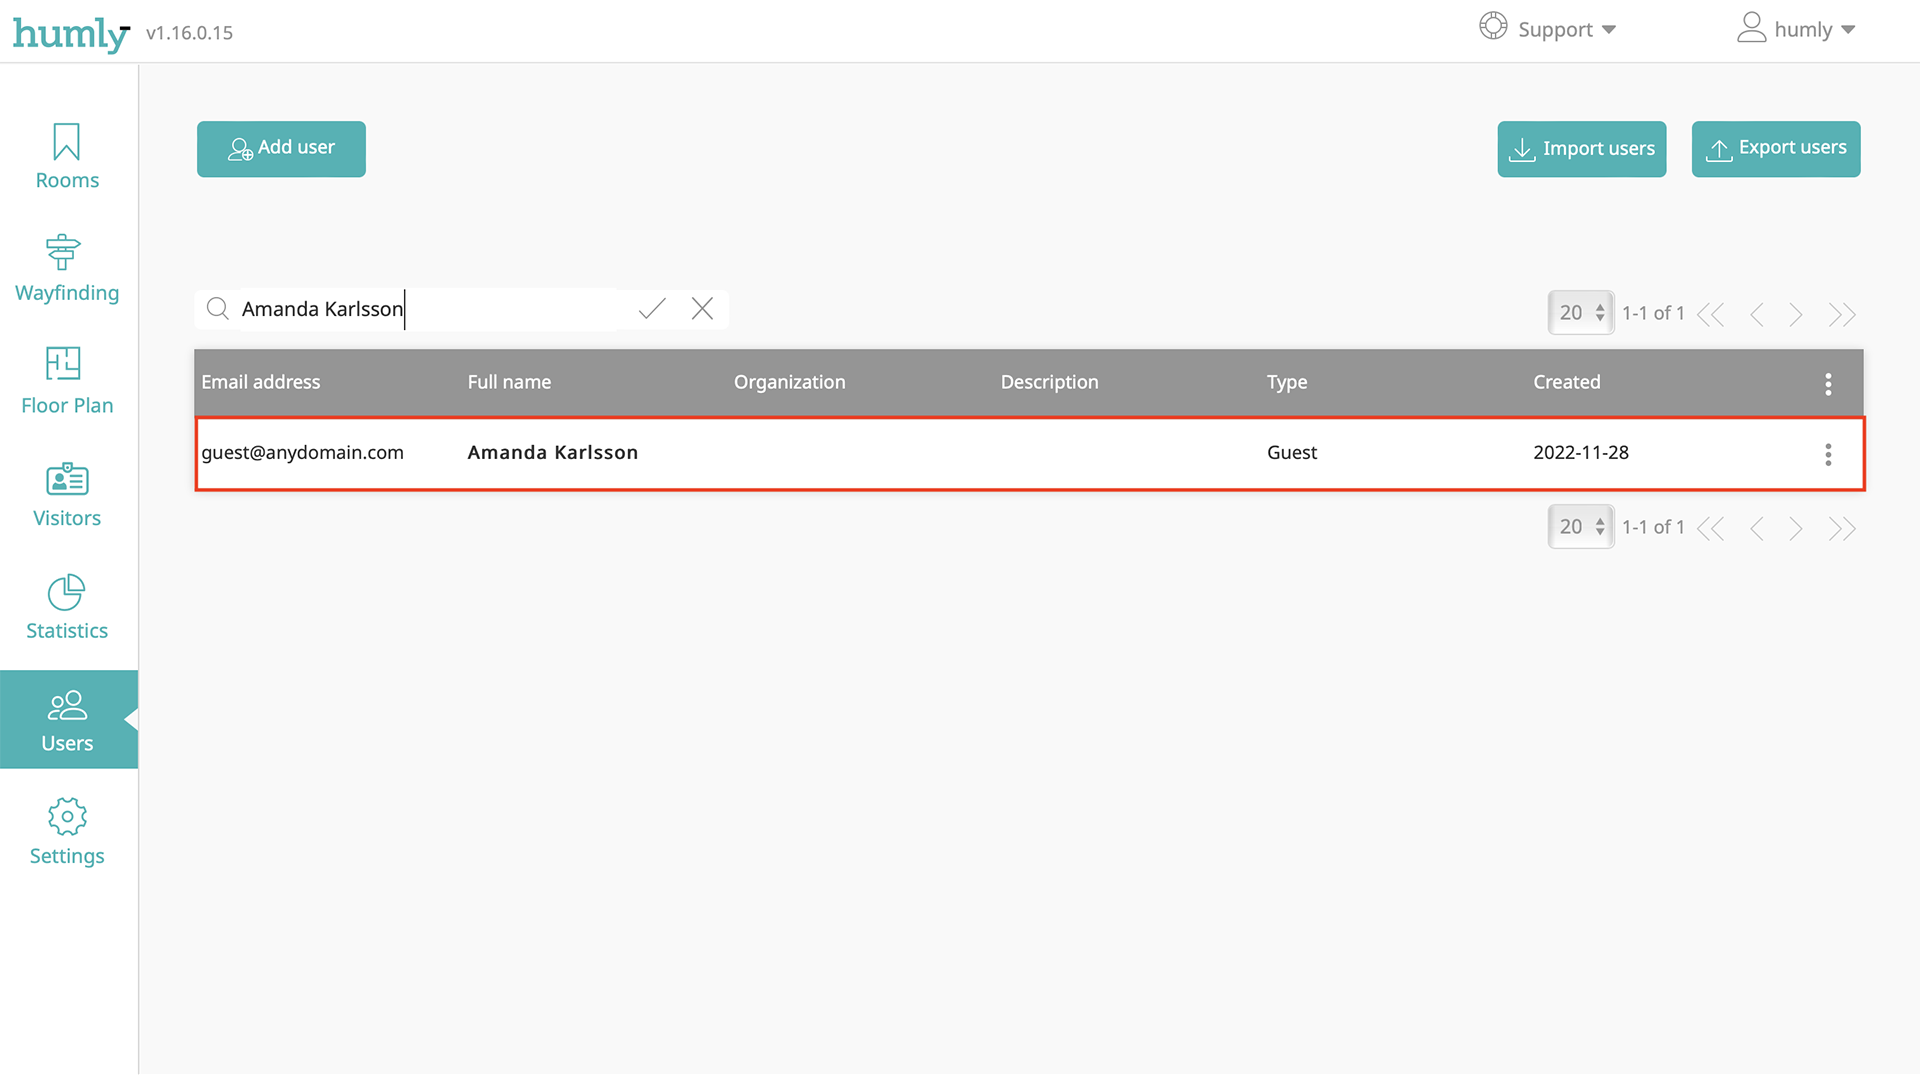
- Enter the Email Address and Full Name of the guest you want to add to Humly Control Panel. For User Type select Guest and click Add.

- The added guest can be found in the list of users.
-
The Guest will receive an email which includes their account information and an URL to Humly Reservations if that is enabled in Settings>,Global Settings.
Import Guests
Importing guests using a CSV-file supports a way to add multiple guests at the same time to Humly Control Panel. There are two options to import guests from a CSV-file, direct or scheduled.
Scheduled The CSV can contain a mix of all user types that exist in Humly Control Panel and not only Guests. For example, a CSV can consist of i.e. Global Admins, Local Admins, Users and Guests and all of them will be added or updated in the same operation.
Import Direct
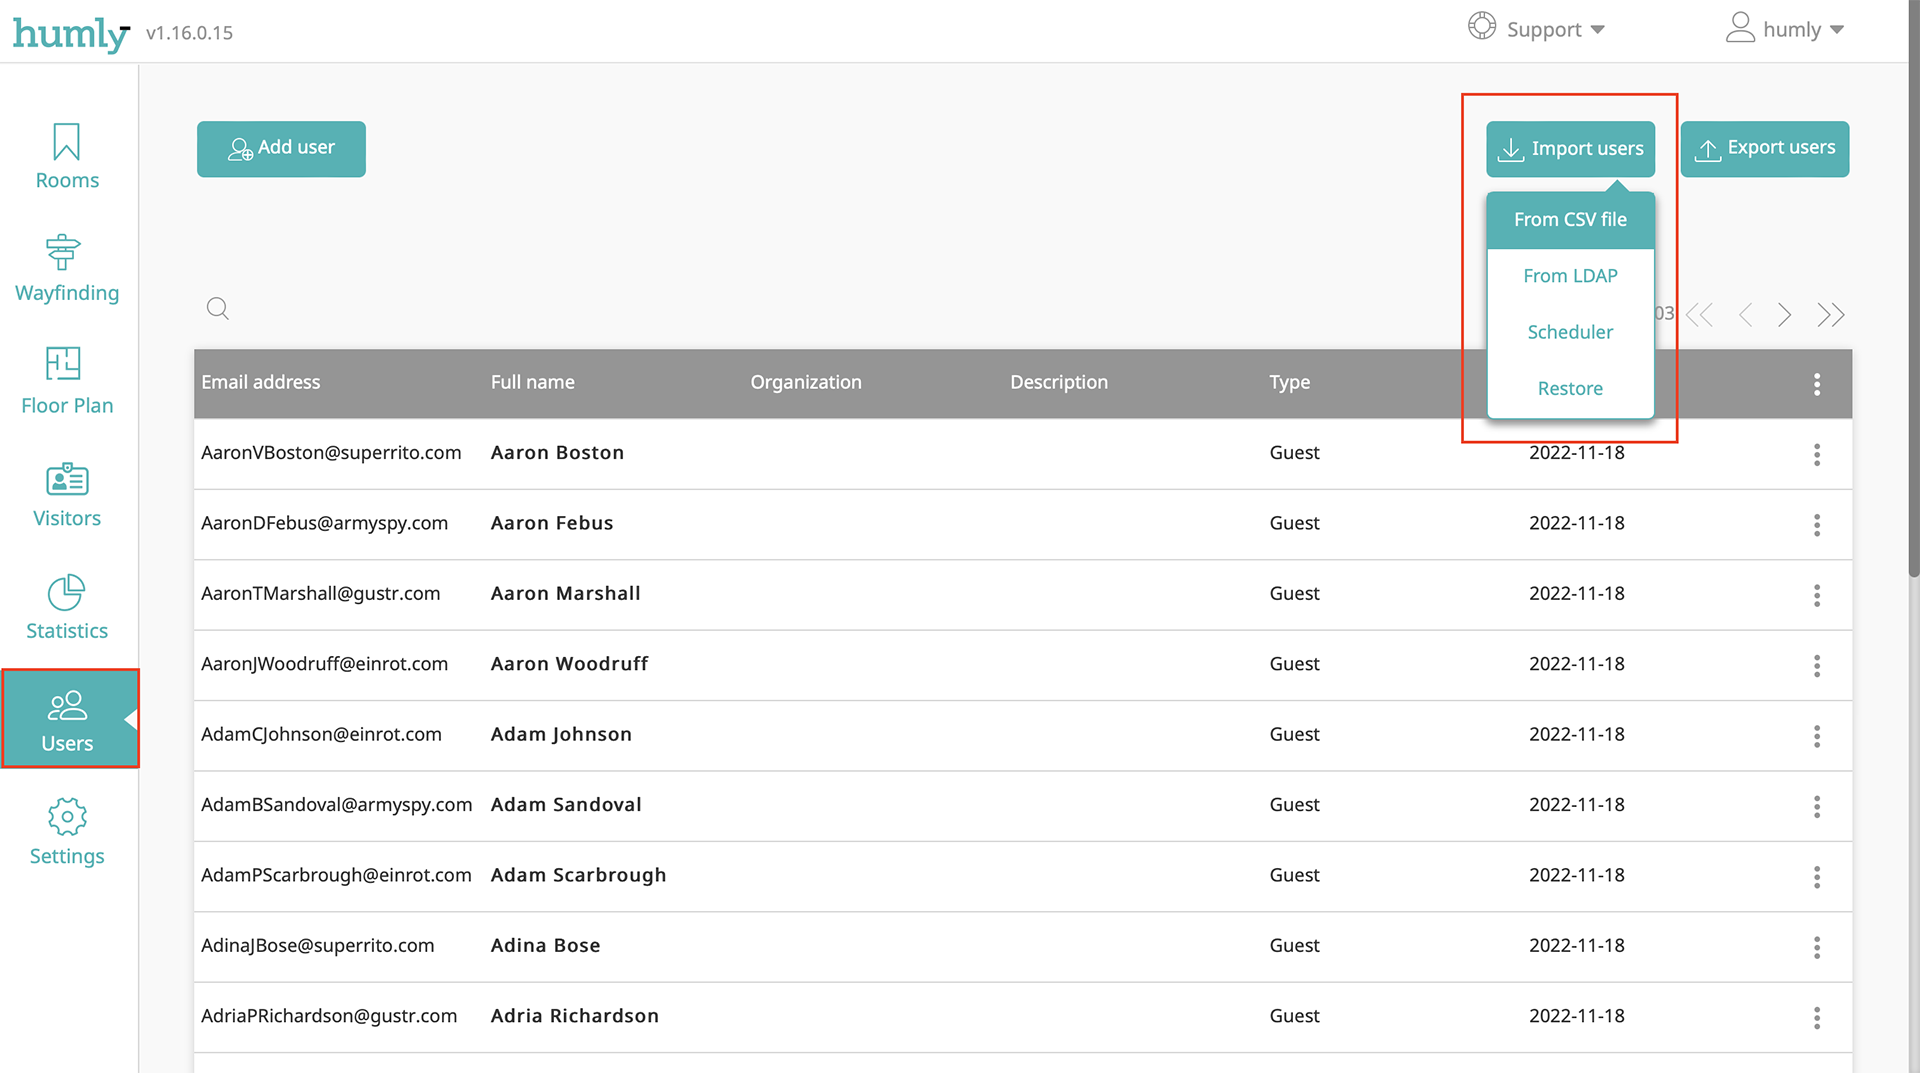
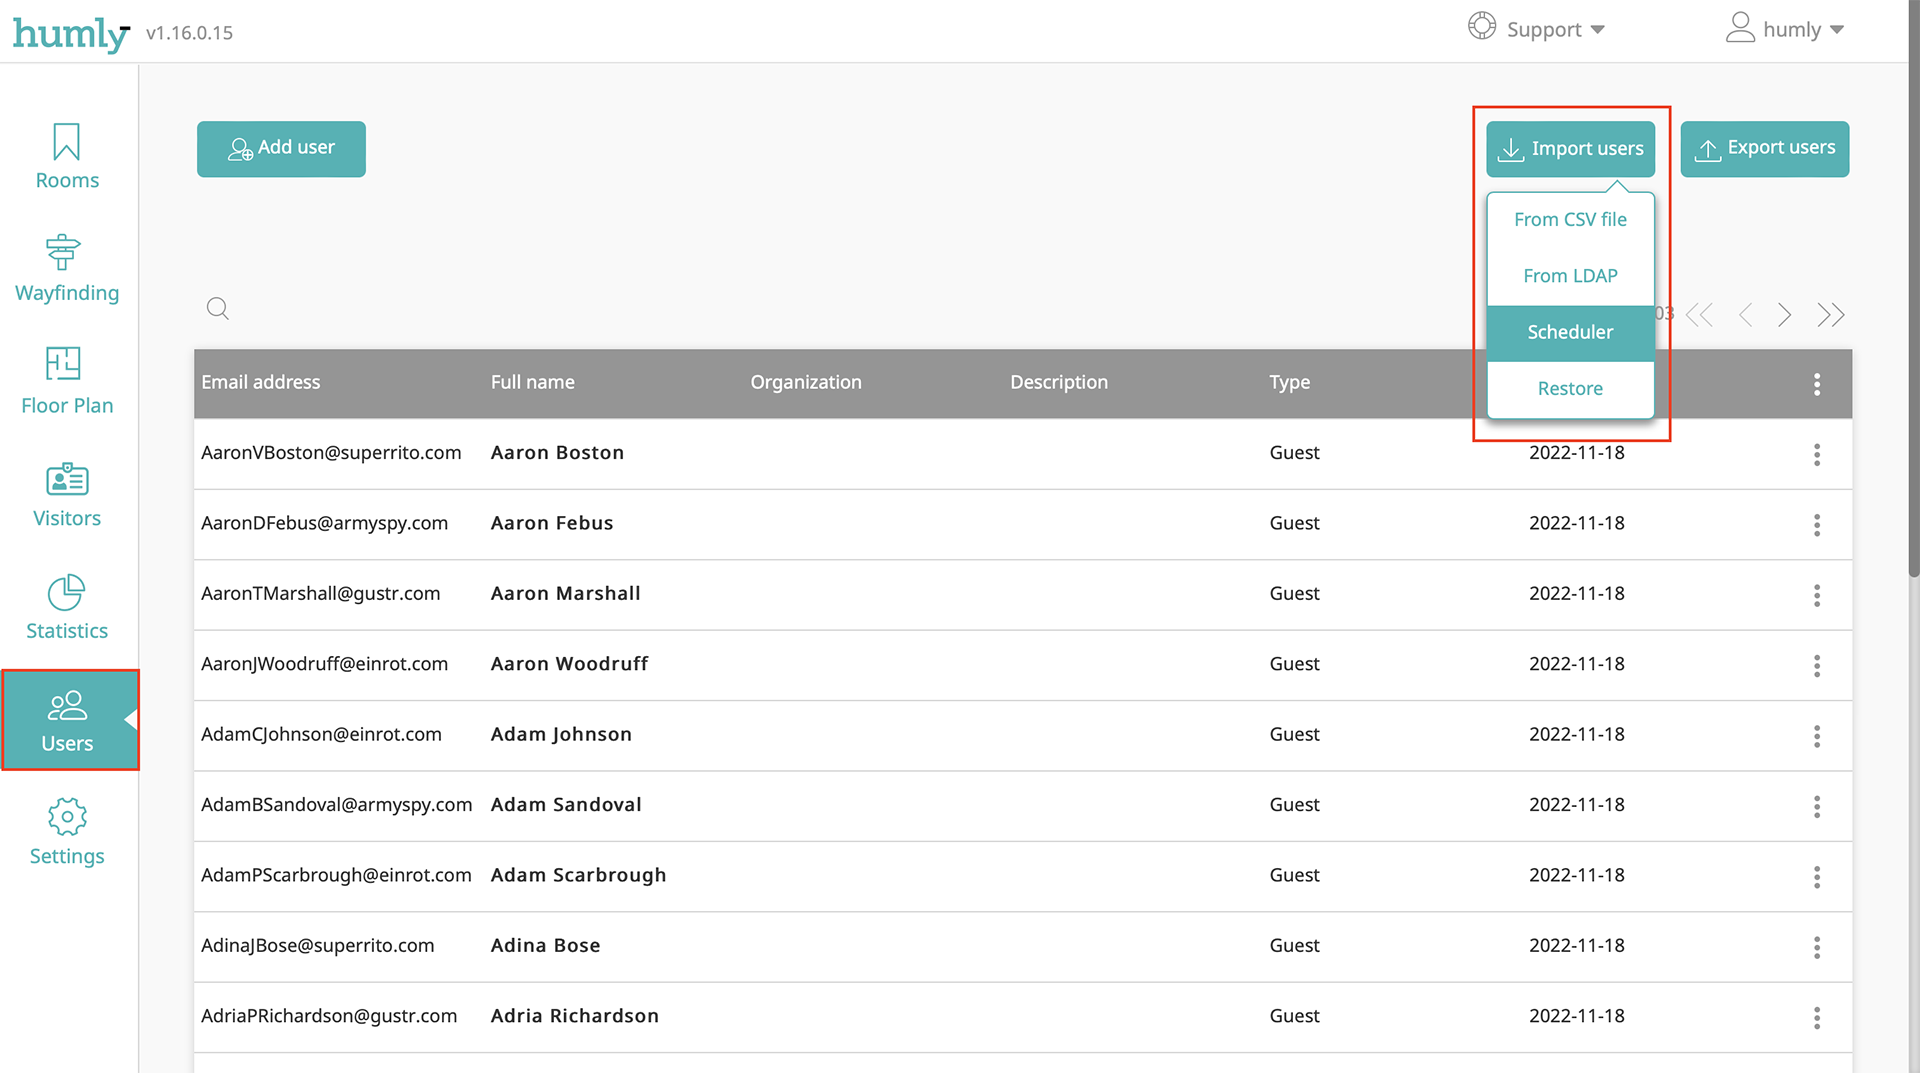
- Go to Users and click Import Users and after that click From CSV File.
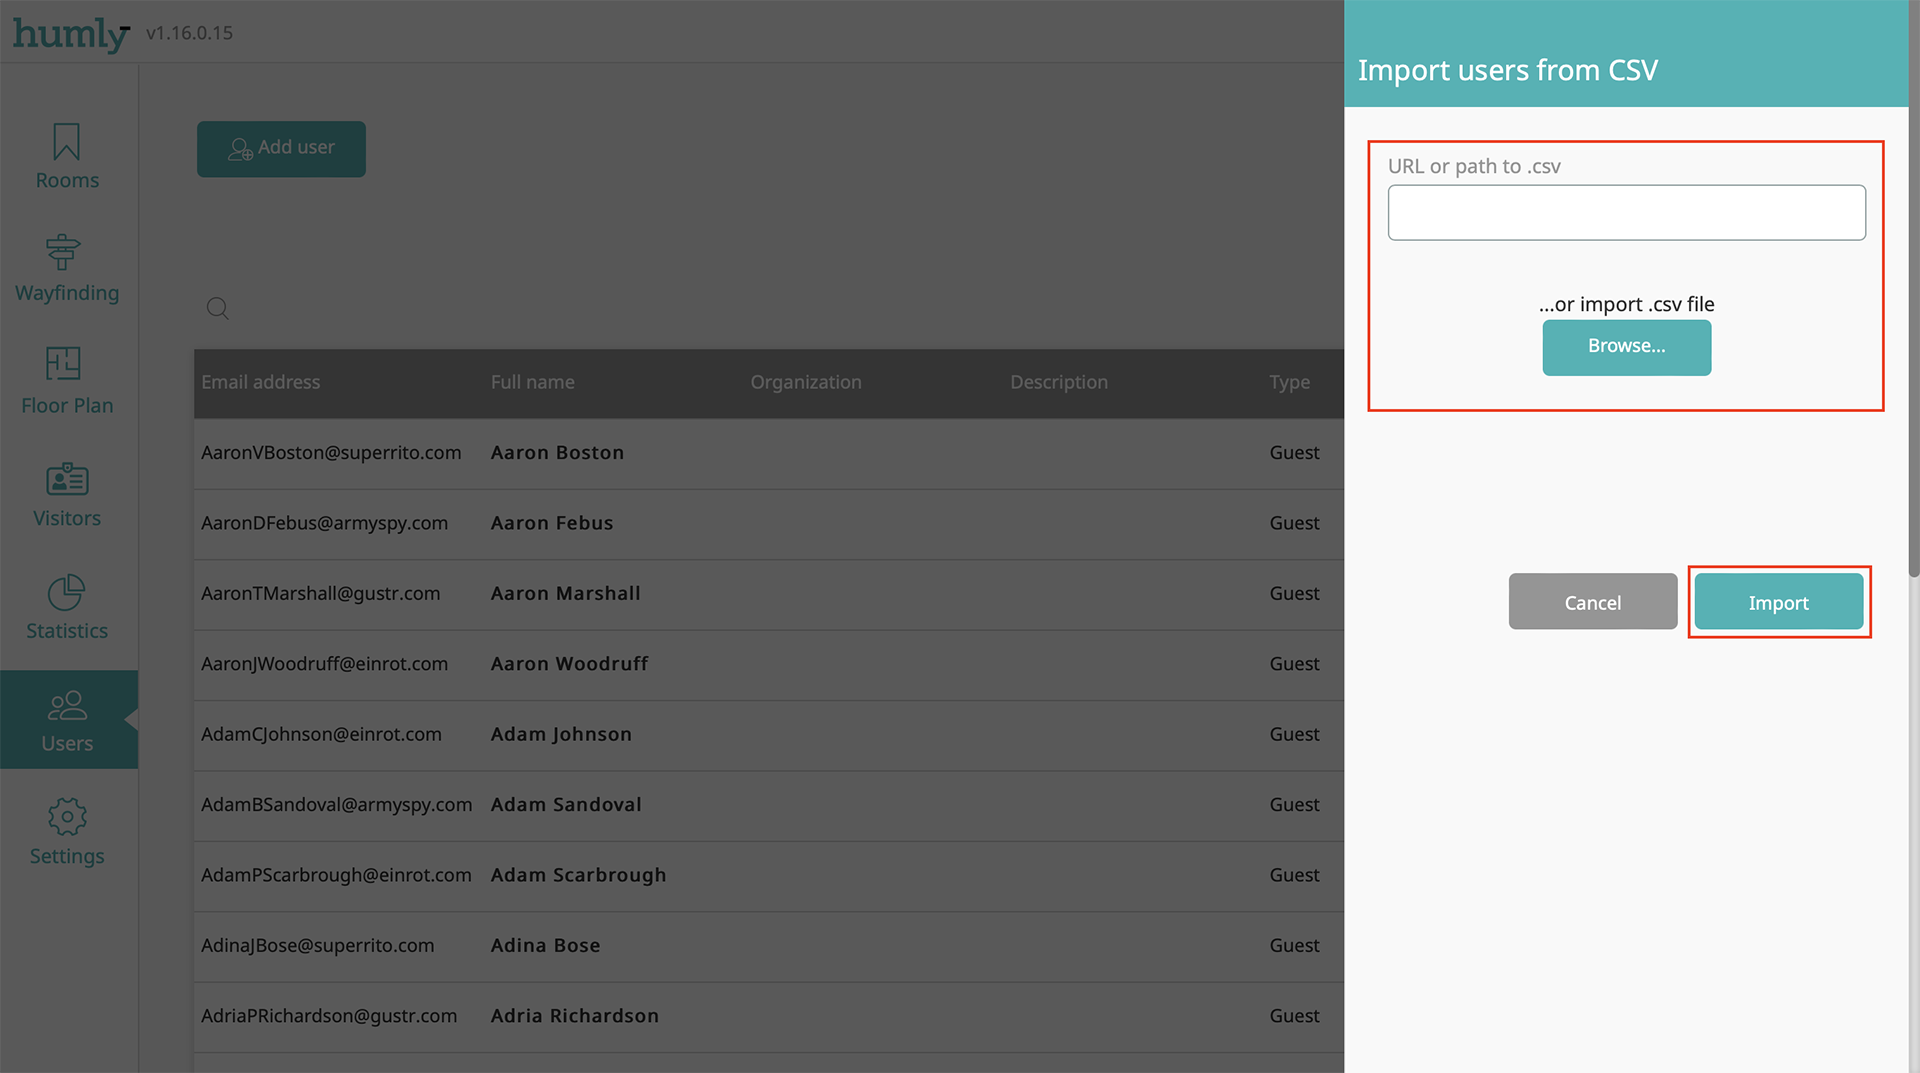
- Provide the URL or path or click Browse… to locate the CSV-file. Click Import to import and add the users to Humly Control Panel.
-
The added guests can be found in the list of users.
-
The Guests will receive an email which includes their account information and an URL to Humly Reservations if that is enabled in Settings>,Global Settings.
Scheduled Import
Scheduled import of users using a CSV-file is a way to import and add multiple users at the same. The import will run every night at 01:00 AM Humly Control Panel server time.
With every scheduled import Humly Control Panel does a comparison between already existing users and the users in the CSV-file and adds, updates or delete them accordingly. For example:
… if the user doesn’t exist in Humly Control Panel but exist in the CSV-file, the user will be added.
… if the user exist in Humly Control Panel and exist in the CSV-file, the user will be updated if there are any differences in the user data.
… if the user exist in Humly Control Panel but doesn’t exist in the CSV-file, the user will be deleted from Humly Control Panel.
- Go to Users and click Import Users and after that click Scheduler.
- Enter the email address to which the import report will be sent after every scheduled user import.

- Enter the email address to which the import report will be sent after every scheduled user import.

-
Click Save to start the user import scheduler with will run every night at 01:00 AM Humly Control Panel server time.
Next…
Learn how to enable or disable Guest Access for specific meeting rooms by following Manage Guest Access for Meeting Rooms guide.
Find out more about how Guest accounts work in Humly Control Panel and how it can support you organisation by reading Guest Account - Introduction.