How to Configure a Humly Visitor Screen
1. Go to Visitor.
2. Click Create Humly Visitor Screen.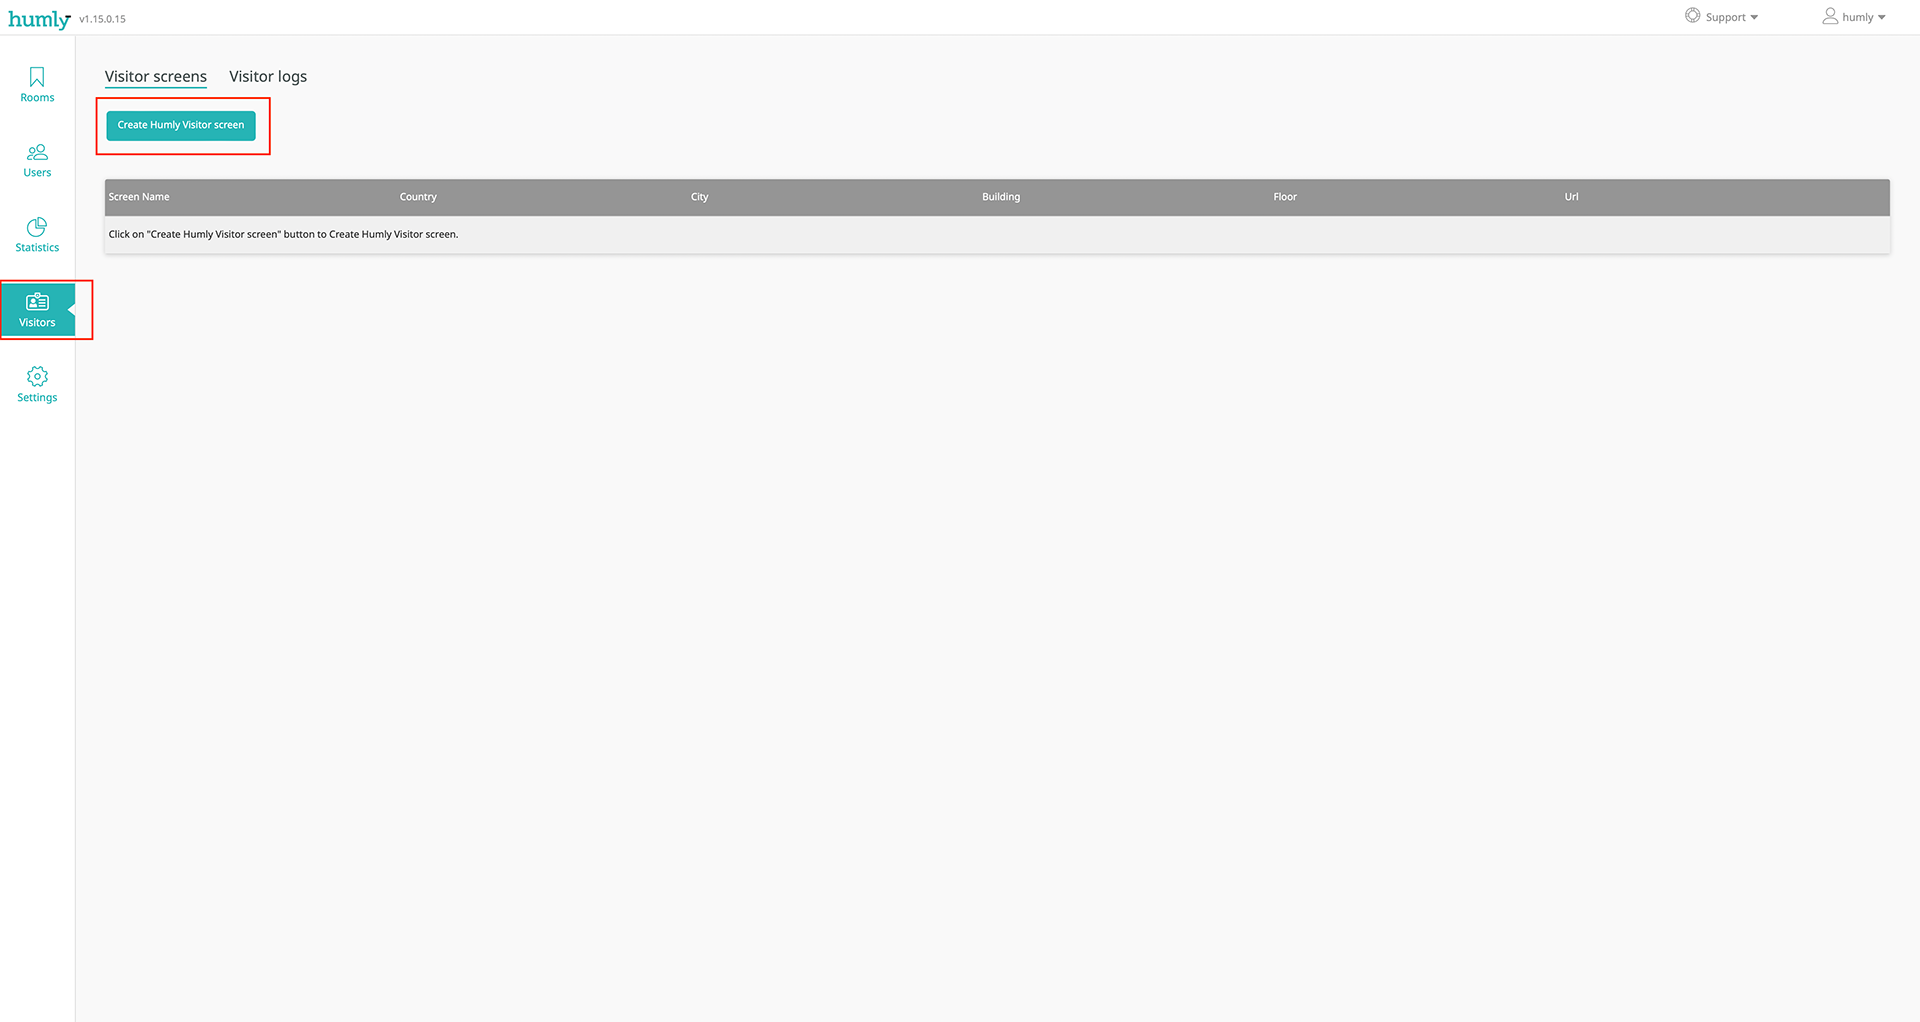

Tip! As a recommendation, use something that describes where on a floor it will be set up, i.e. next to the reception, next to the entrance or similar.
4. Choose where the Humly Visitor screen will be located by assigning it to a structure.

5. Select default language which will be used for the Humly Visitor screen and the which timezone it will be using (affects check-in/check-out timestamps in the visitor log)

In Humly Currently it’s only English that can be selected but support for more languages will come in a near future (Arabic, Catalan, Chinese - Simplified, Chinese - Traditional, Czech, Danish, Dutch, Estonian, Finnish, French, Galician, German, Icelandic, Italian, Japanese, Korean, Latvian, Lithuanian, Norwegian, Polish, Portuguese, Russian, Spanish, Swedish, Thai)
6. Upload a logotype in PNG format which will be displayed on the Humly Visitor screen. Maximum 1048576 bytes (1 MB) file size is supported.

7. Select which form fields that will be displayed on the Humly Visitor screen and whether the visitor is required or not fill in their information
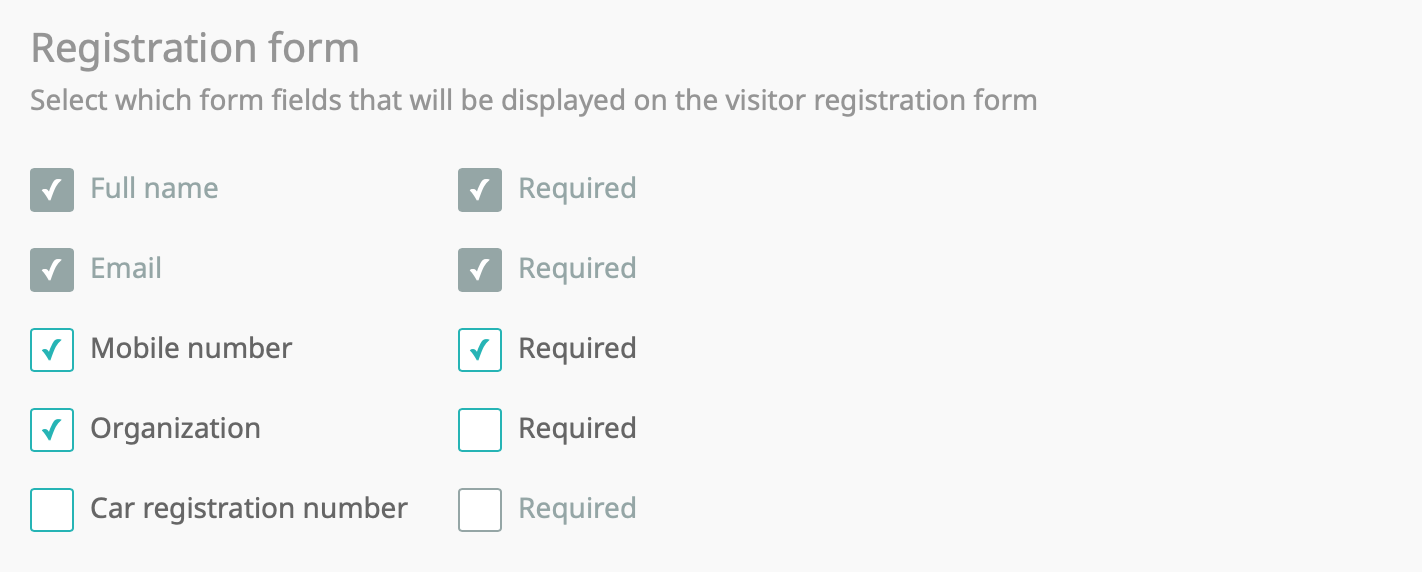
Humly Full name and Email will always be shown and will always be required from the visitor.
8. Enable Search Employees functionality. If enabled the Humly Visitor screen will suggest people to visit as the visitor types the name of the person they want to visit. If Humly Control Panel is configured using Exchange or M365 as booking backend, you have the option search in a certain group by enabling Search for members in an Exchange/M365 Group and providing a name of that group.
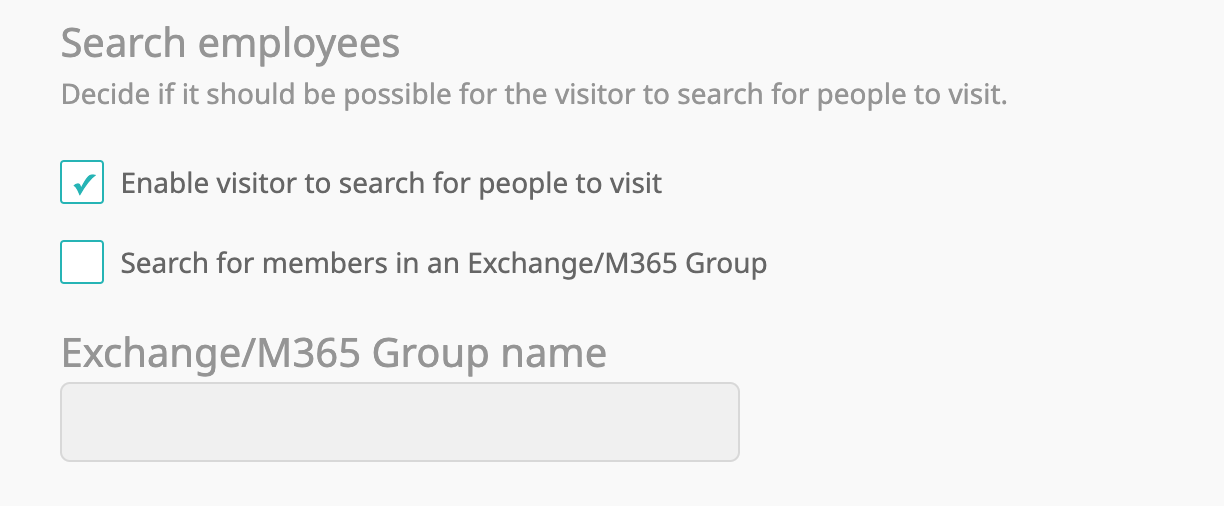
If there already exist users that has been manually added to Humly Control Panel and you enable Search for members in an Exchange/M365 Group, you will only get a match for users from the Exchange/M365 group.
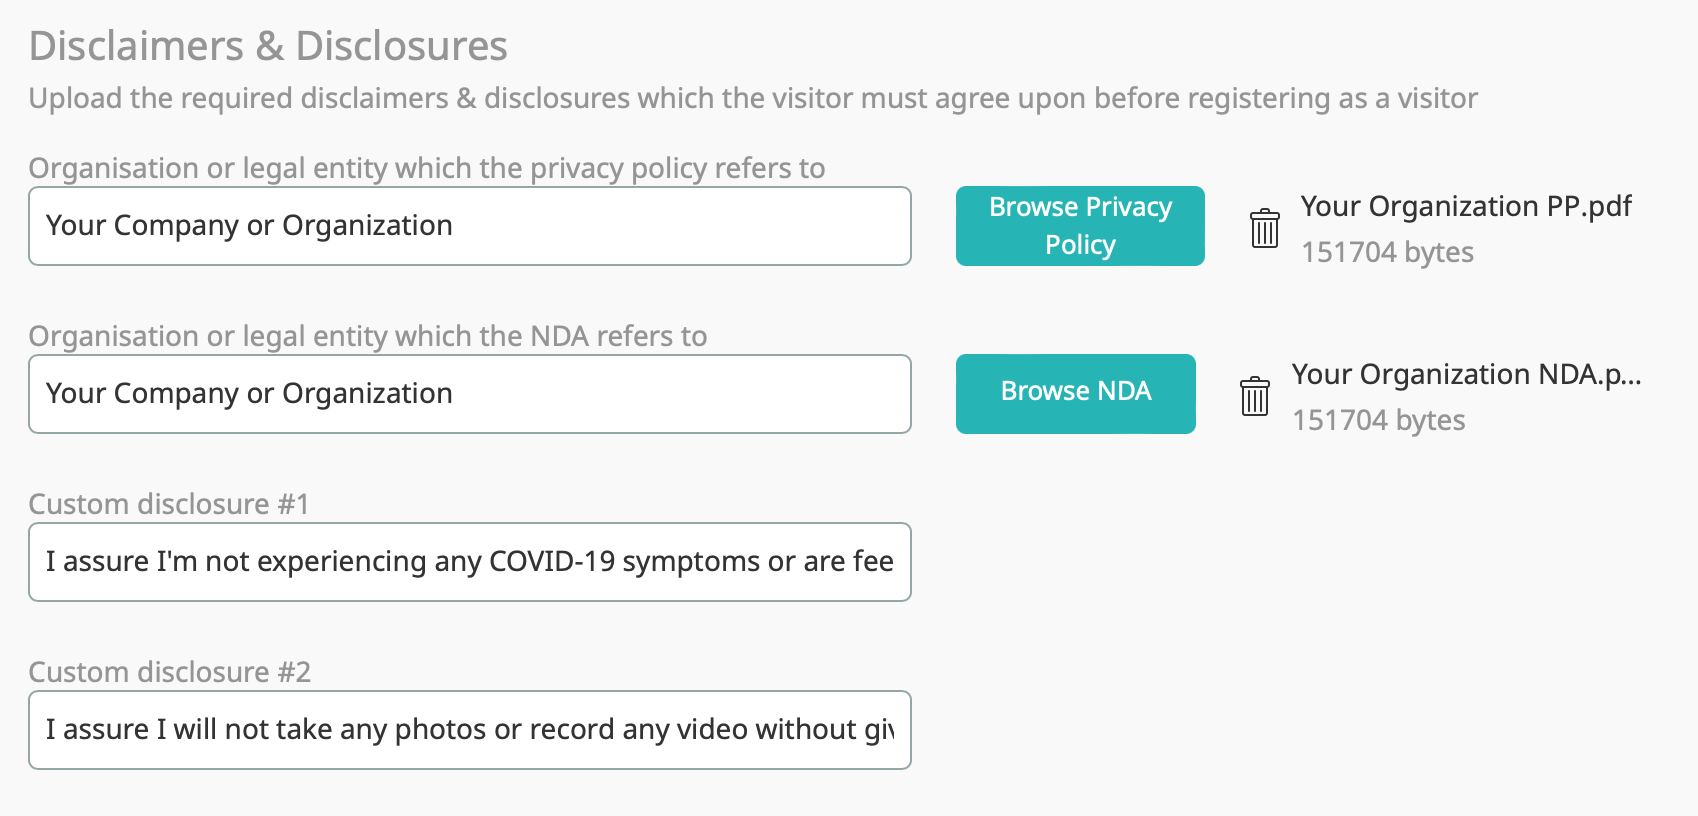
9. Upload your company or organisation’s Privacy Policy and/or Non Disclosure Agreement in PDF-format which the visitor must confirm before being able to check-in. The maximum file size for the PDF is 1048576 bytes (1 MB).
10. Enable or disable sending an SMS notification to the host including who checked in, in which building, on which floor together with the visitors contact information.
Sending SMS requires a special license for it to work. To find out more about the SMS notification service that we provide, please contact support@humly.com.

11. Enable or disable automatic visitor check-out and select at what time, in the screens selected timezone, all visitors will be automatically checked out, e.g. after office hours. This will make it easier to track which visitors are currently in the building over the span of a working week.
Check-out synchronisation occurs every 15 minutes (i.e. 16.30, 16.45, 17.00, 17.15 etc.). We recommend using that for minutes when having automatic check-out enabled. Otherwise there will be a delay for up to 14 minutes before a visitor's check-out time is displayed in the visitor log in Humly Control Panel.

12. Select how to print the visitor badge.
1. No visitor badge printing - No visitor badge printing. However, a visitor badge is still generated and can be printed from the visitor log in Humly Control Panel.
2. Manual printing from Humly Control Panel - The visitor badge can be printed from the visitor log.
3. Automatic printing using email - An email with the visitor badge as an attachment in PDF-format is sent to a specified email address.
Please refer to the documentation of your email client how to automatically print attachments of incoming emails.
4. Automatic printing using print service - Automatically print the visitor badge using Humly Print Service (HPS).

13. Upload a logotype that must be in PNG format, which will be shown on the visitor badge. If no logotype is uploaded the Humly logotype will be used.
For the visitor badge we recommend using a logotype that works well and has good contrast against a white background. Required format is a PNG image with a maximum file size of 1048576 bytes (1 MB).

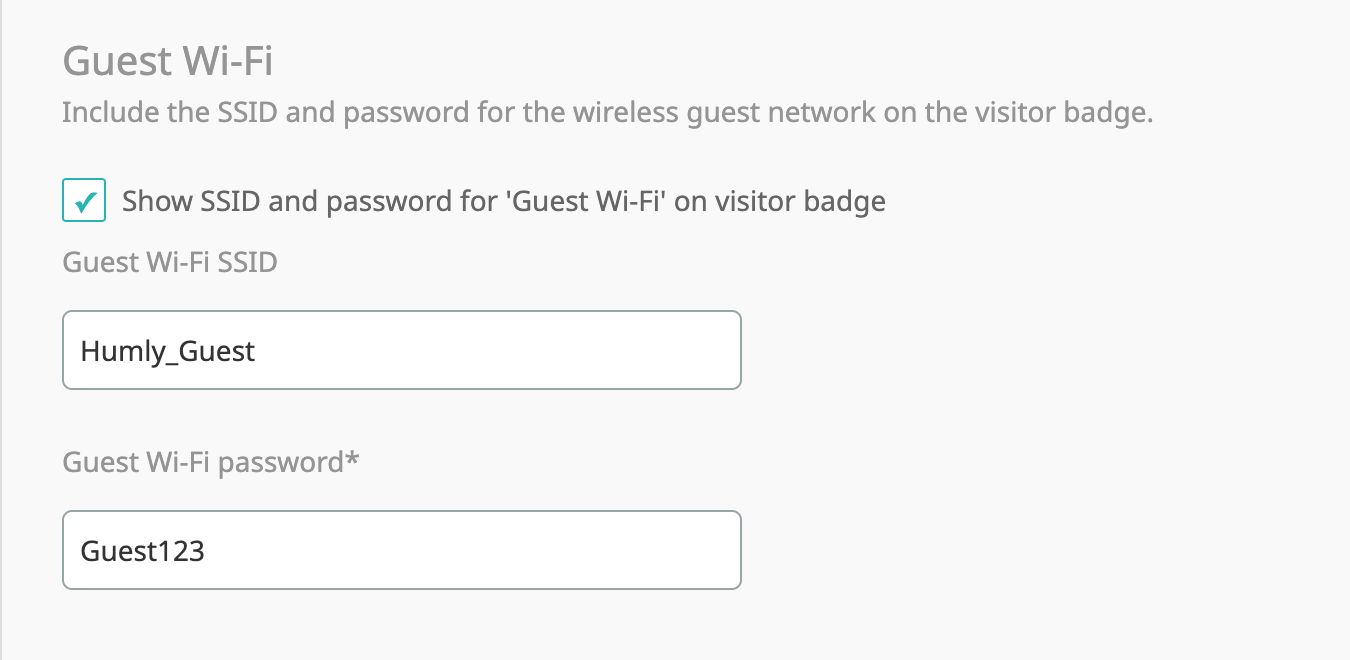
14. Choose to include the name of the guest network on the visitor badge and decide whether you want to also include the password or not.
15. Click Create and the visitor screen will be added to the list of Humly Visitor screens. You have the option to edit or delete any Humly Visitor screen from this list.
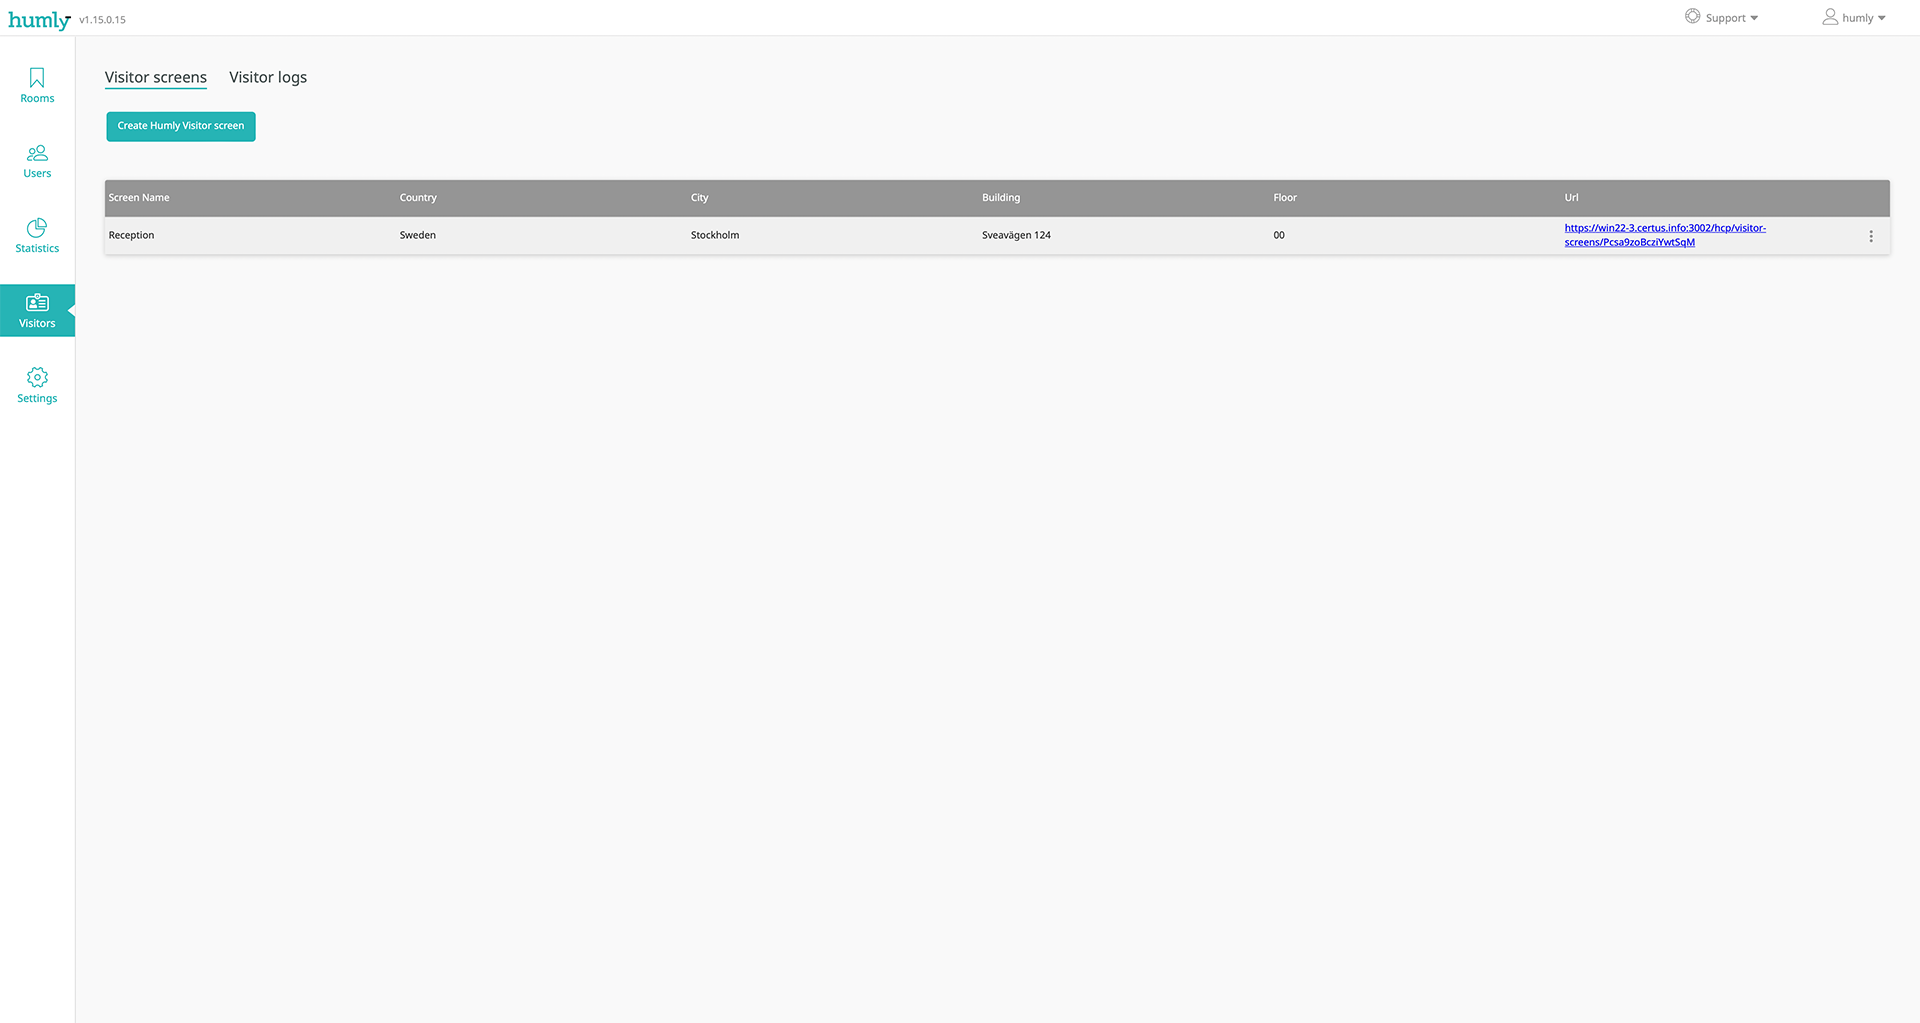
16. To access the created visitor screen click or copy the URL address and paste it in a browser or the signage application your organisation are running on your hardware for the Humly Visitor screen.
For the best visitor and self-service experience we recommend running Humly Visitor on an Android or iOS tablet in portrait mode. If your organization prefer to use another solution, please reach out to support@humly.com for advice.
Next...
Install and configure our recommended visitor badge printer Brother QL-820NWB by following
the How to Install &, Configure the Brother QL-820NWB Visitor Badge Printer guide.
Download and install the Humly Print Service so that visitor badges will be printed automatically by following the How to Configure Humly Print Service guide.