This documentation is a guide on how to install and setup the, by Humly, recommended Brother QL-820NWB professional wired/wireless network label printer.
If the printer your organization will be using for visitor badge printing is from a different manufacturer and/or model, we refer to its documentation and not this how-to guide.
Download driver for Brother QL-820NWB
-
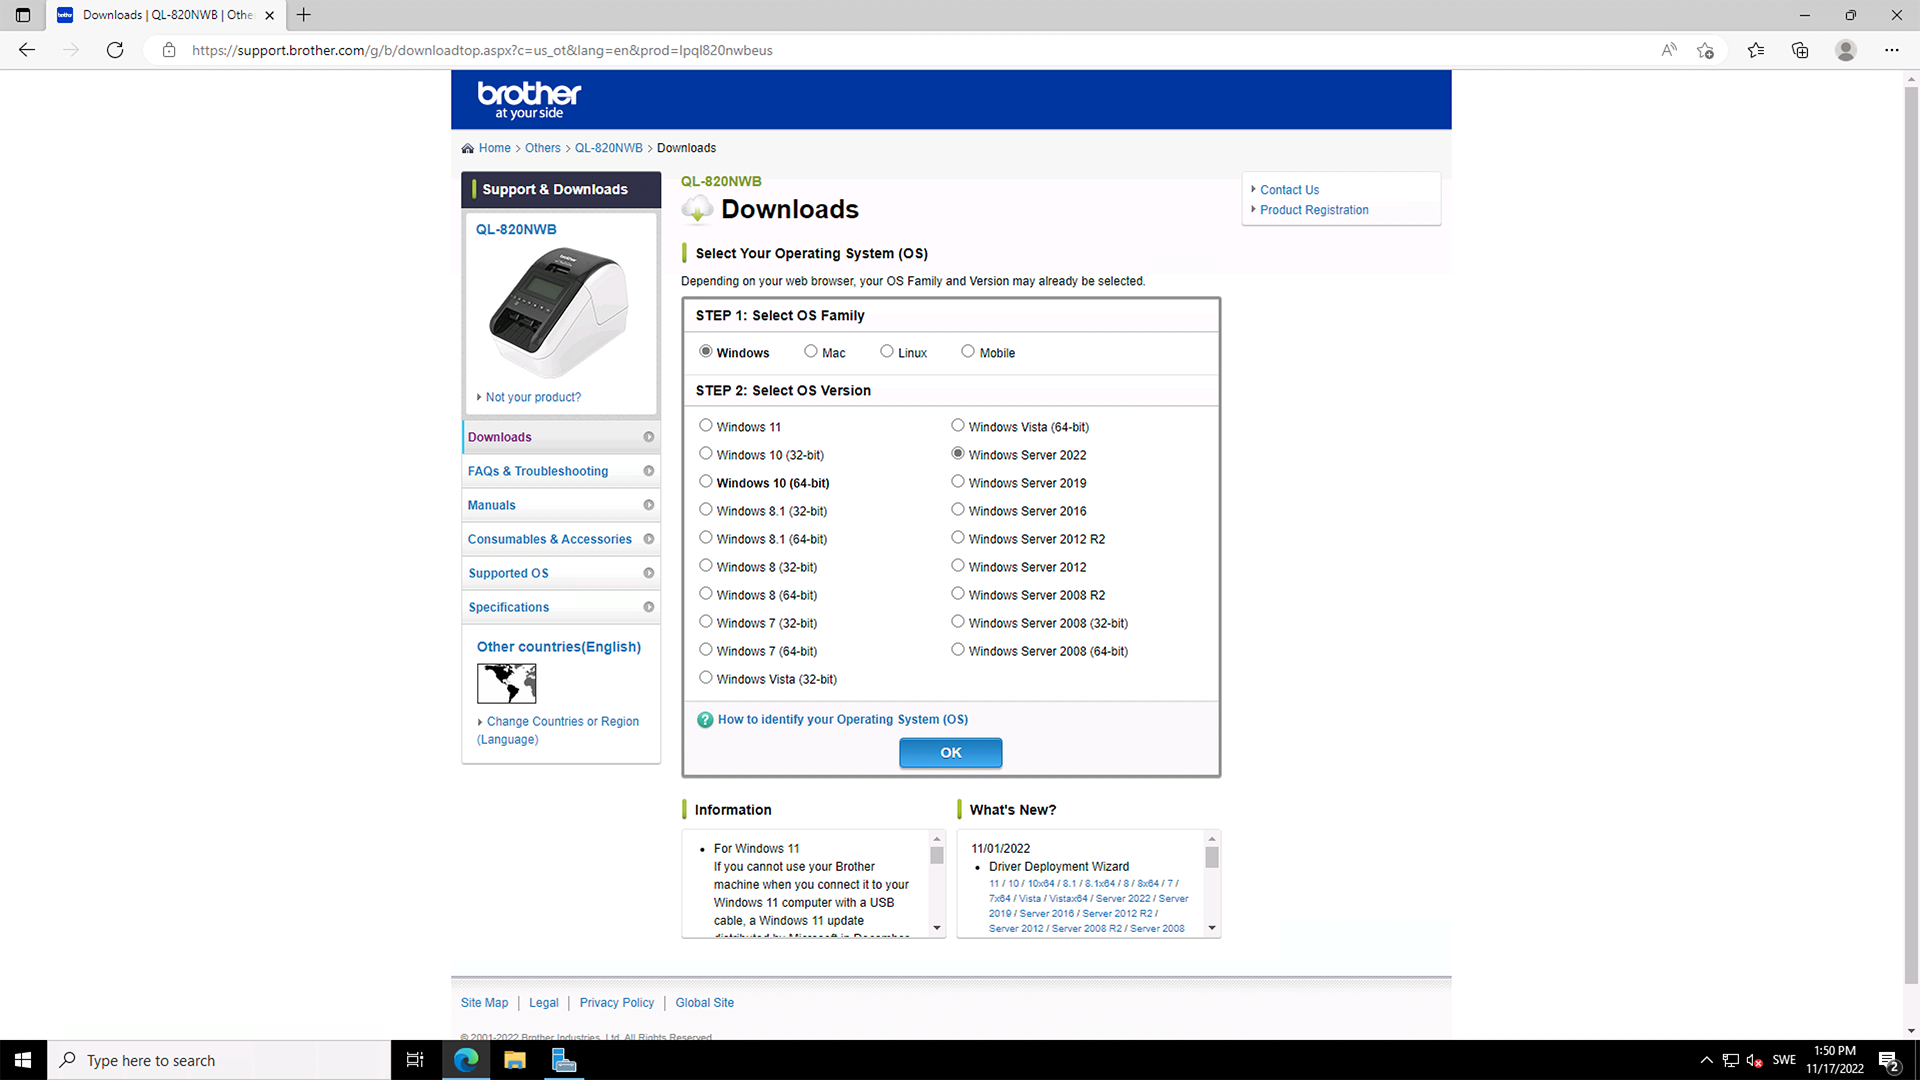
Go to support.brother.com and select on which operating system the QL-820NWB label printer will be installed and configured for, click OK.
-
Click Printer Driver to continue.
Note! Only drivers are needed. There is no need to download Software/Document Installer or Editor Tools.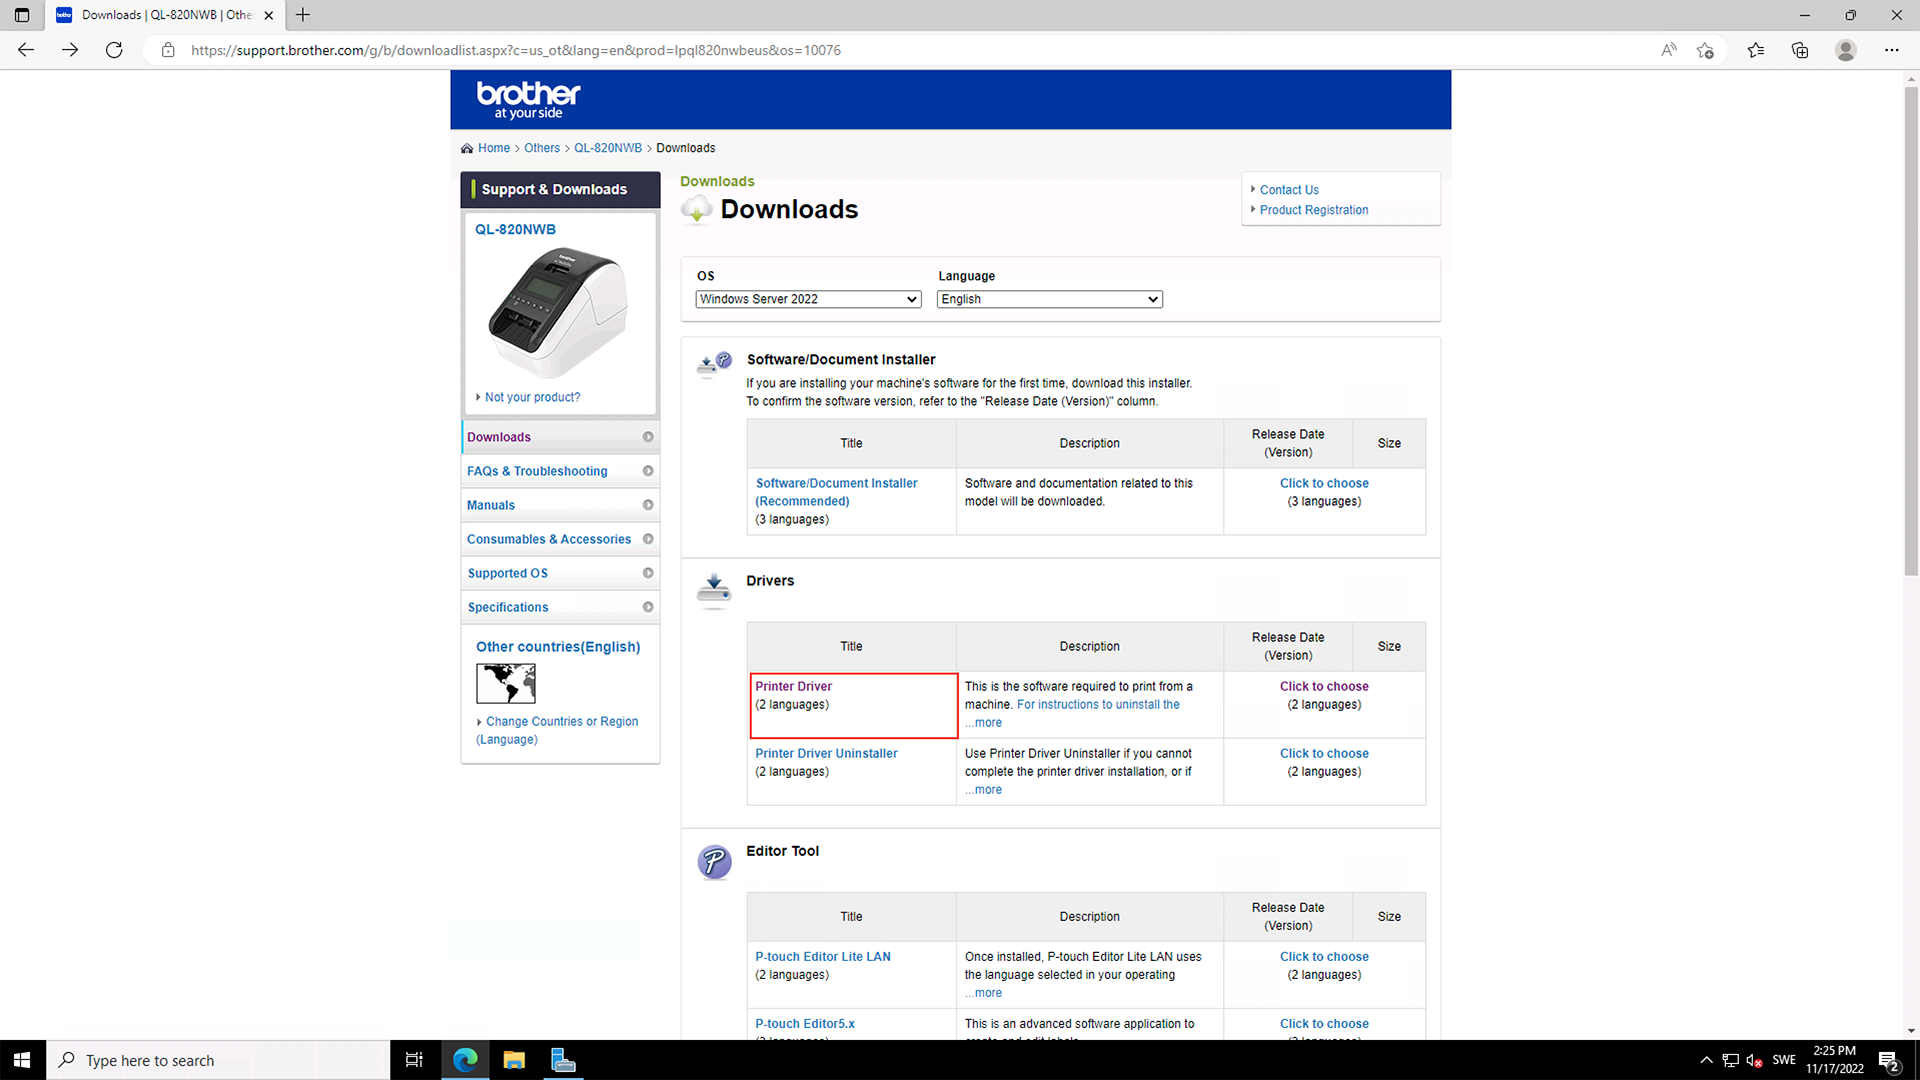
-
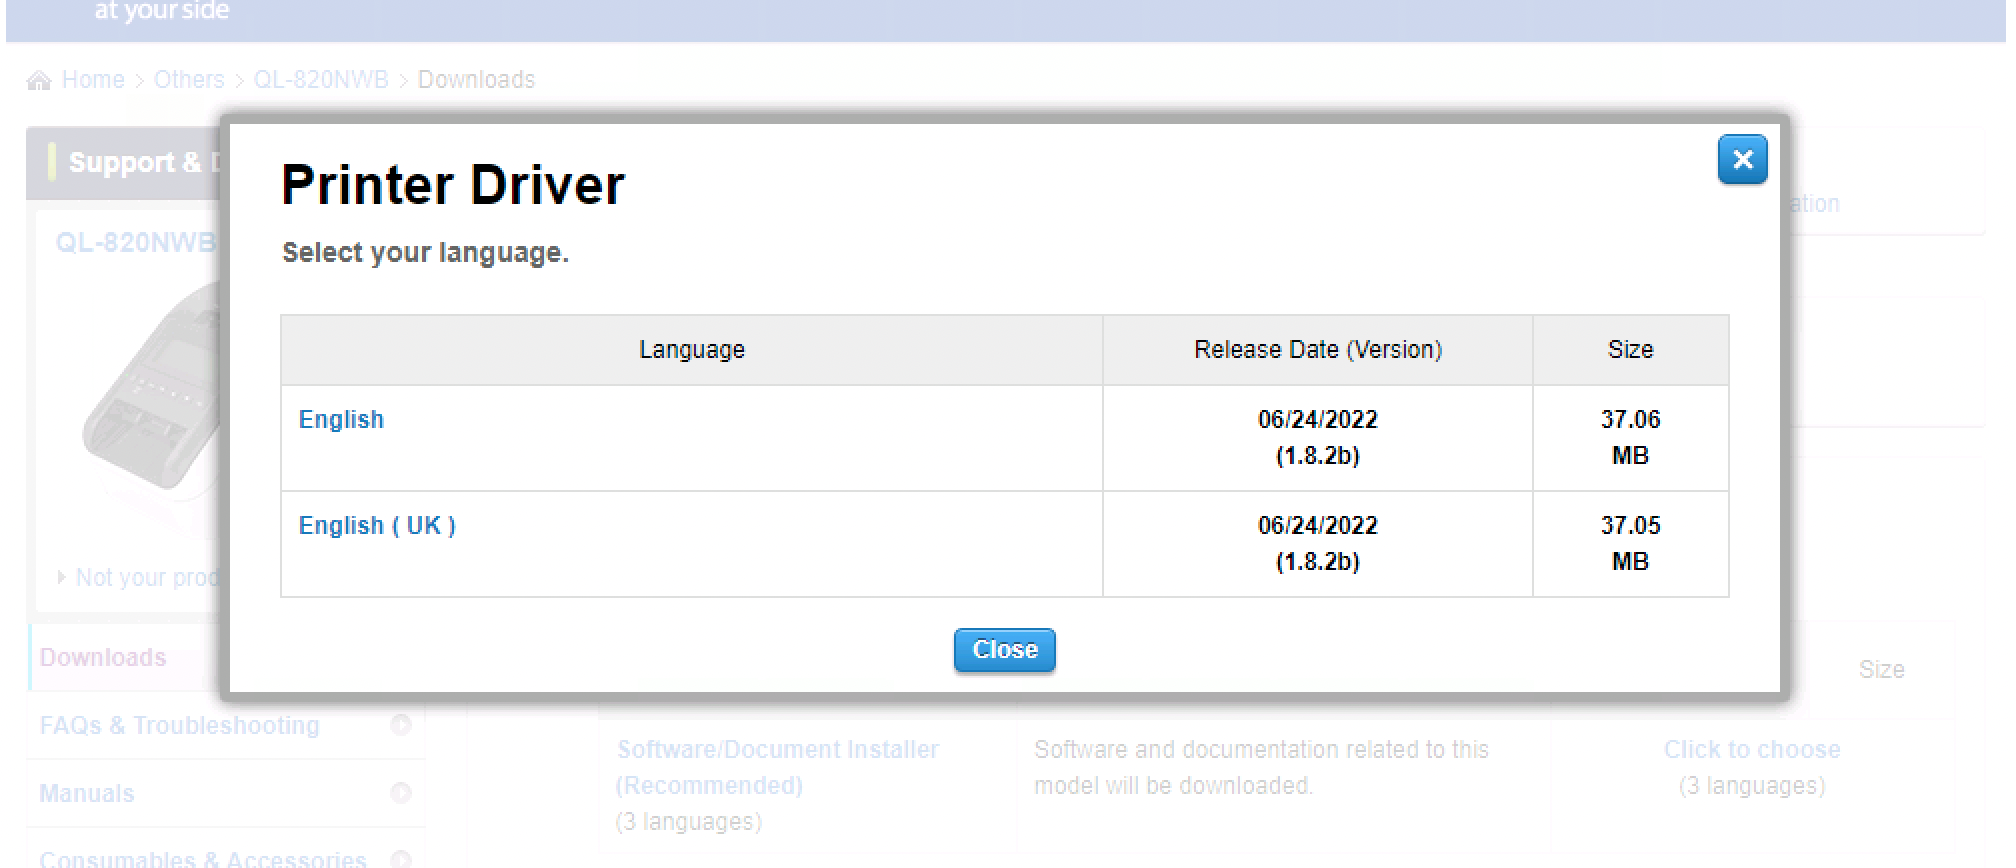
Select printer driver language to continue.
-
Click Agree to the EULA and download to download the driver for Brother QL-820NWB.
-
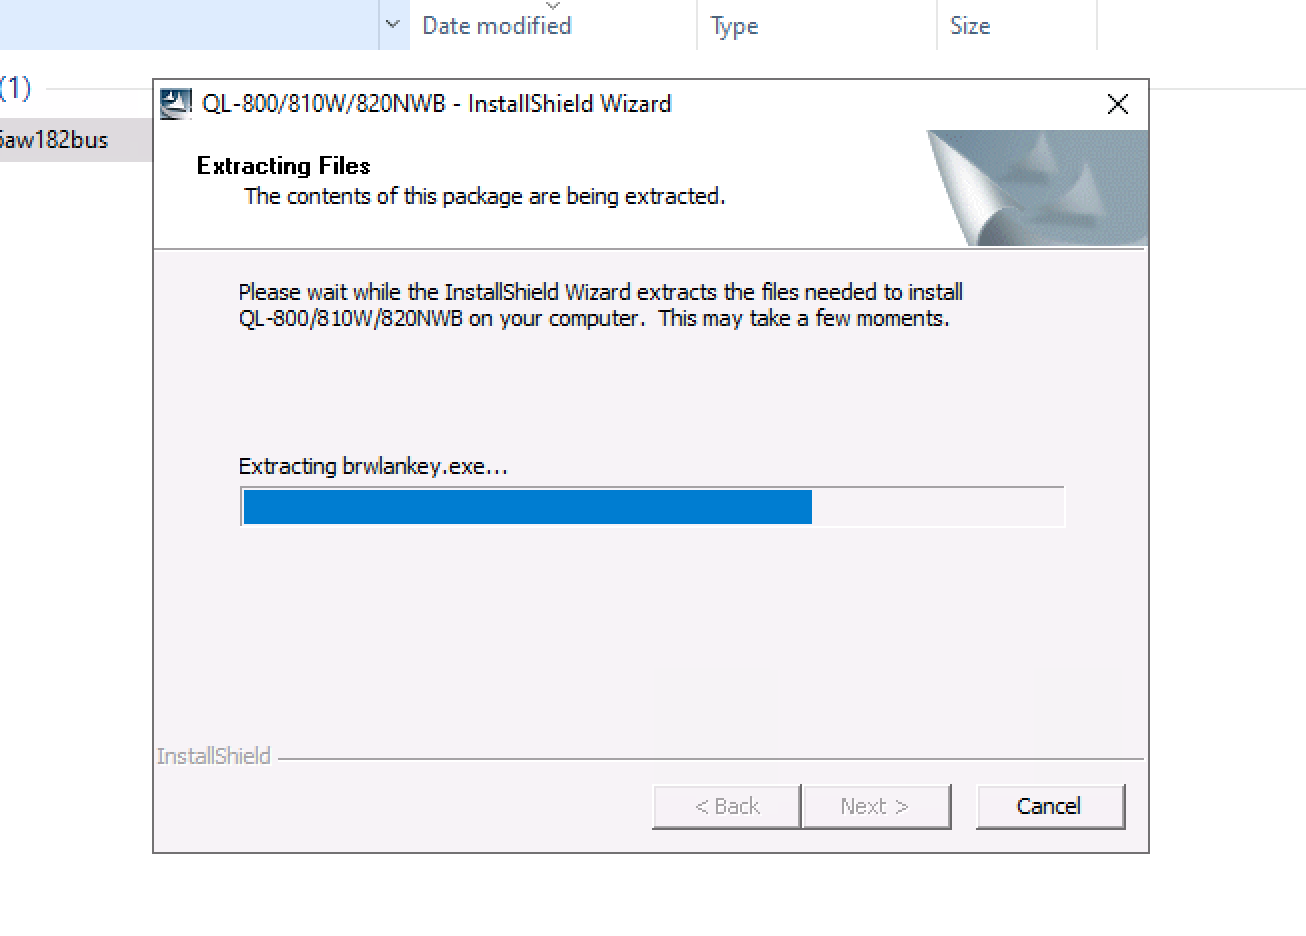
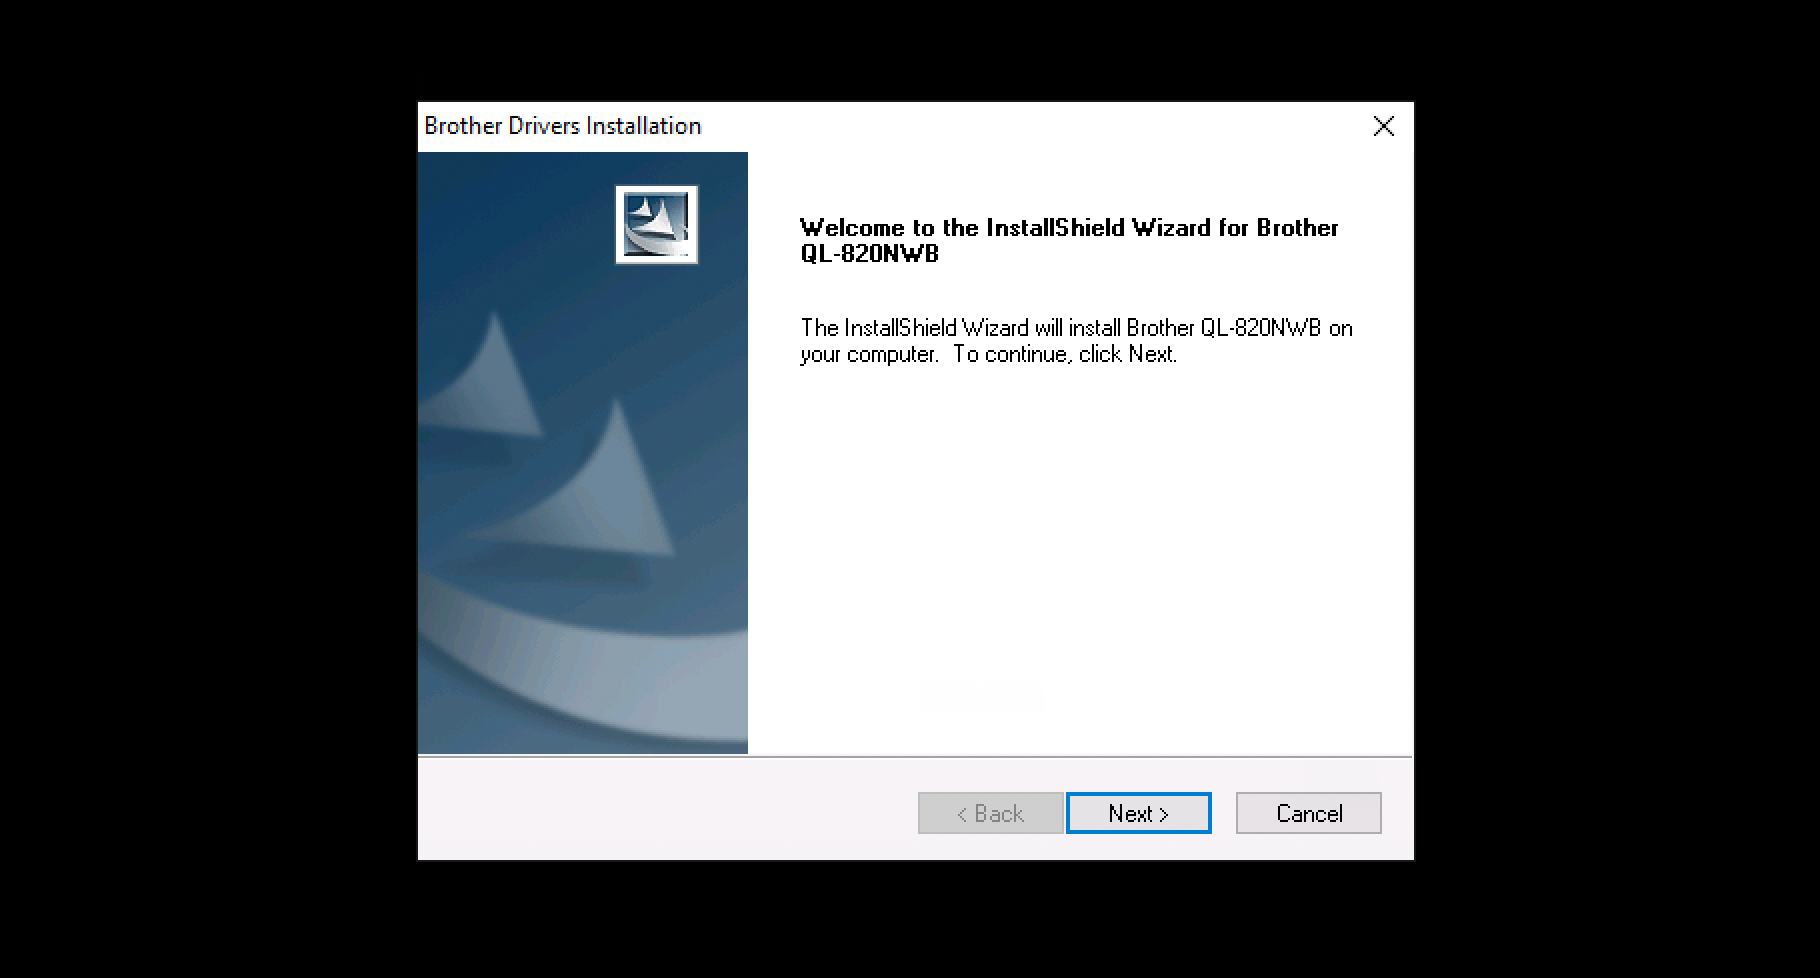
Launch the QL-800/810W/820NWB - InstallShield Wizard that has been downloaded to extract the necessary files. Click Next if the installer won’t proceed automatically to the next step.
-
Select QL-820NWB and click OK

-
Click Next to begin the installation wizard for the Brother QL-820NWB driver.
-
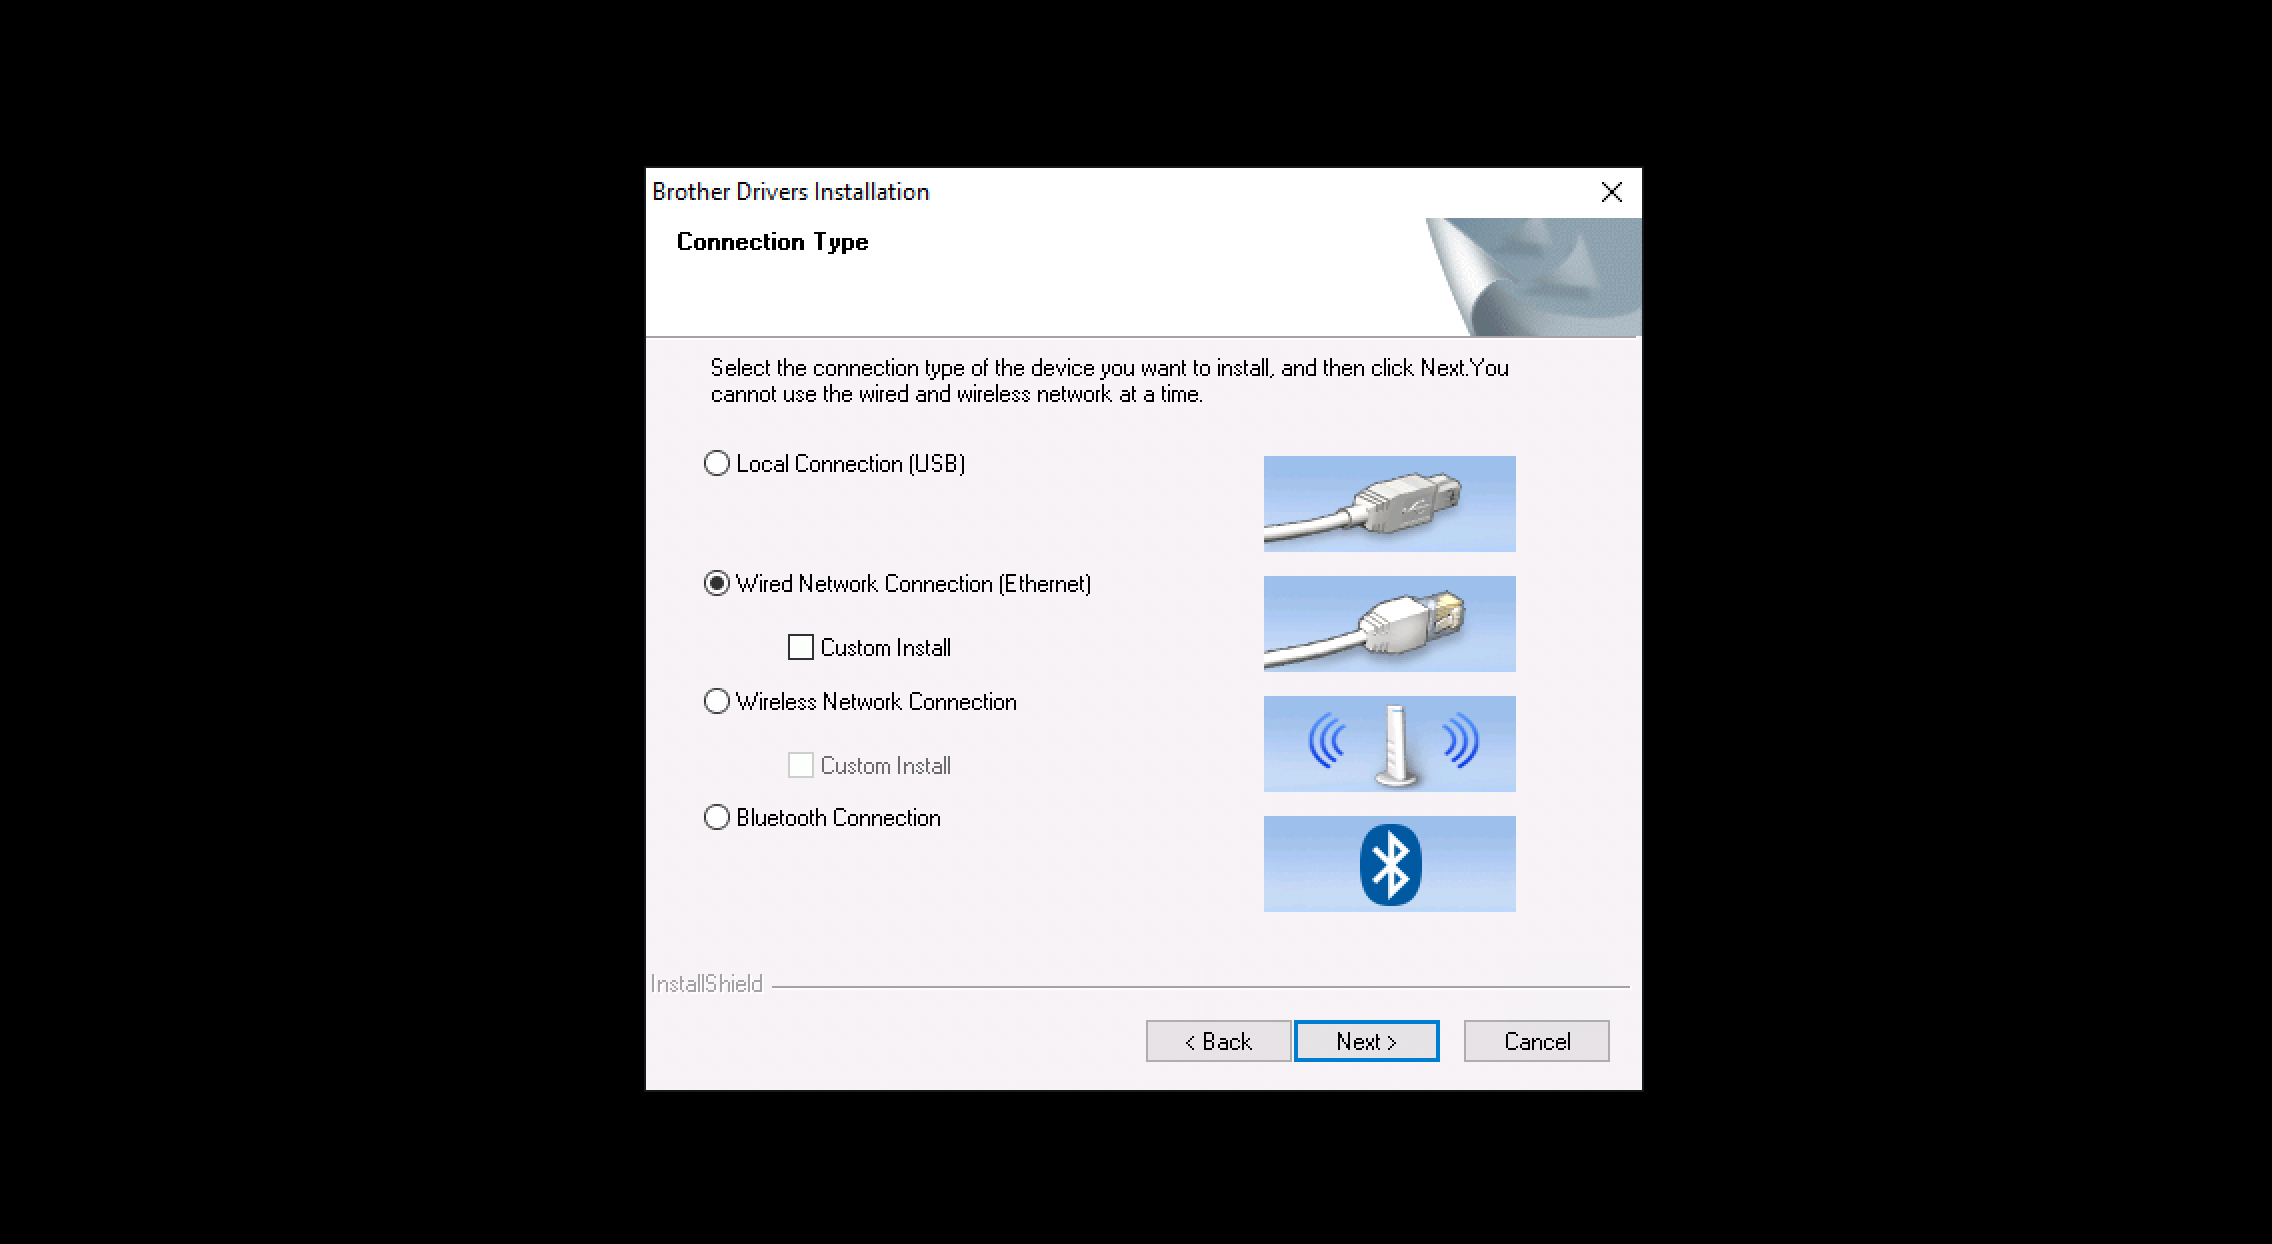
Select the connection type of the Brother QL-820NWB and click Next. For the purpose of this guide we will select Wired Network Connection (Ethernet).
-
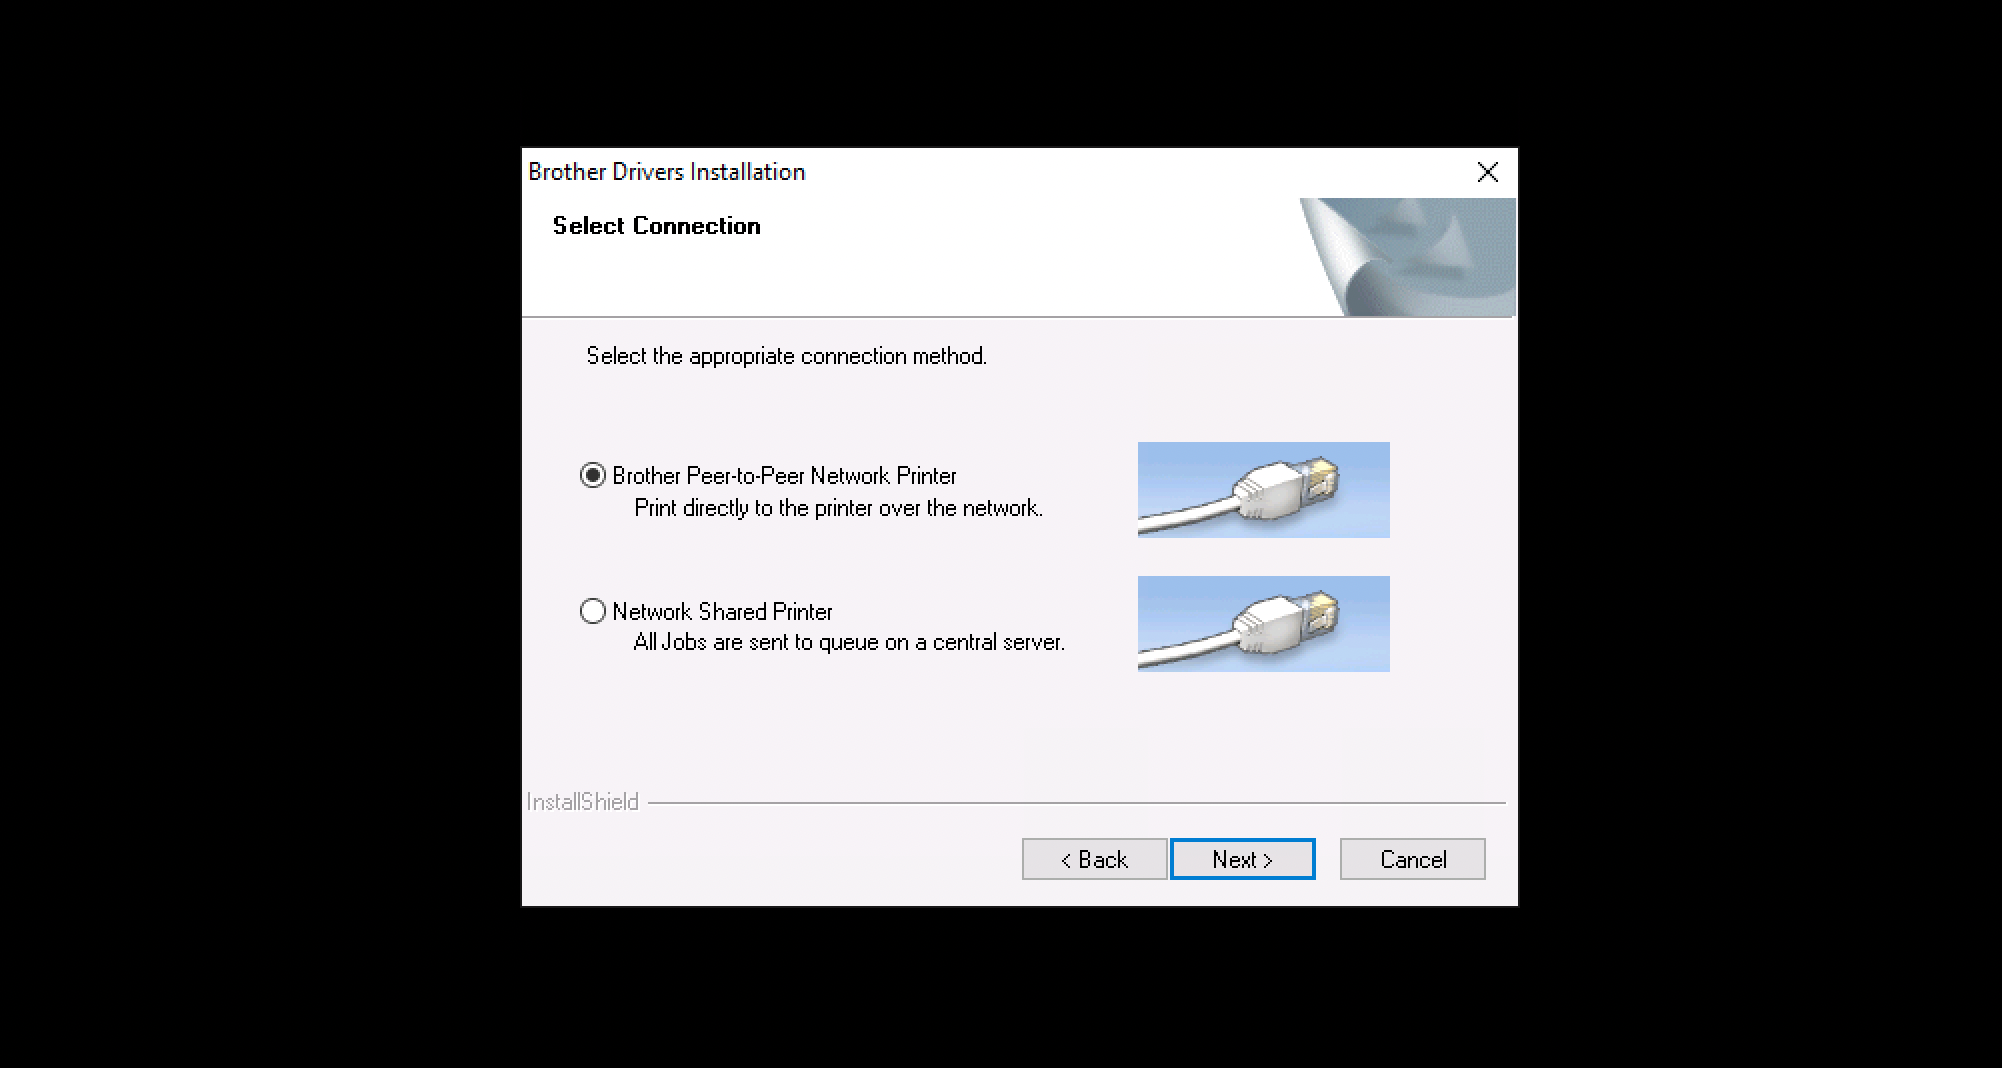
Select the appropriate connection method and click Next. For the purpose of this guide we select Brother Peer-to-Peer Network Printer.
-
If a Firewall and/or Antivirus protection is detected you will see this step. In this case we refer to your organization’s network infrastructure. For the purpose of this guide we select the recommended settings and click Next.

-
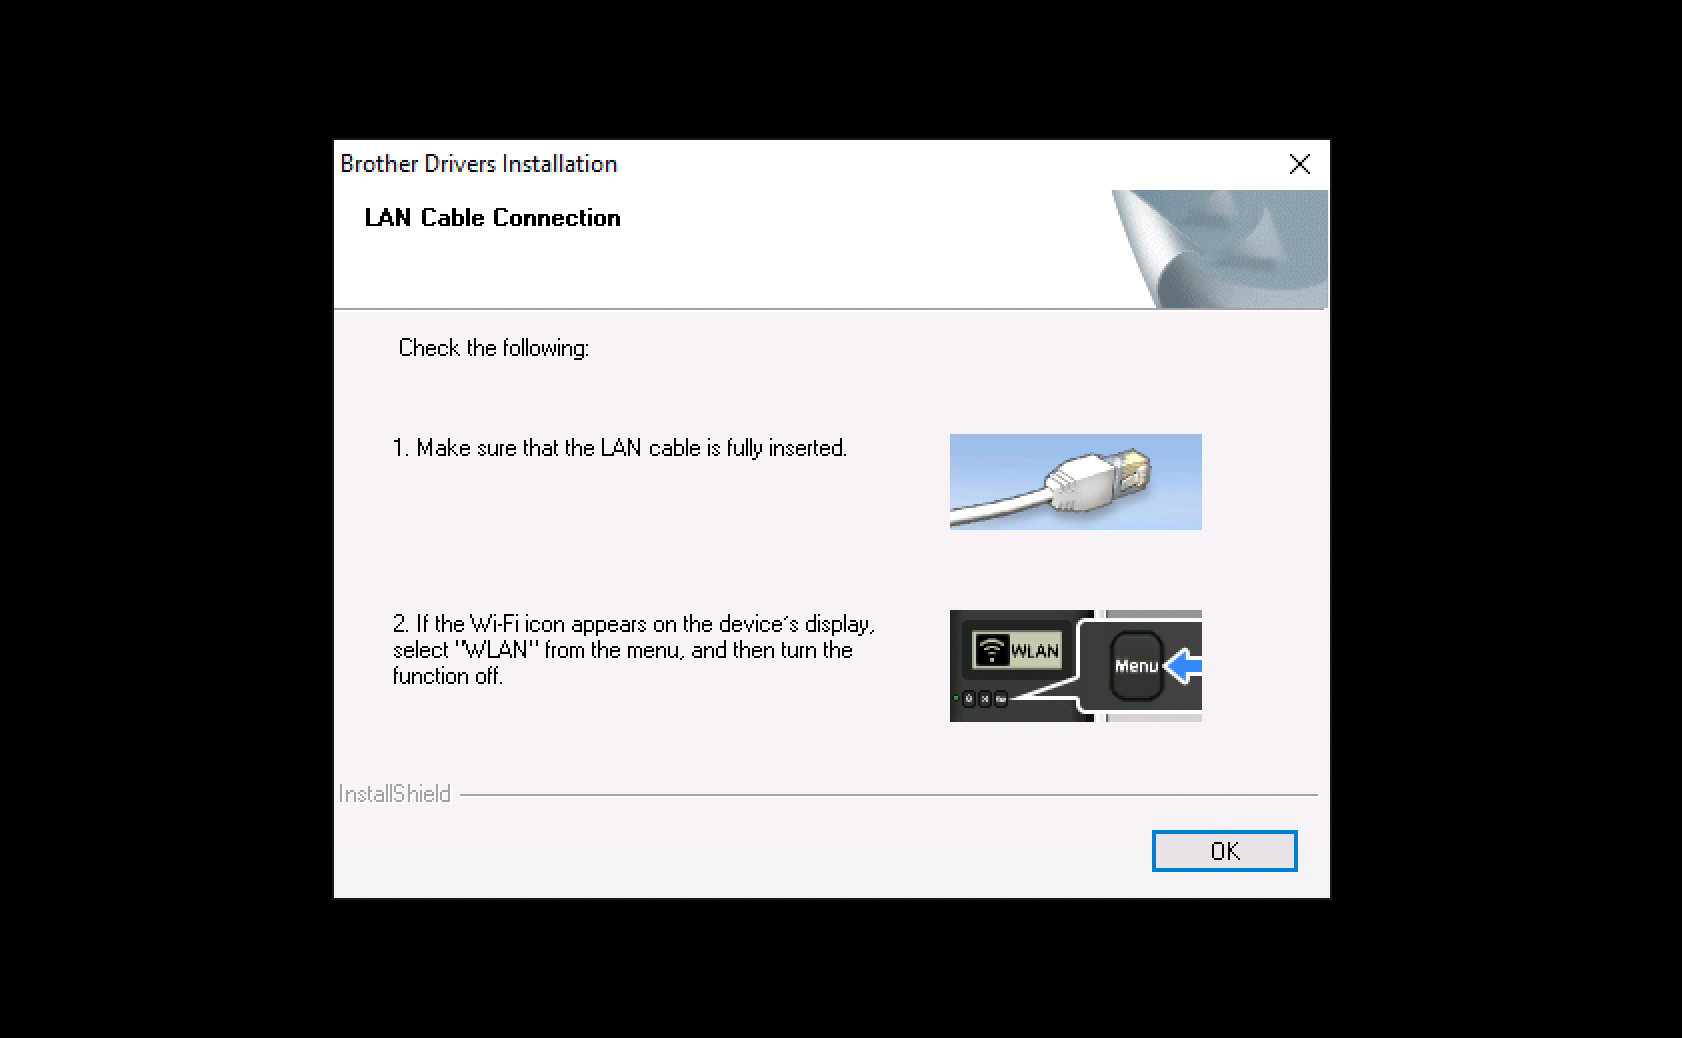
Follow the instructions and click OK to continue.
-
The installation wizard will try and find the Brother QL-820NWB label printer on the network. If it is found successfully it will show up and can be selected and you can click Next to continue.
If the printer is not found the following message will be displayed. In this case click No to proceed to try and find it manually on the network.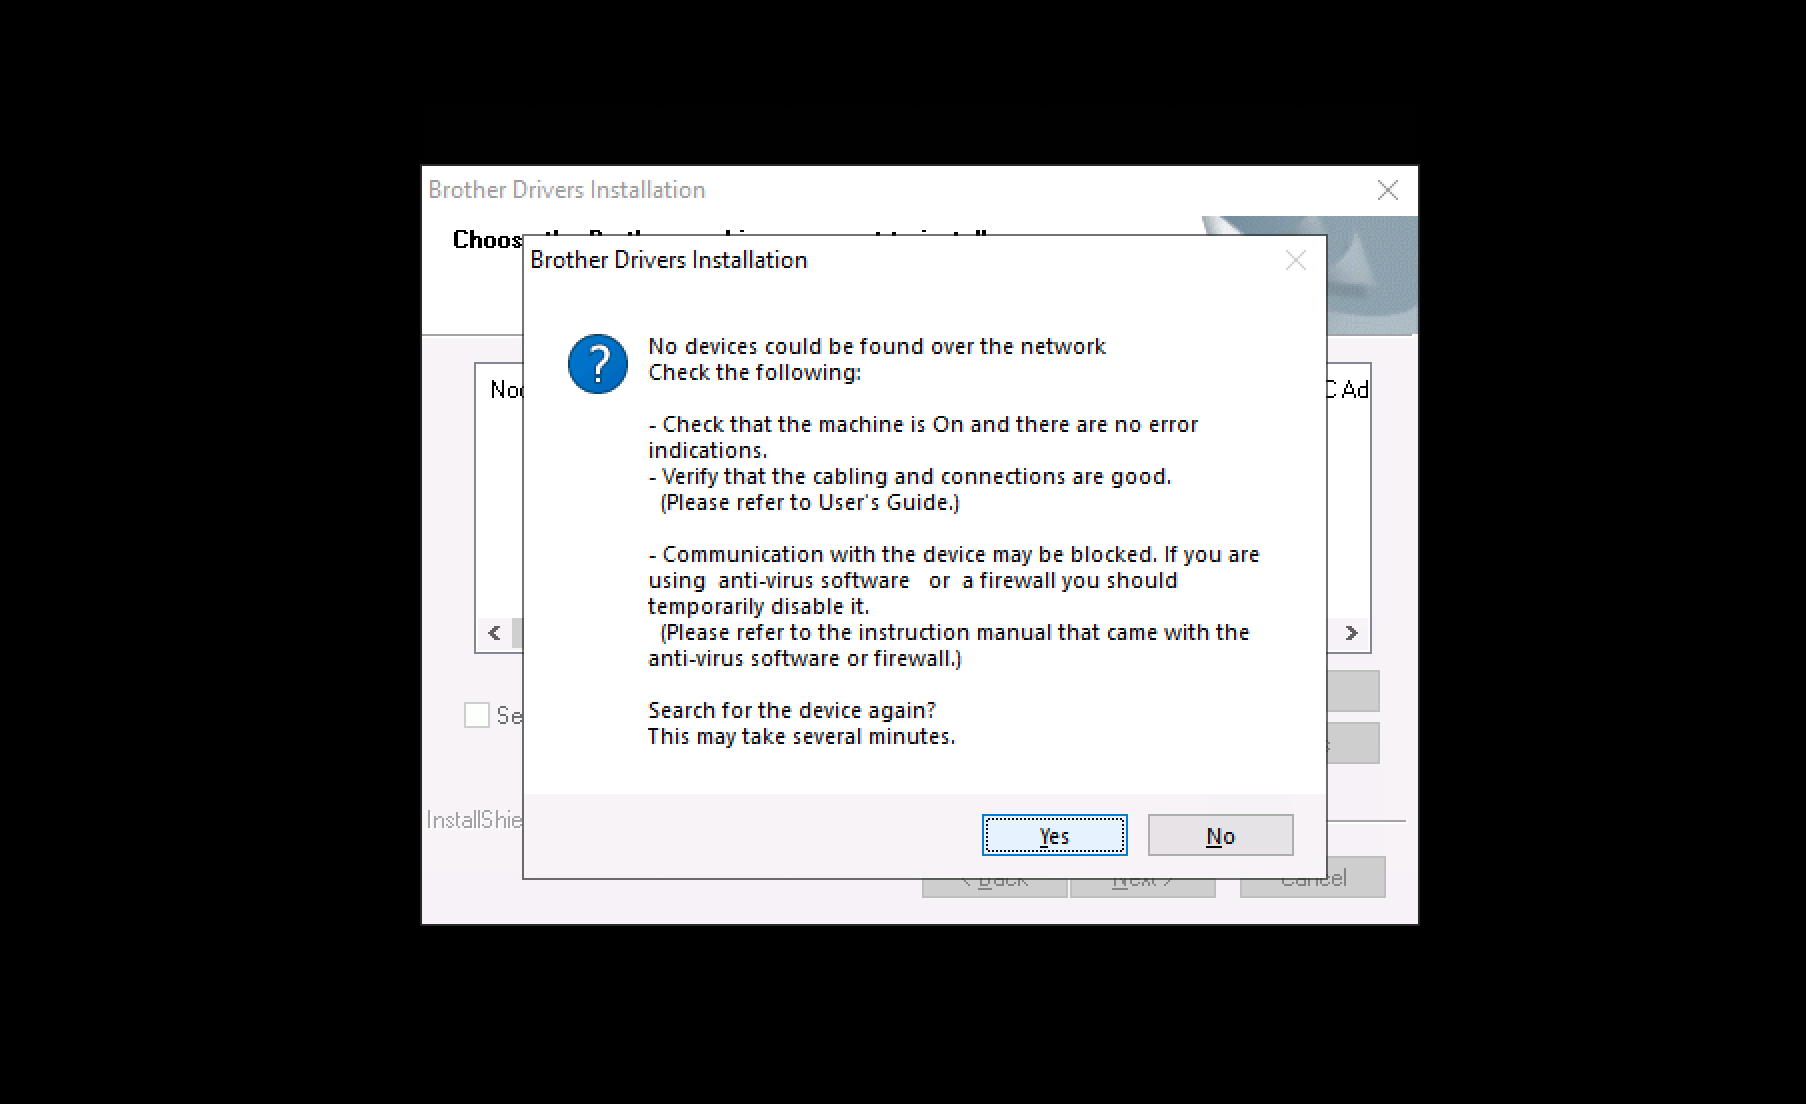
-
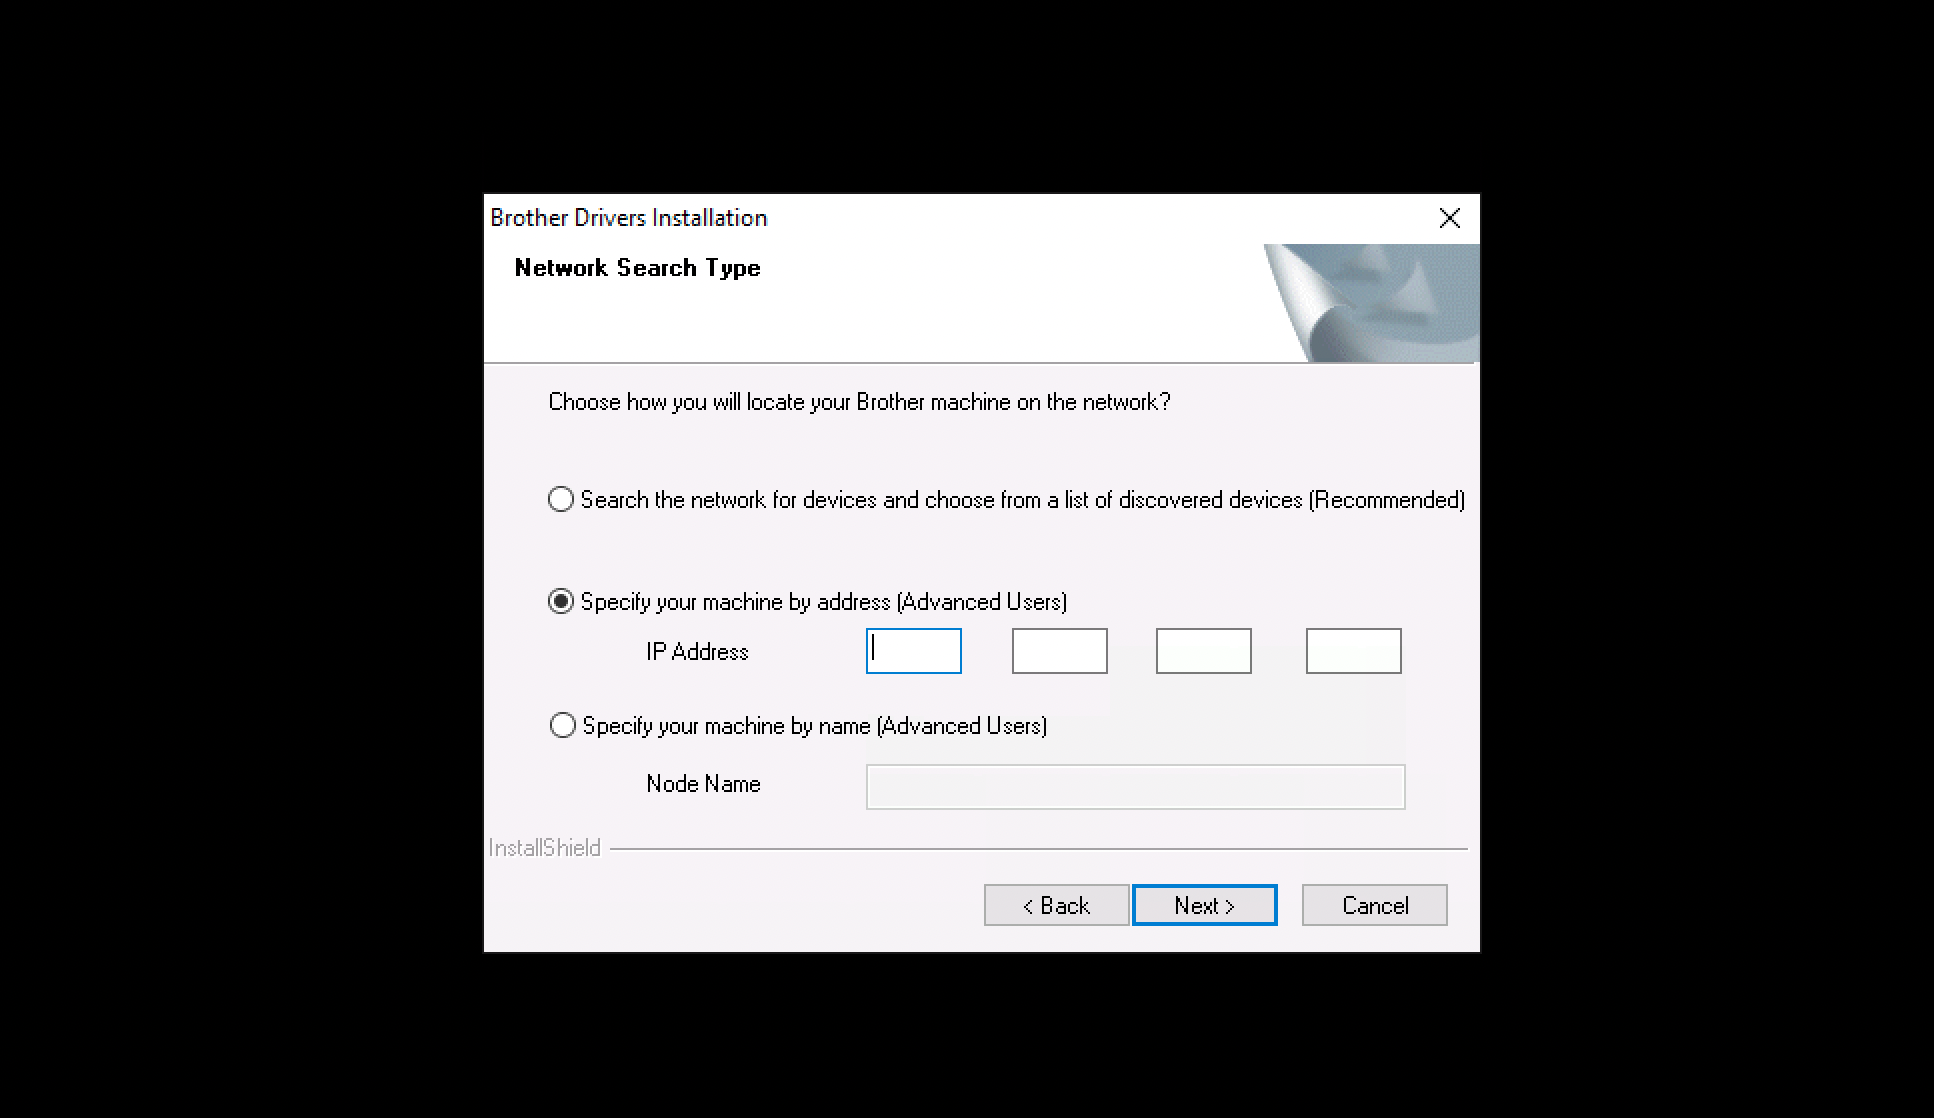
Choose how you will locate the Brother QL-820NWB label printer on the network. For the purpose of this guide we specify the printer by its IP address and then click Next.
-
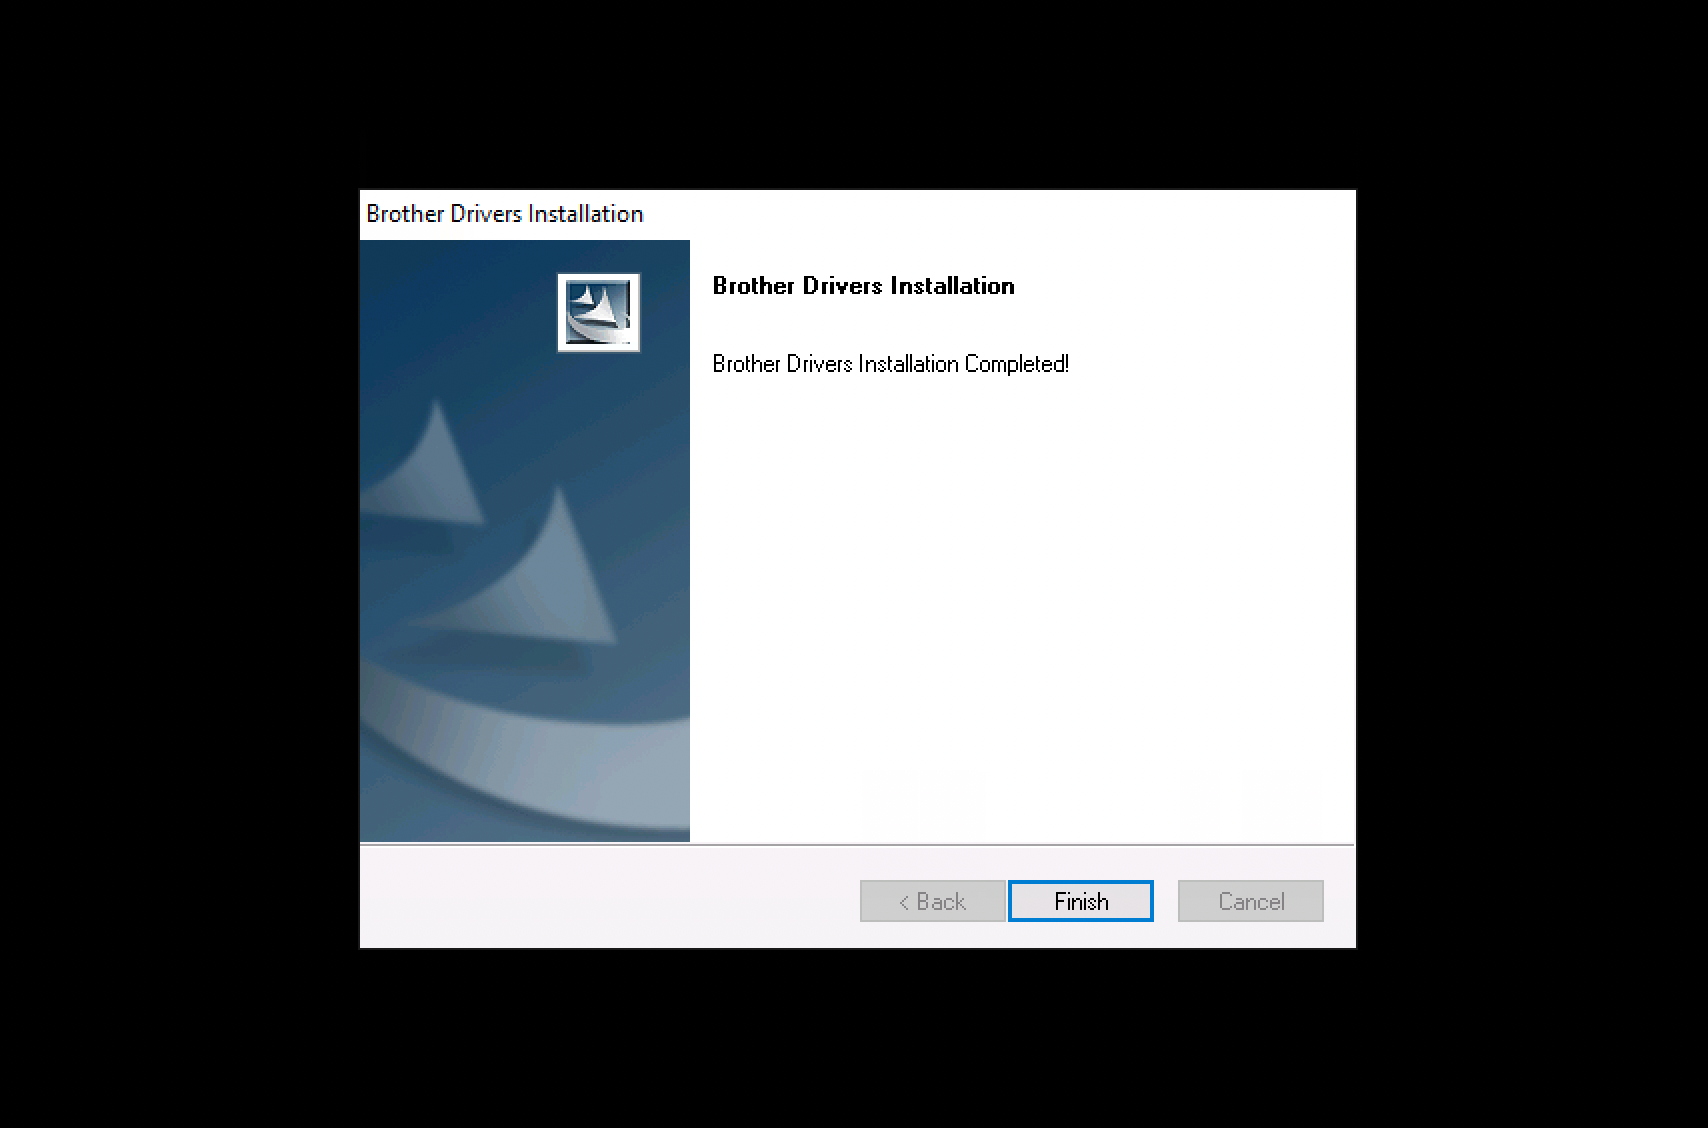
If the Brother QL-820NWB is located it will be installed. Click Finish to exit the installation wizard.
Configure Brother QL-820NWB
It is important to set up the correct Printing Default Settings for the Brother QL-820NWB so that the visitor badges are printed correctly.
-
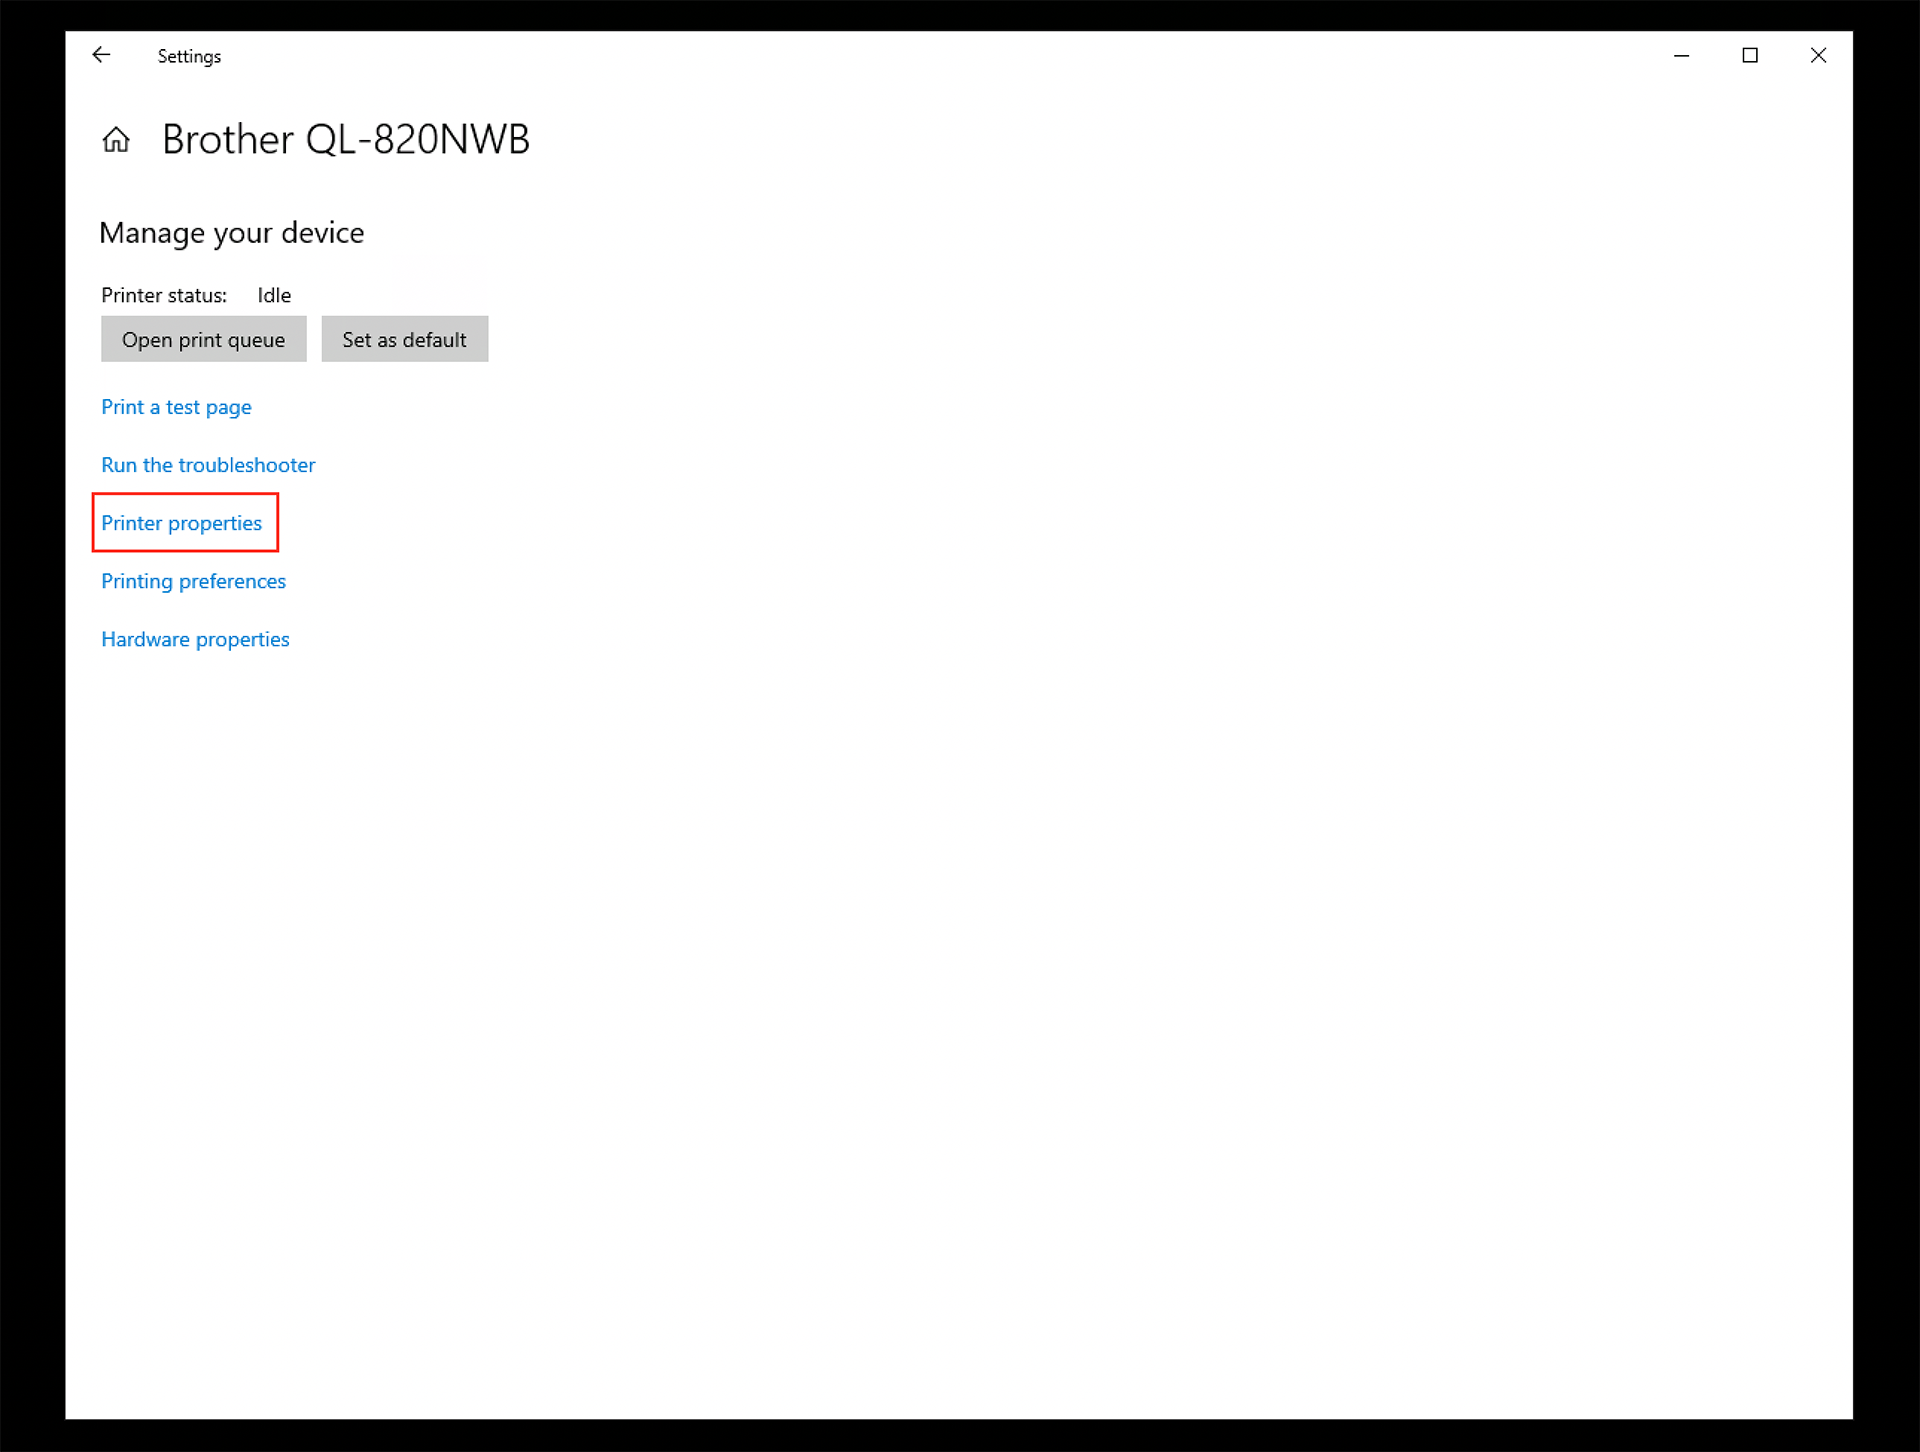
In Windows, go to Printers &, Scanners and click Manage for the Brother QL-820NWB.

-
Click Printer properties on Manage your device.
-
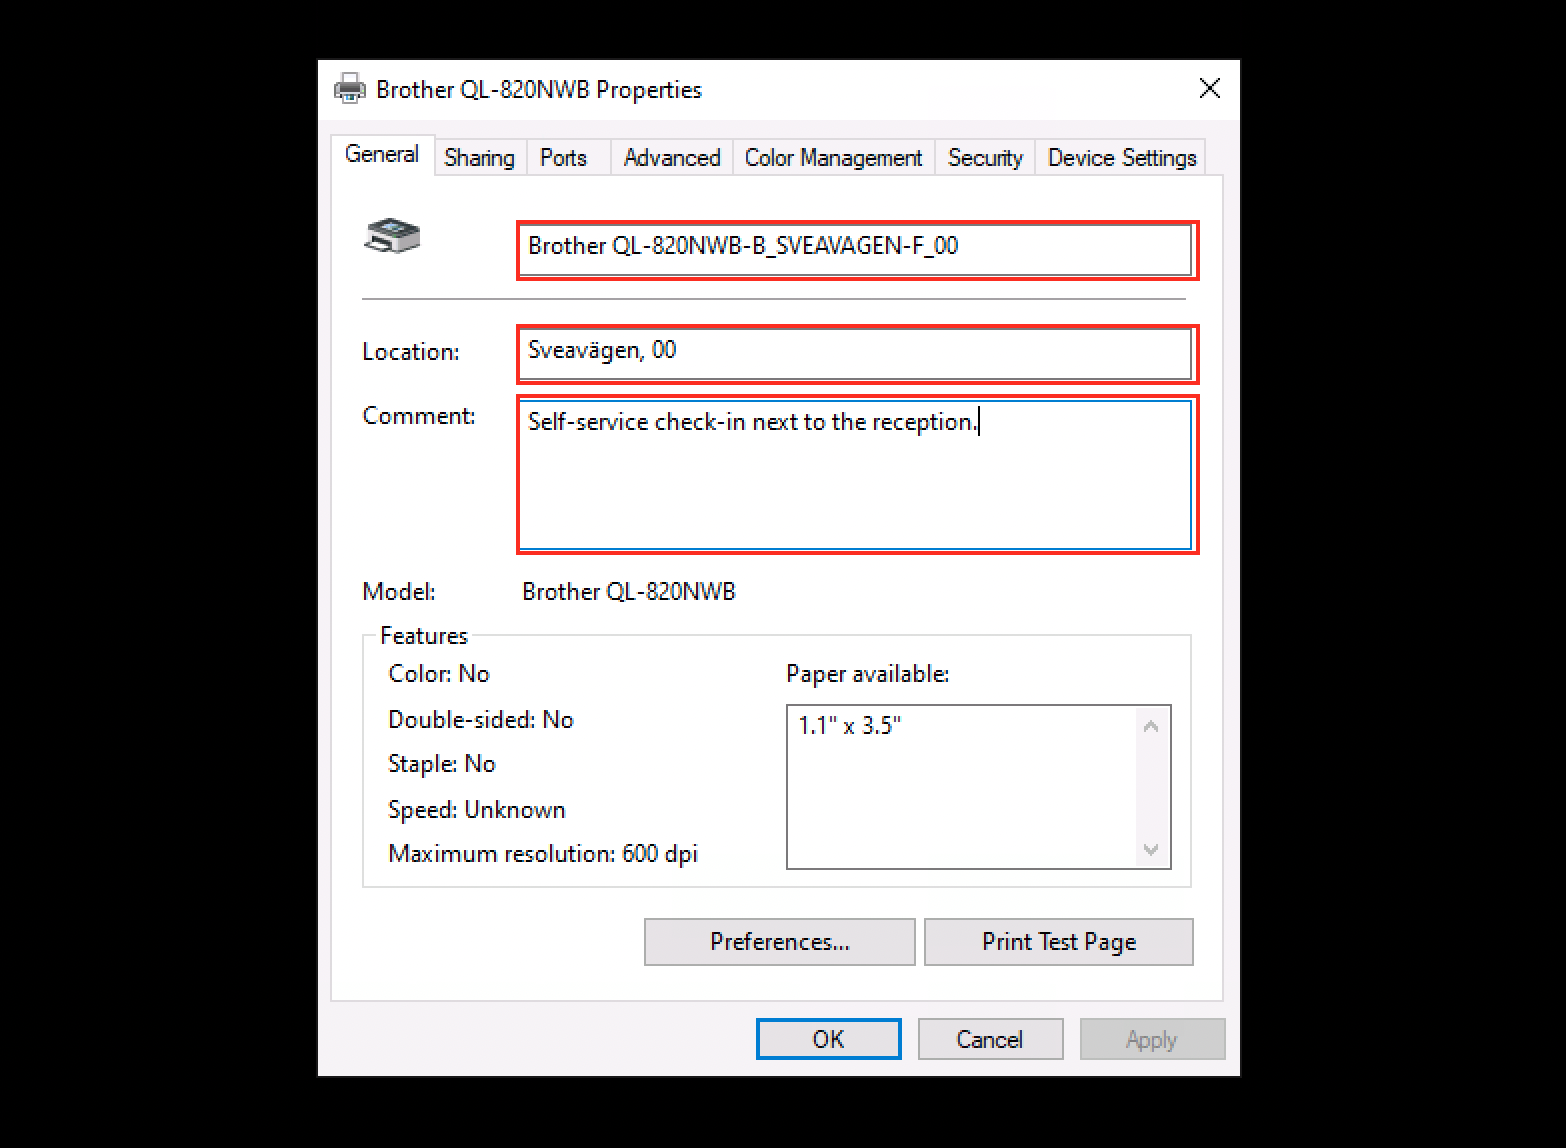
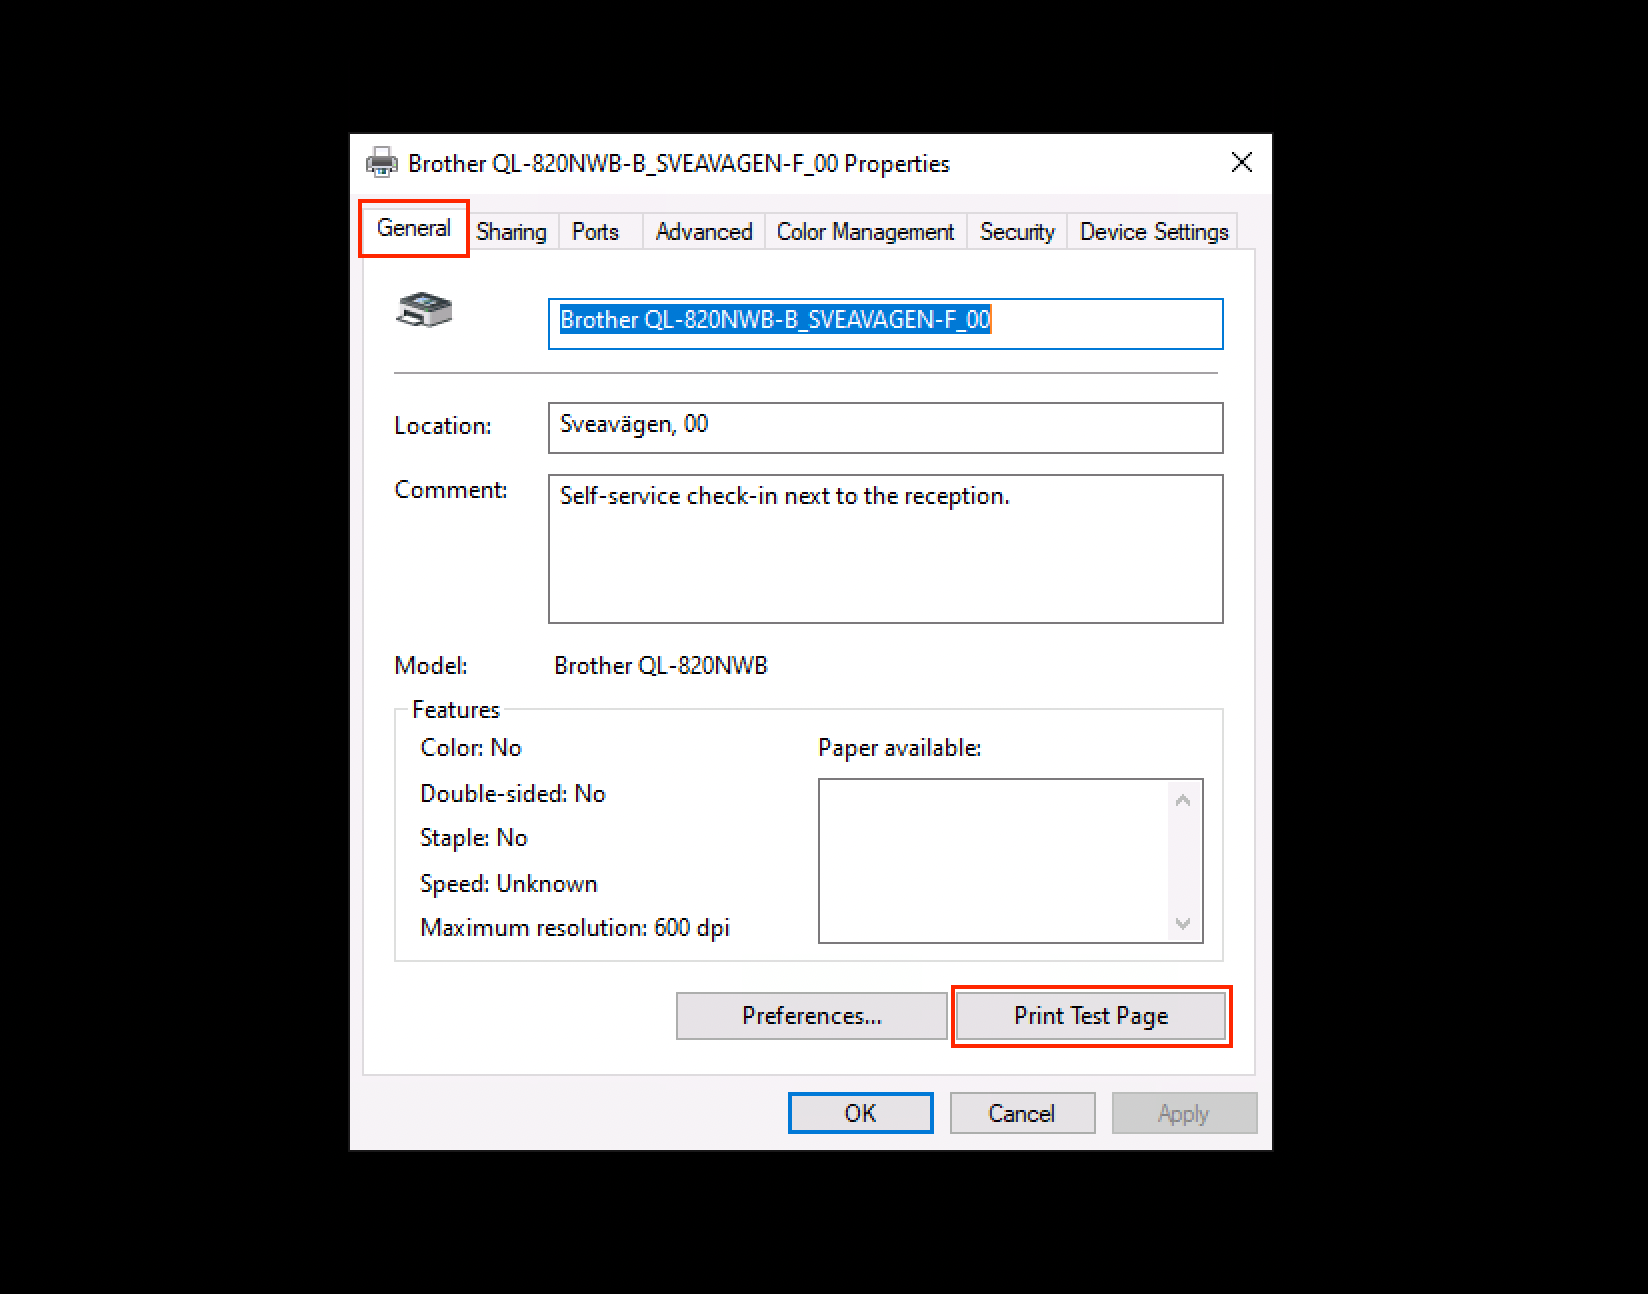
On the General tab it’s possible to give the Brother QL-820NWB a more friendly Name(which will show in the Humly Print Service and can then be used for the Humly Visitor screen which will use that printer when automatically printing the visitor badge), add a Location and a useful Description.
-
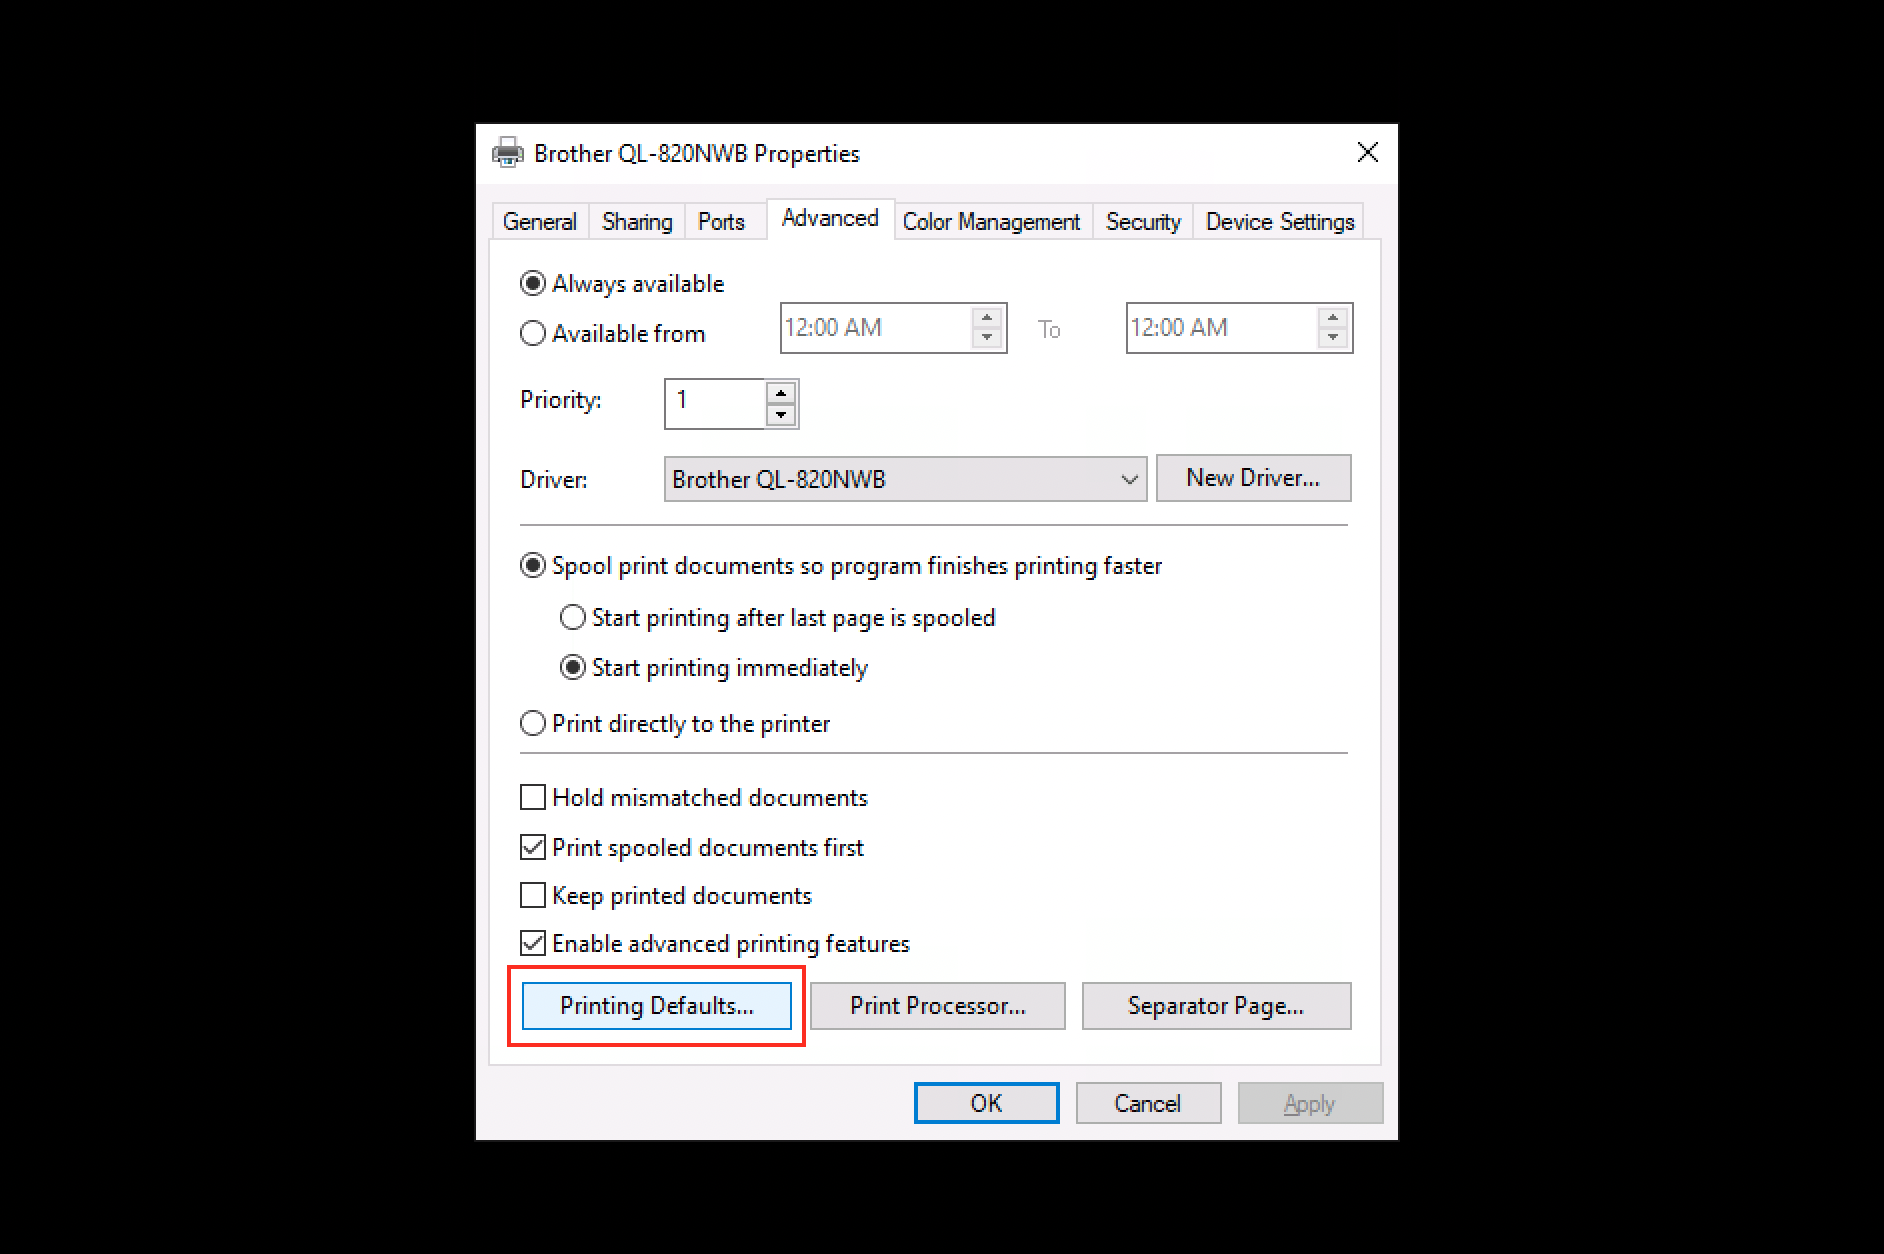
On the Advanced tab click Printing Defaults… .
-
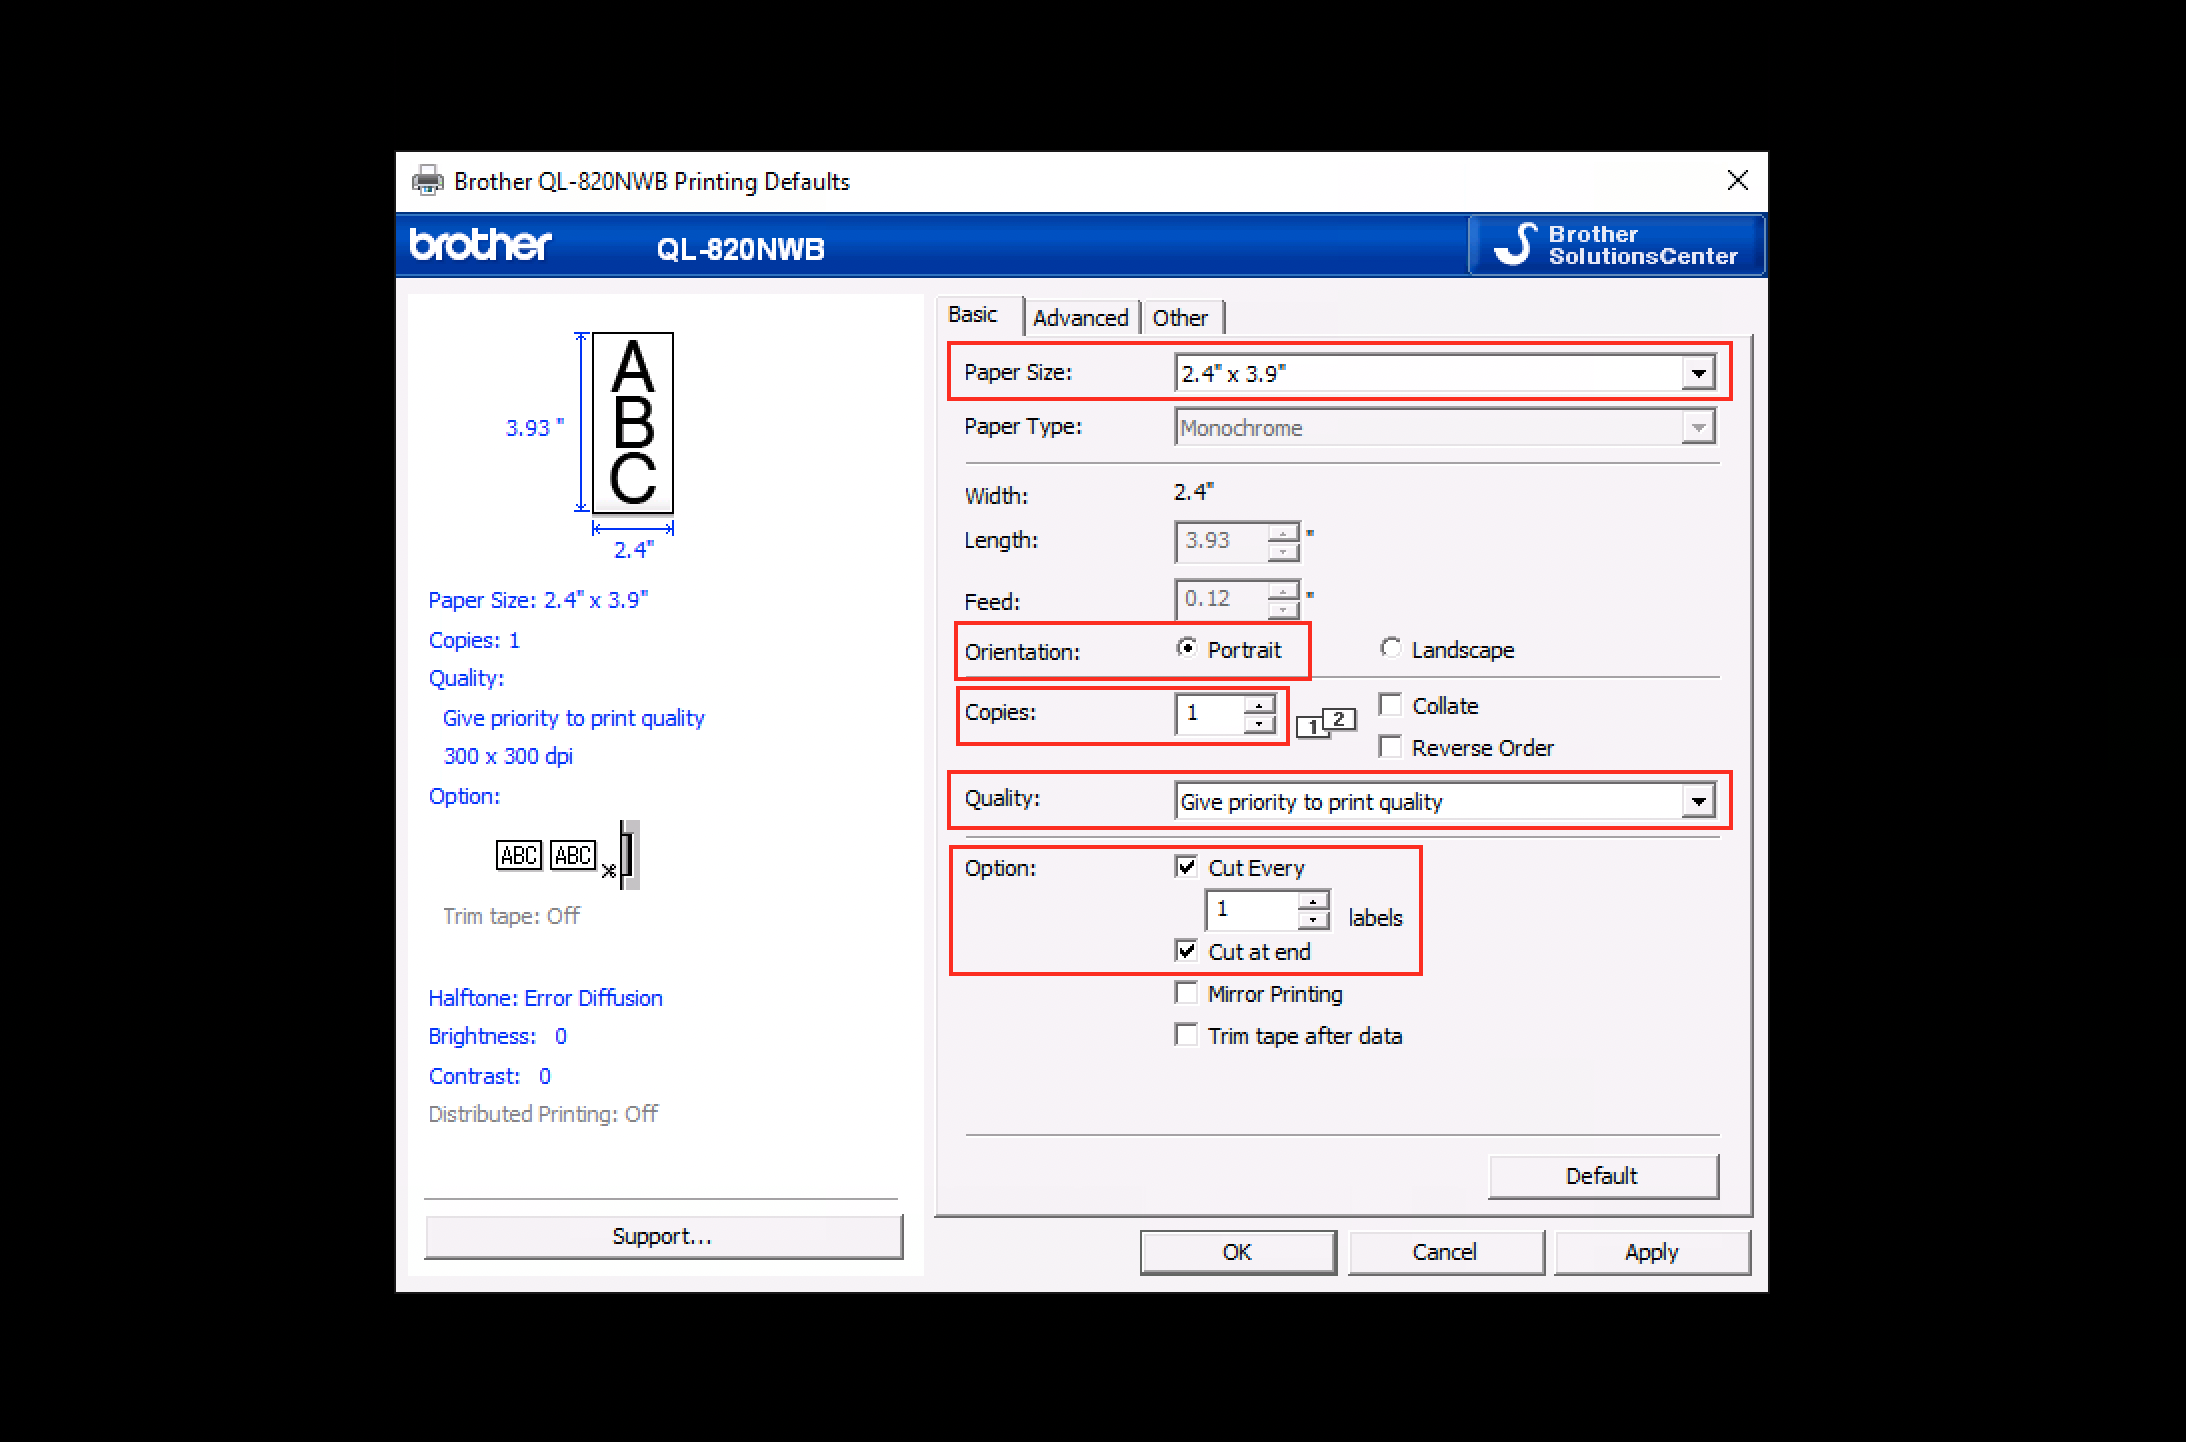
For Brother QL-820NWB we recommend the following default settings for paper rolls (both pre-cut and continuous tape roll) with the paper size 2.4” by 3.9” (62 by 100 mm).
-
Paper Size - 2.4” by 3.9” (62 by 100 mm).
-
Orientation - Portrait.
-
Copies- 1.
-
Quality - Give priority to print quality.
-
Options - Cut every 1 labels and cut at end.
-
-
Click OK to save the default print settings if the paper roll is a pre-cut tape roll, and continue to step 15 in this guide.
If the paper roll is a continuous tape roll click Apply and then continue with the next step, step 7, in this guide.
-
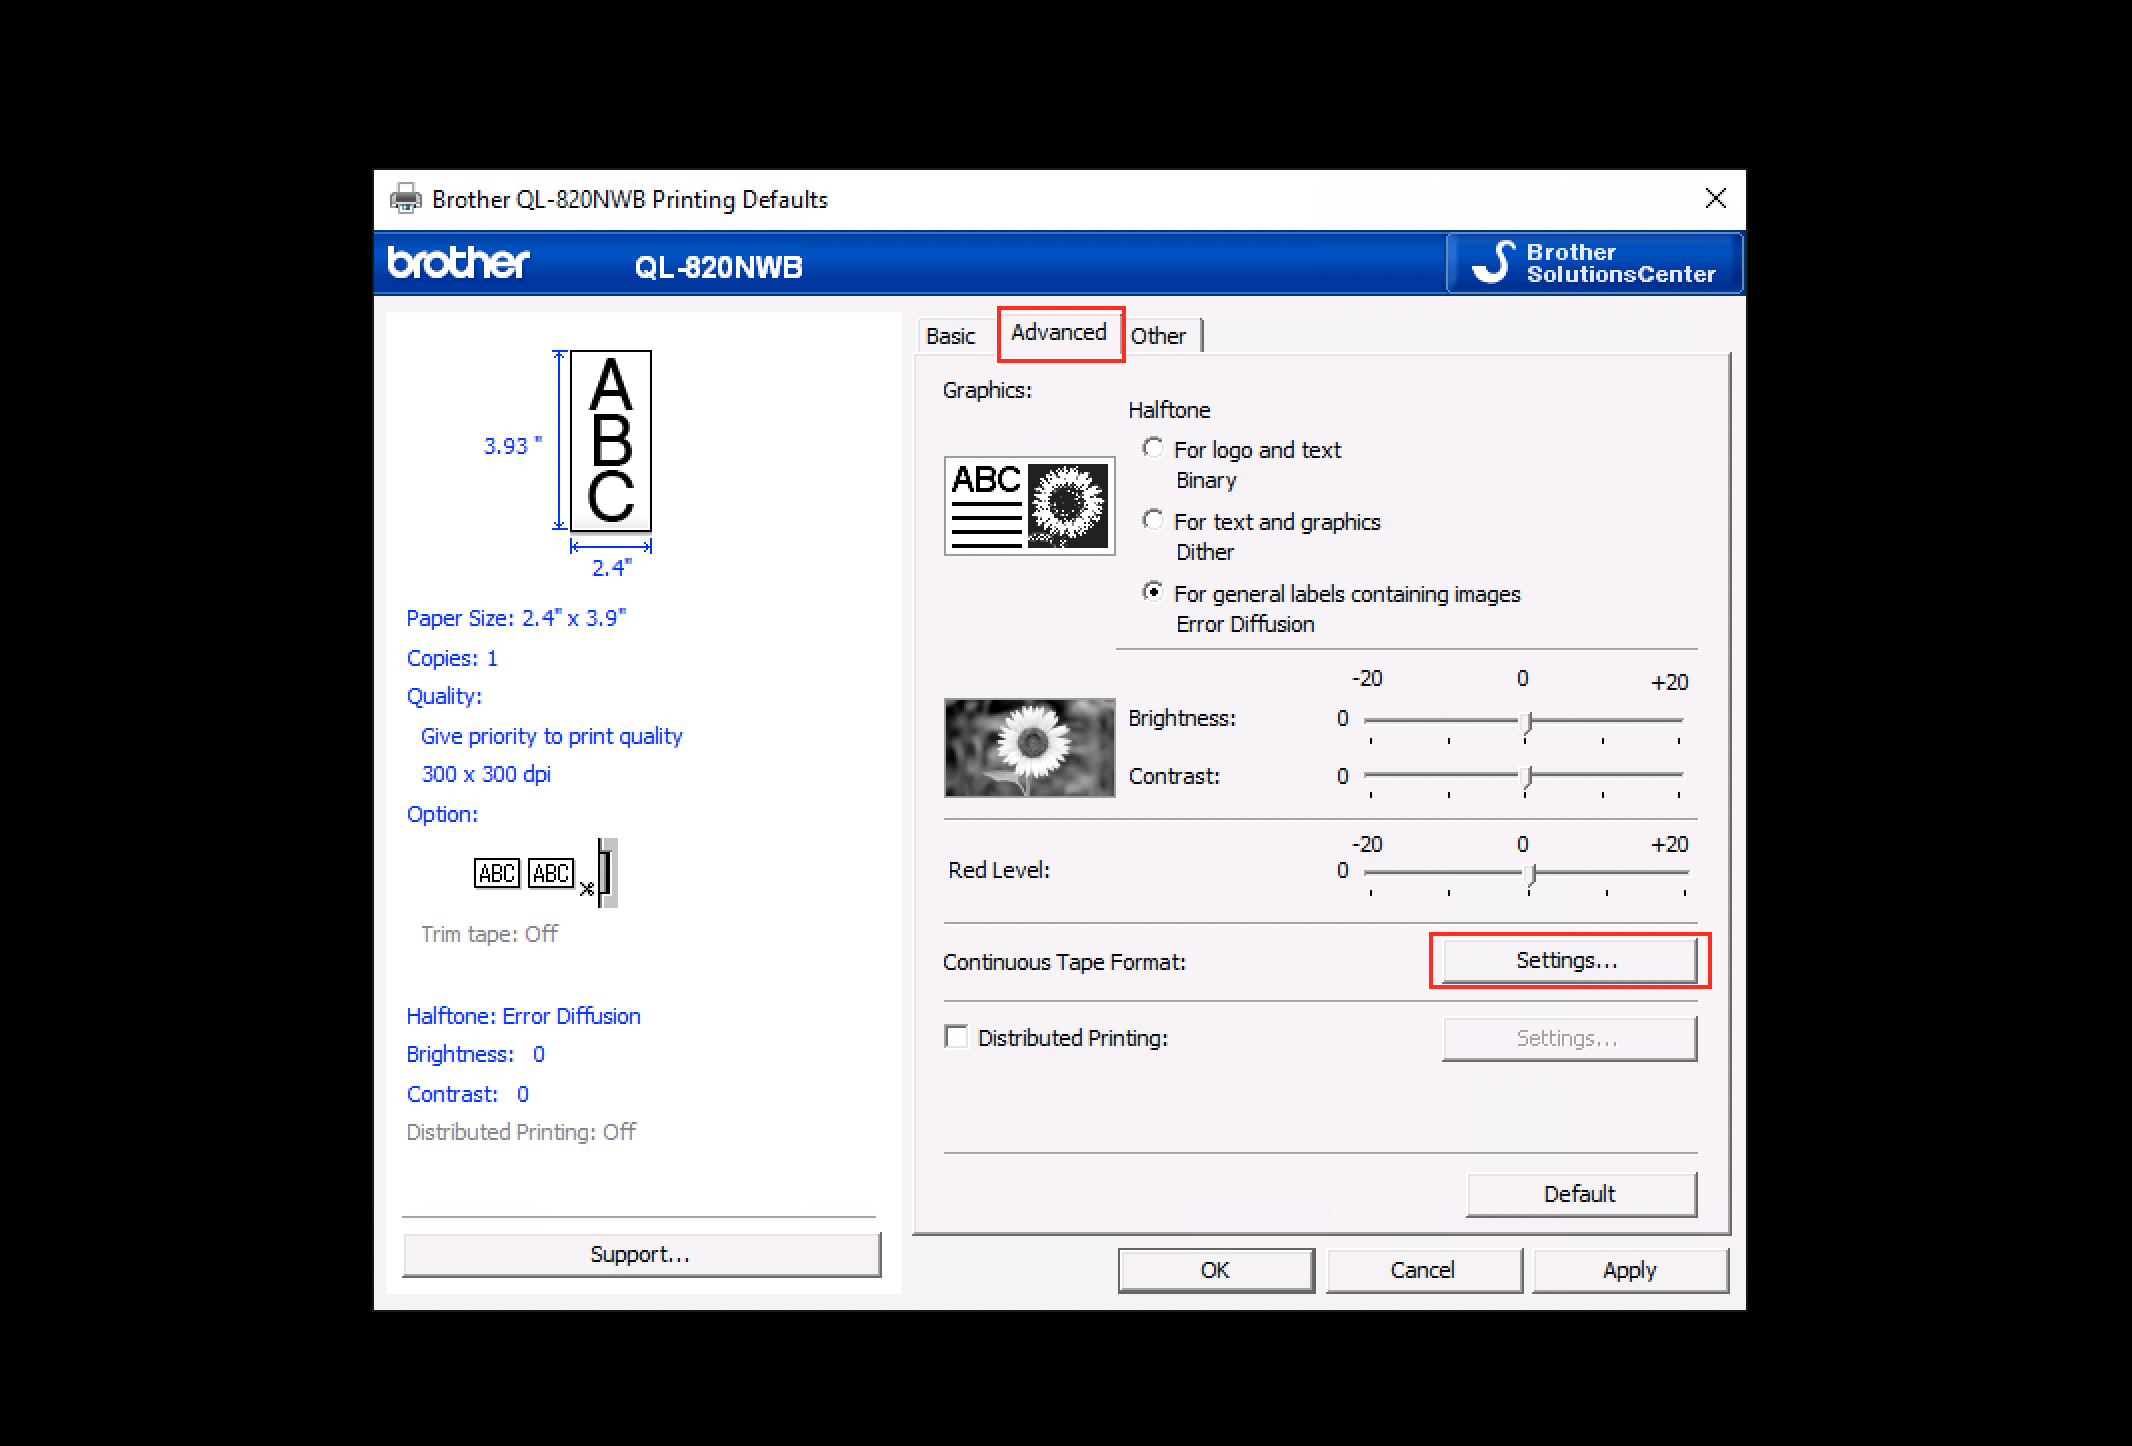
Click Advanced If the paper roll is a continuous tape roll.
-
Click Settings… to access Continuous Tape Format Settings.
-
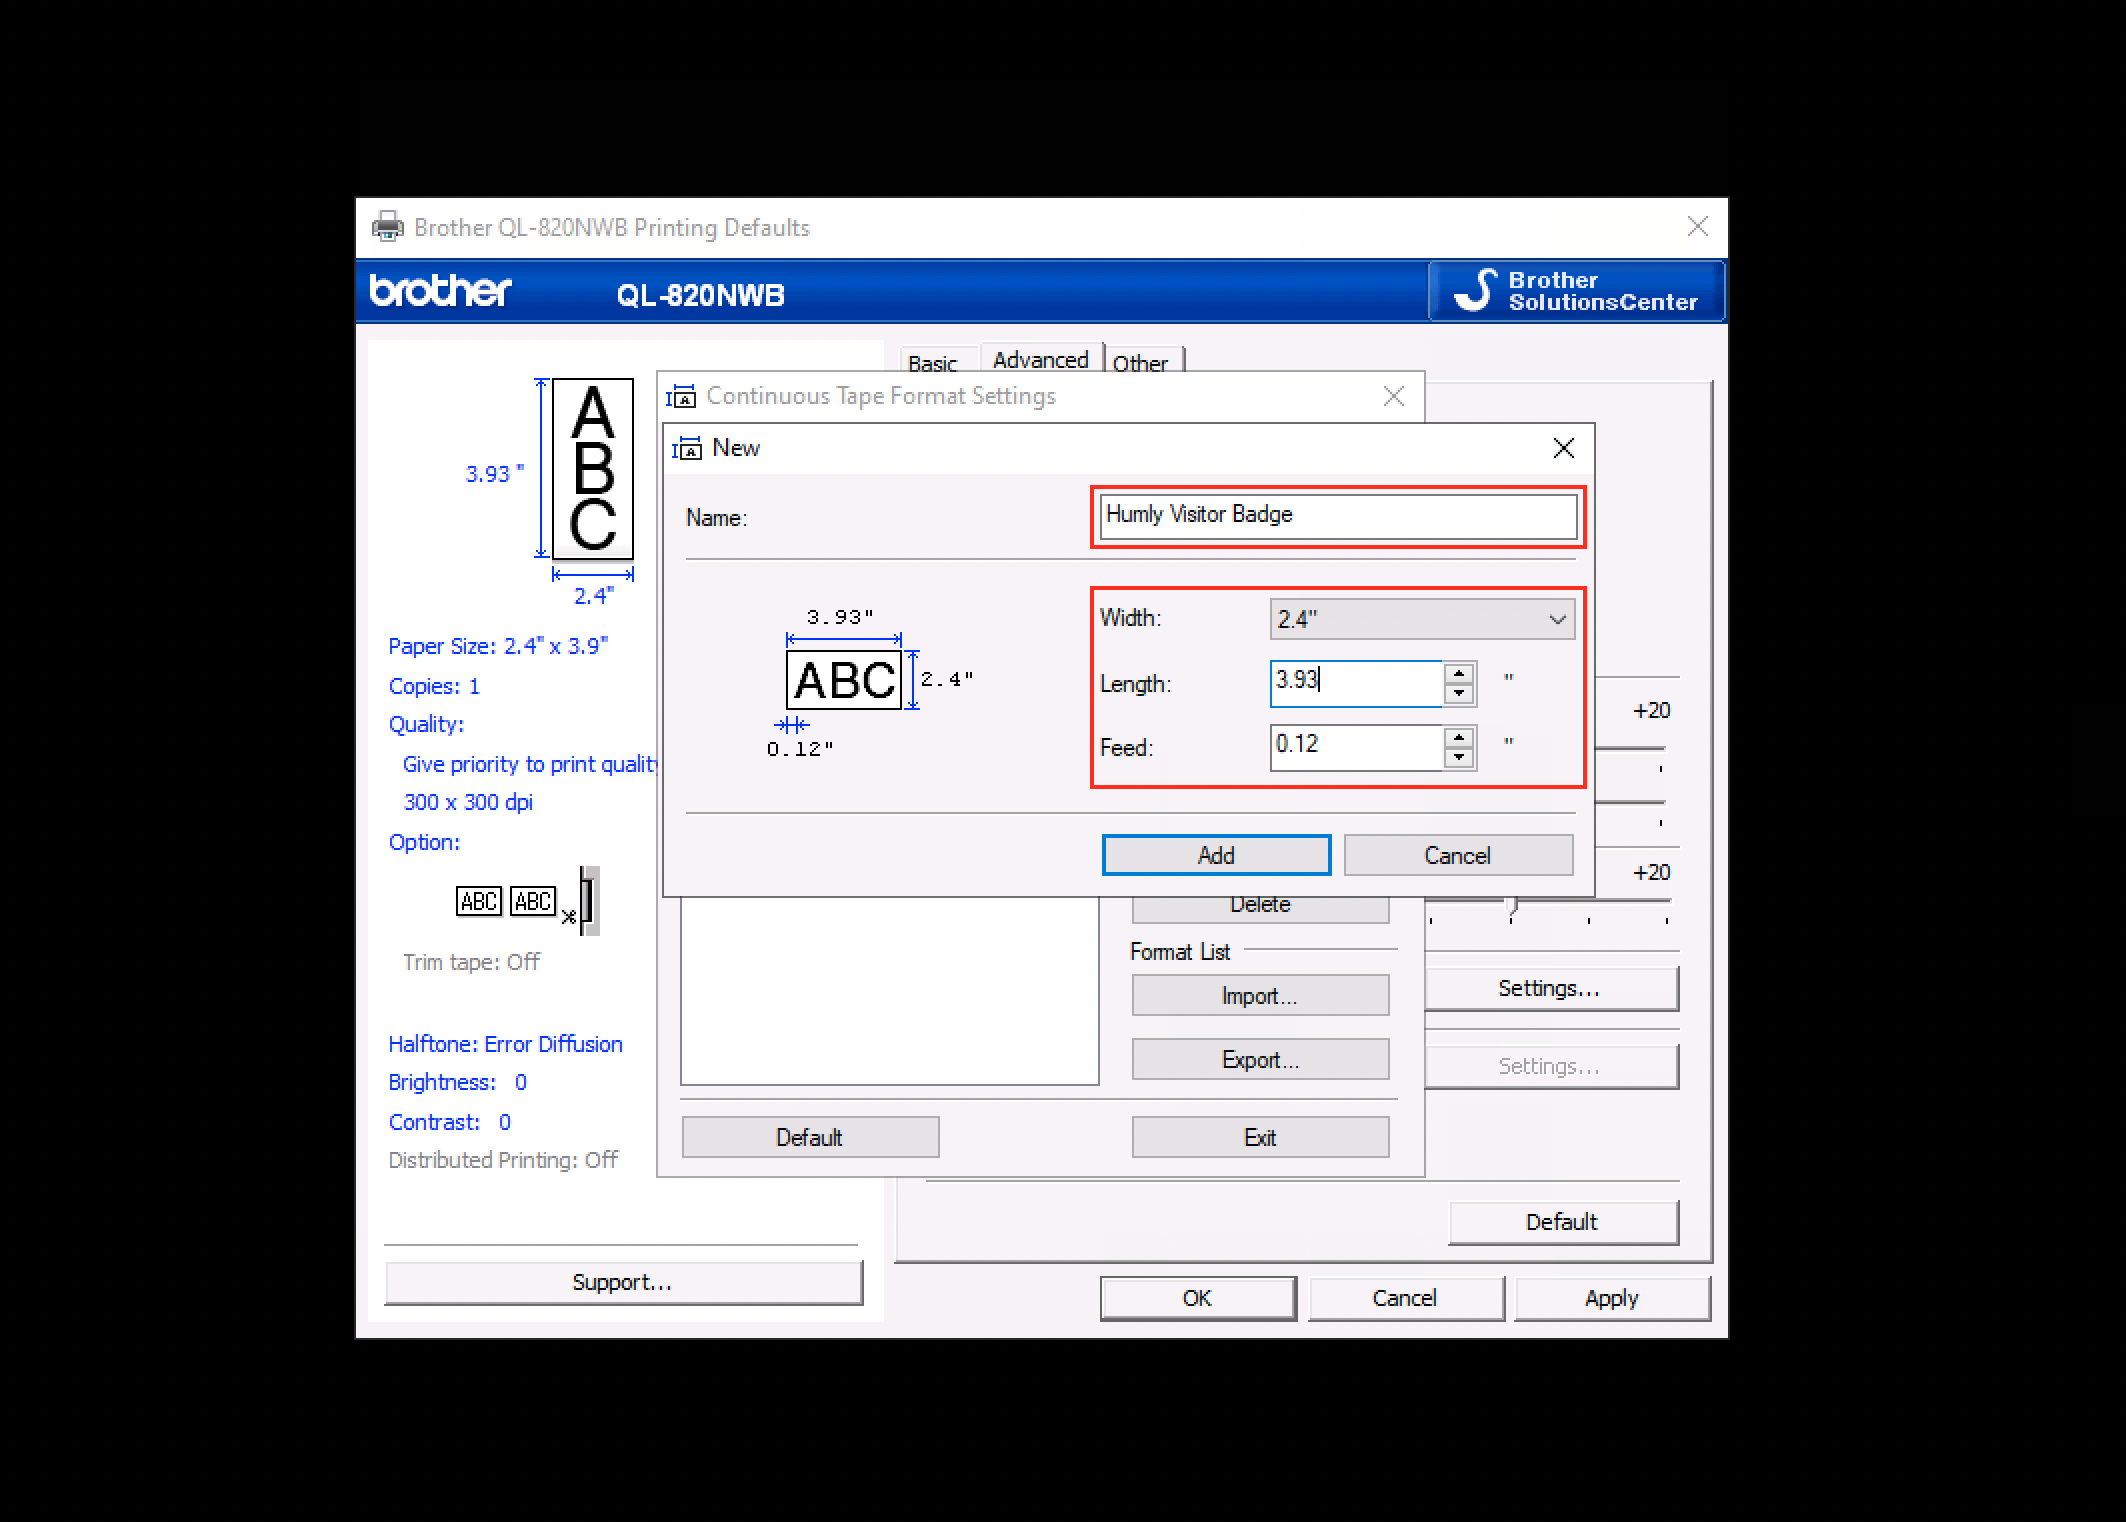
Click New… to create a new continuous tape format.

-
Give the continuous tape format a friendly and descriptive Name and set the Width, Length and Feed.
-
Width: 2.4”
-
Length: 3.93”
-
Feed: 0.12”
-
-
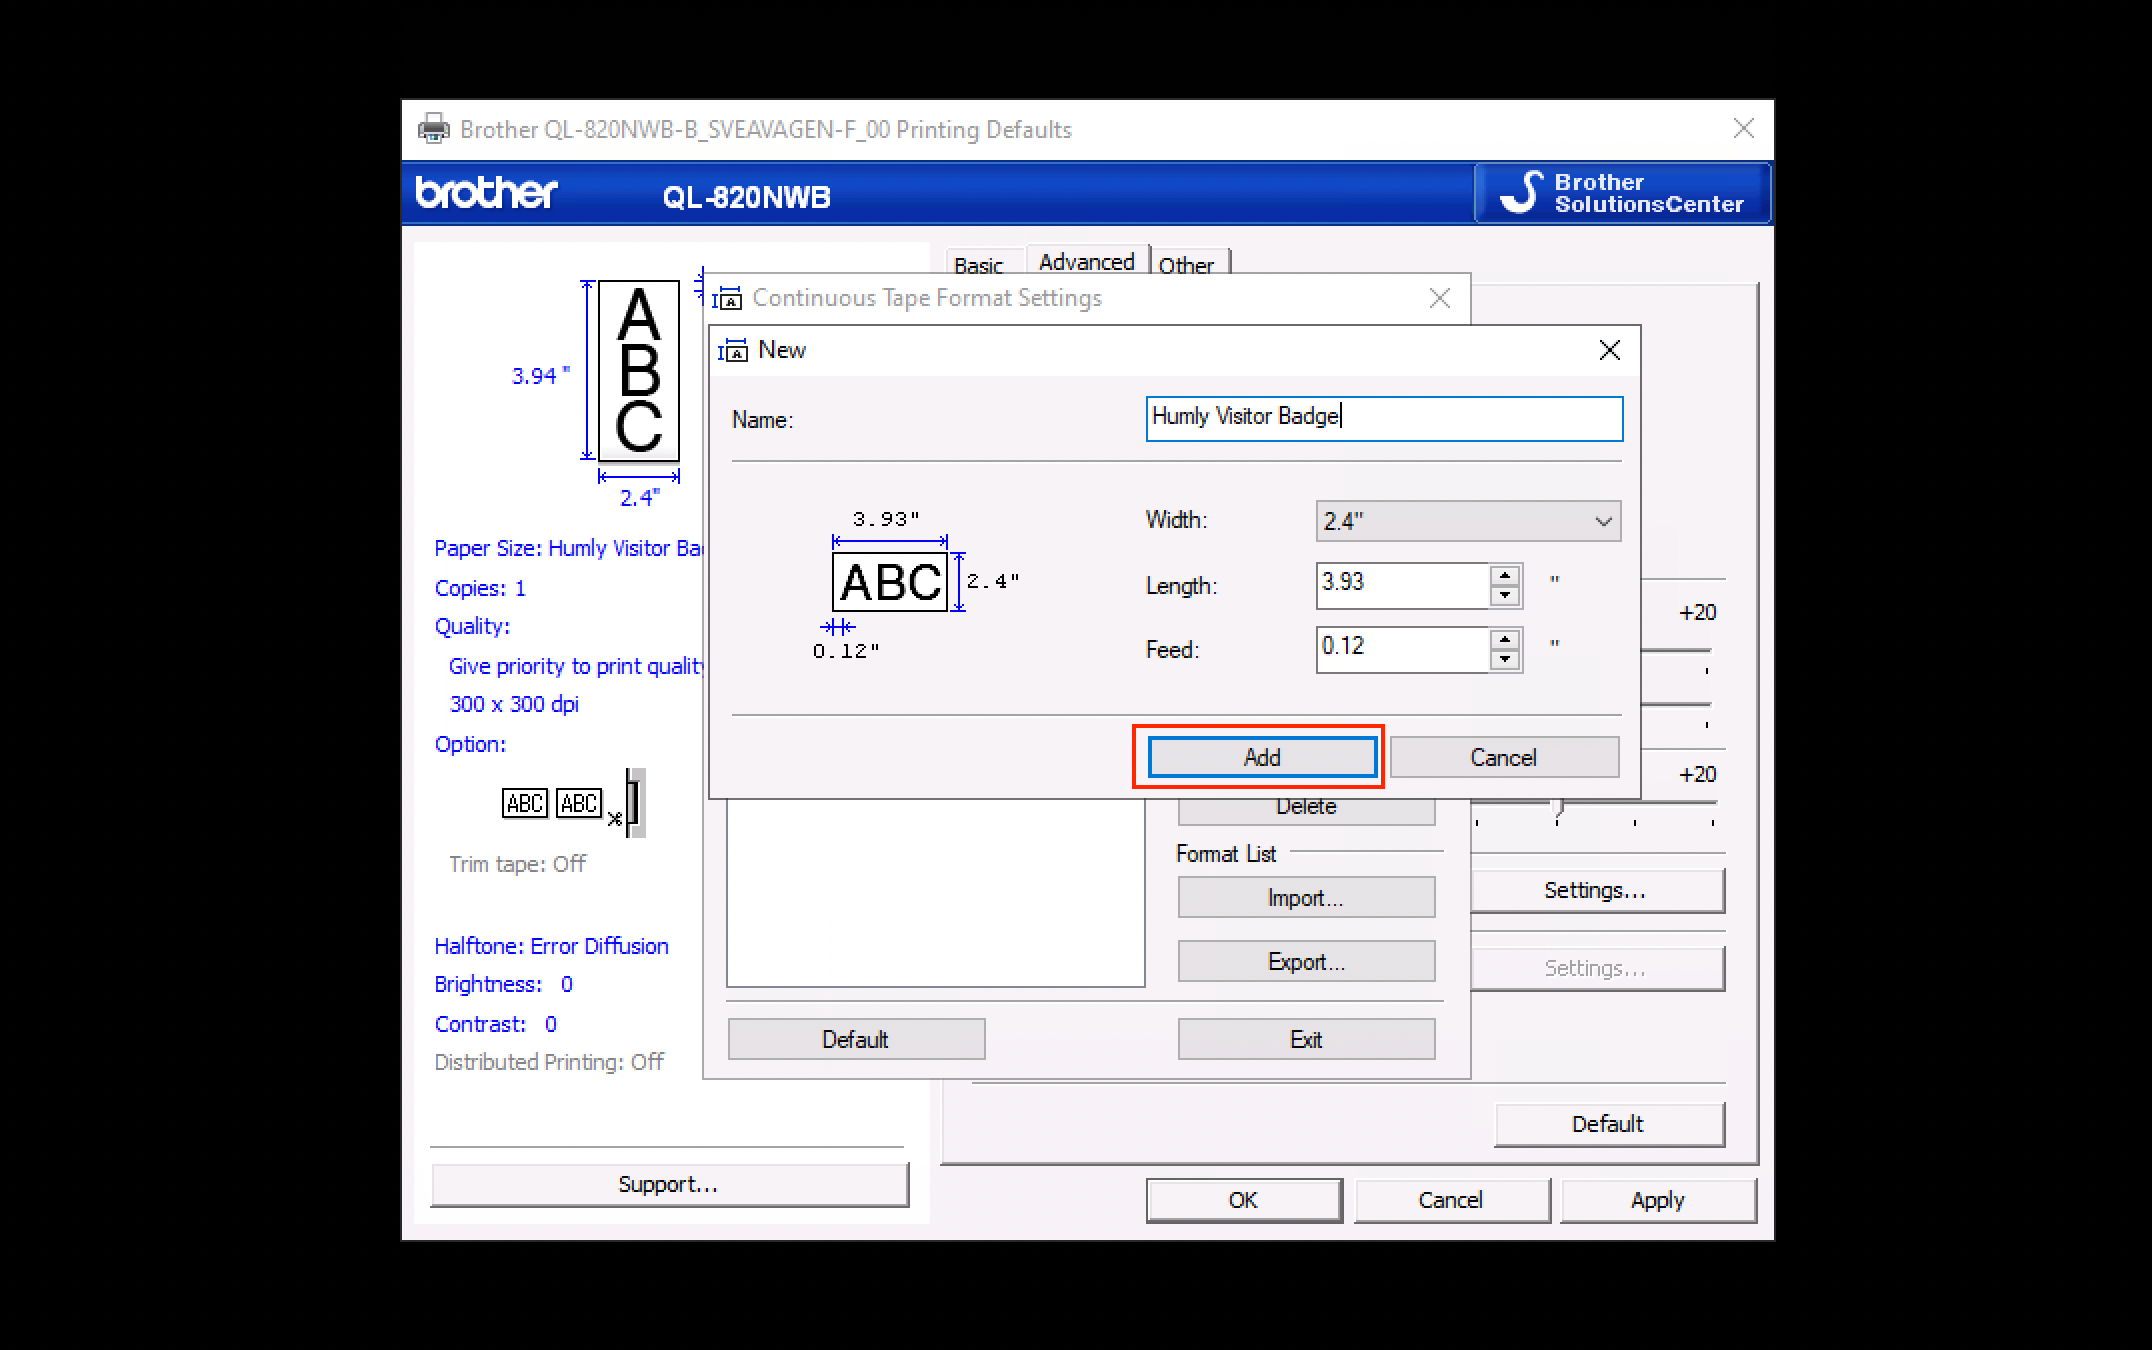
Click Add to create the custom continuous tape format.
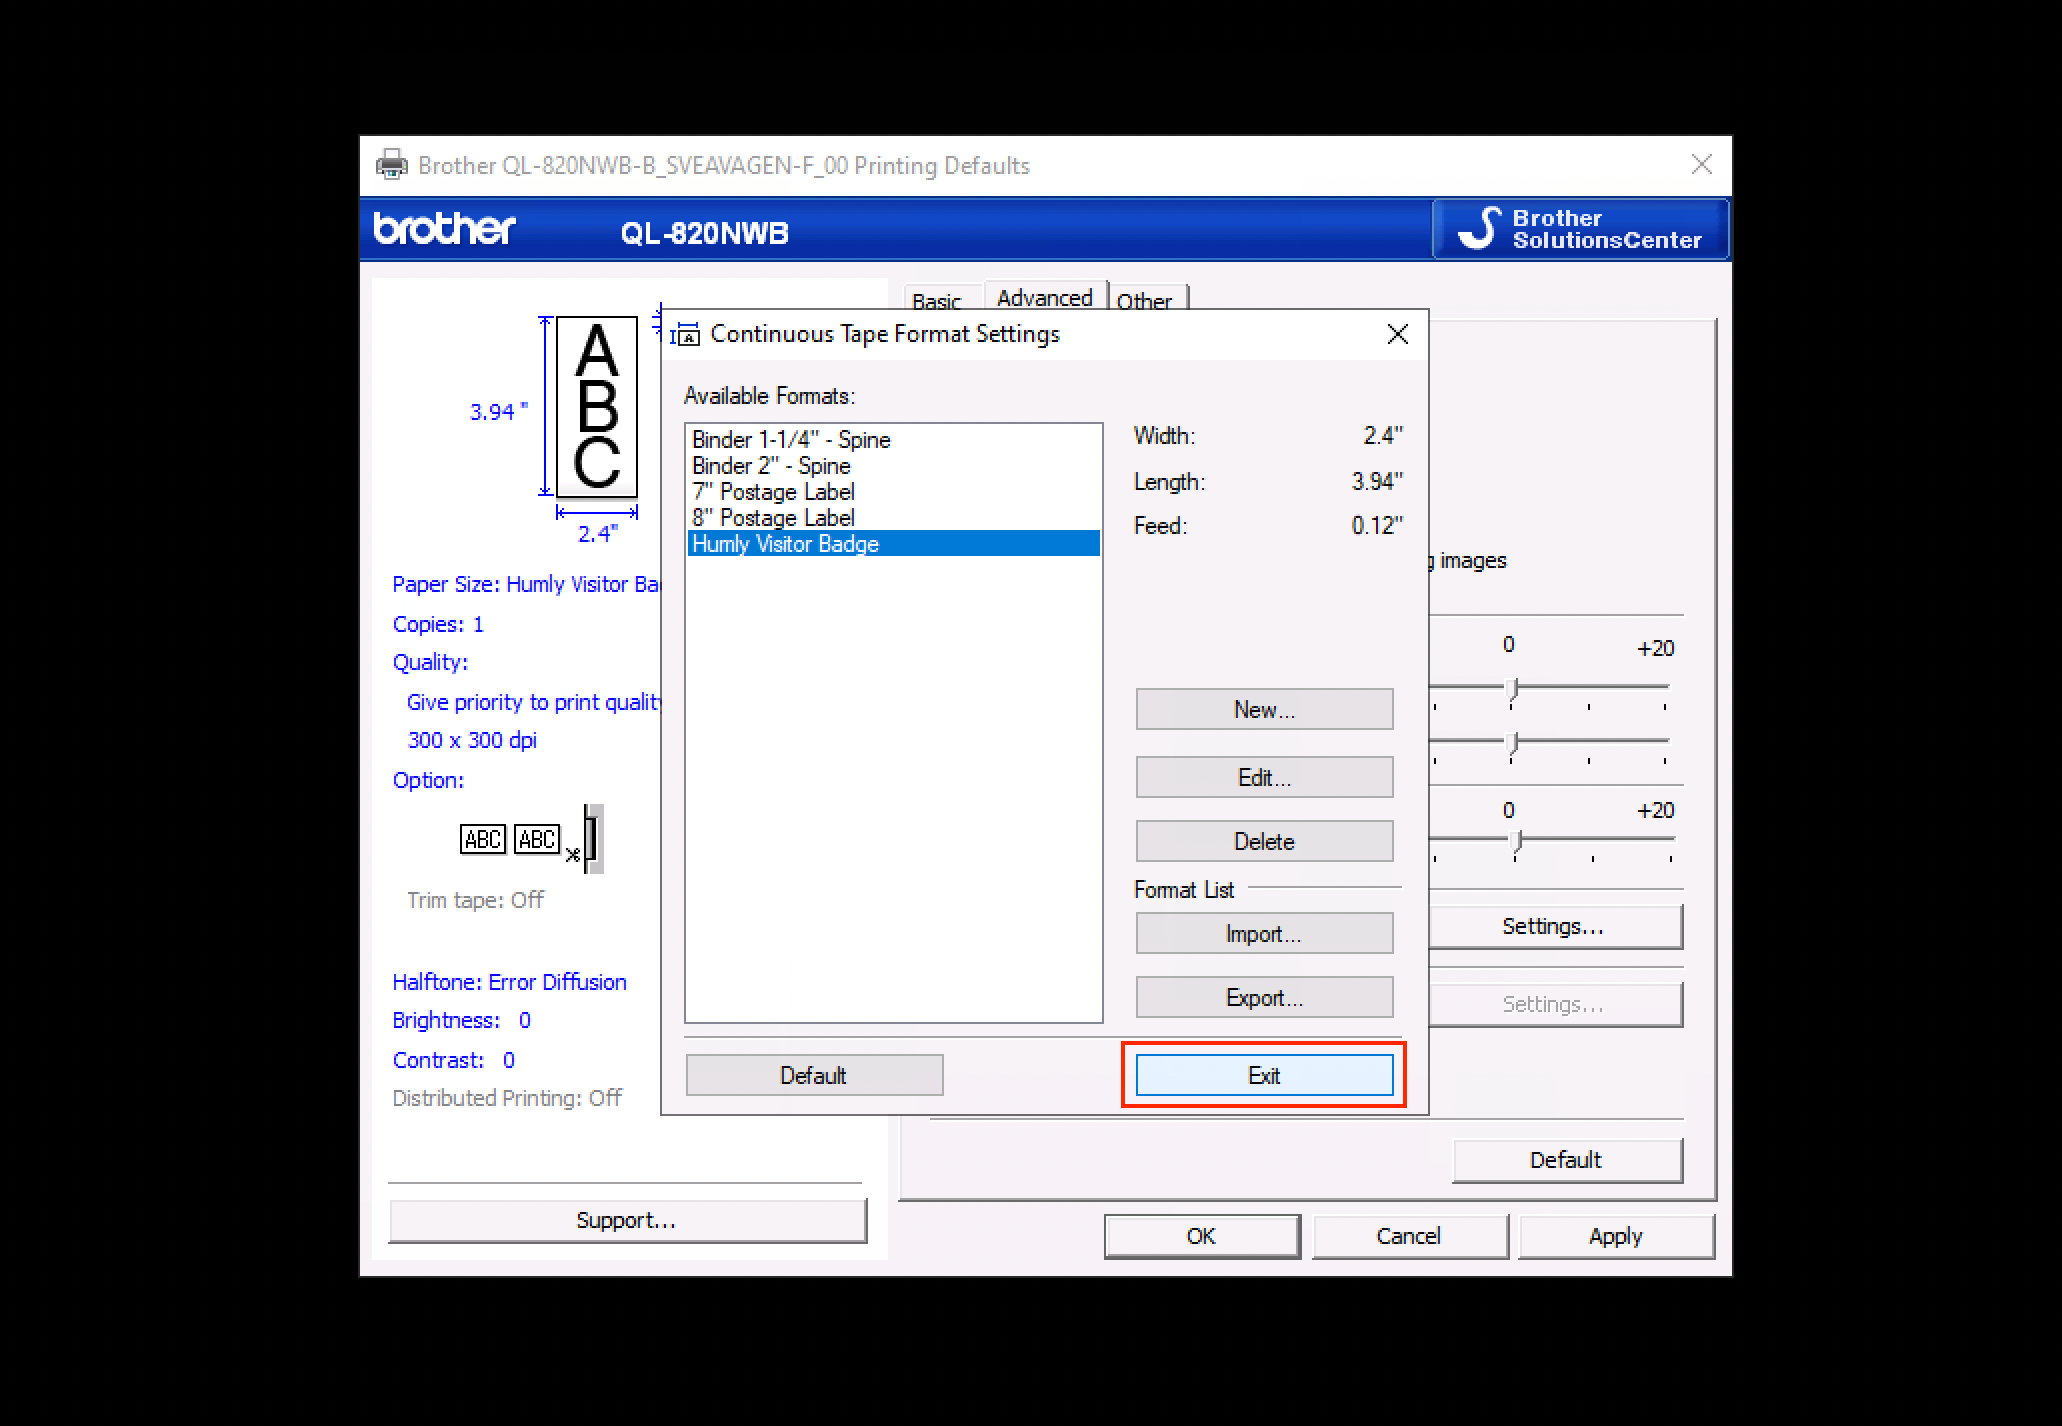
- Click Exit to return to Printing Defaults Settings and then click the Basic tab.
- On the Basic tab click Paper Size dropdown and select the custom continuous tape format that was created.
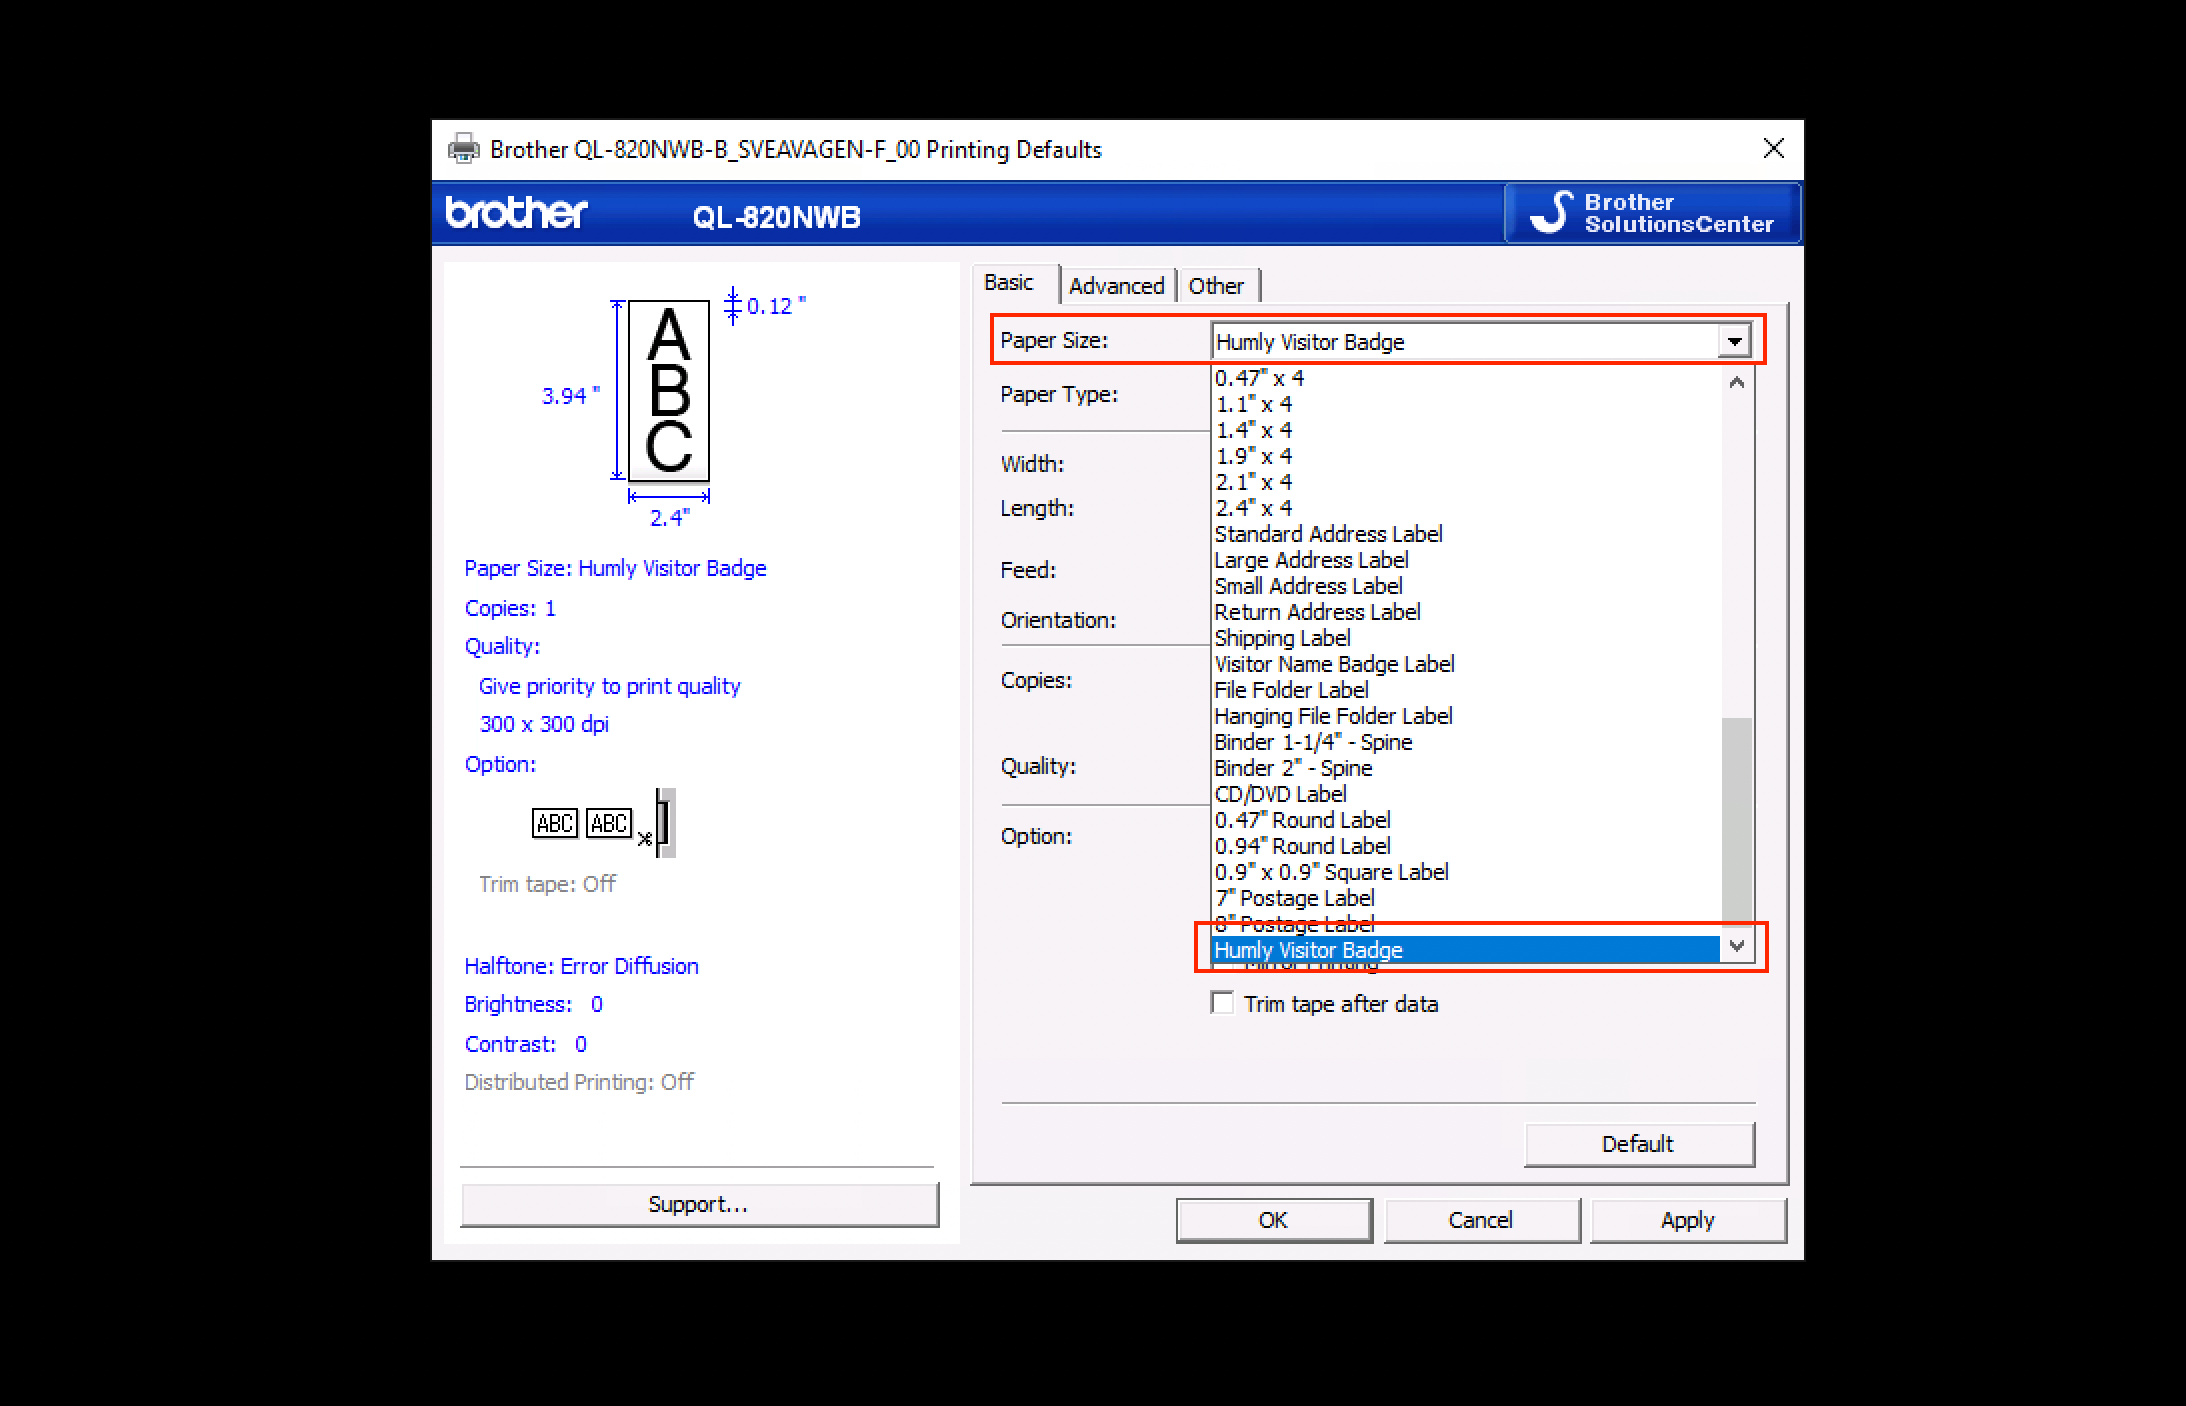
- Click OK to save the Default Print Settings for the Brother QL-820NWB visitor badge printer.

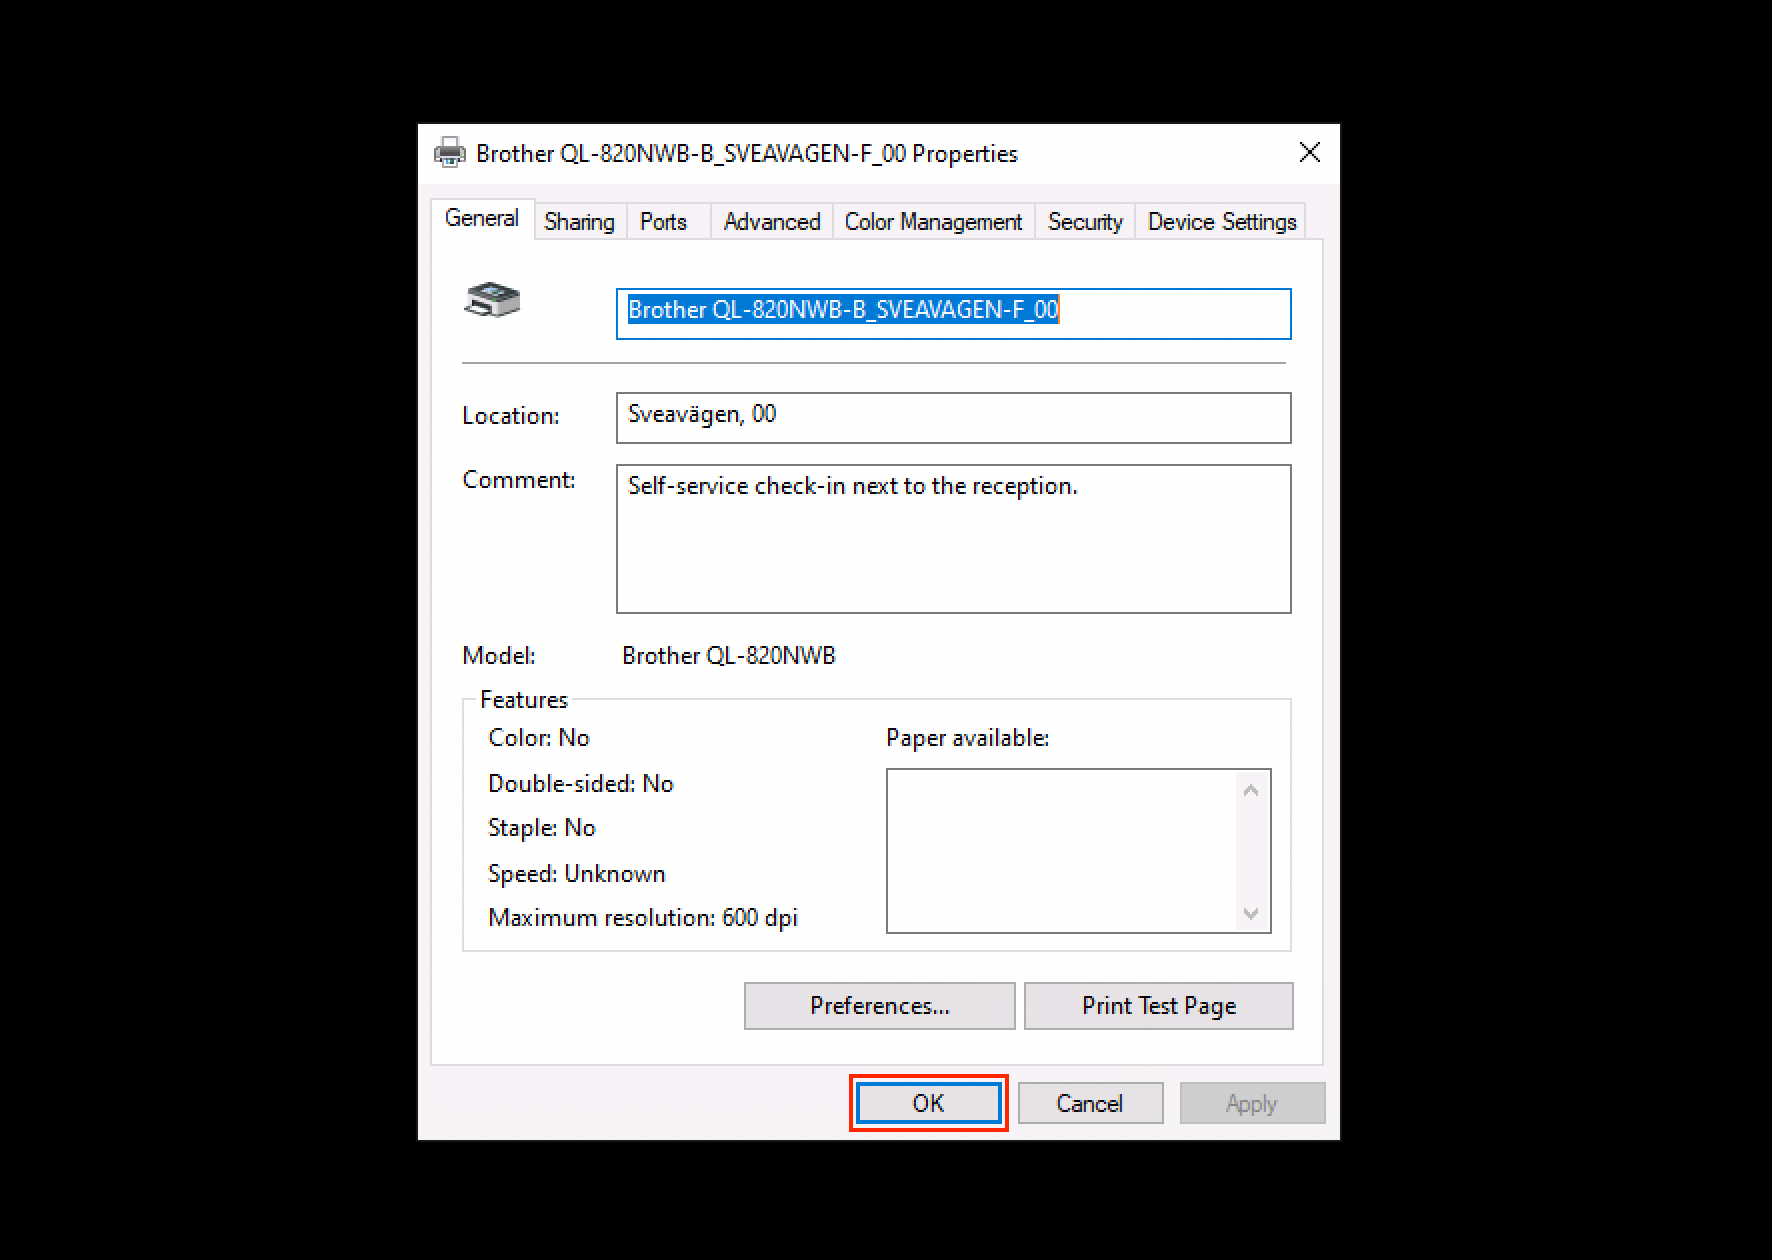
- Click the General tab and then Print Test Page to check that the printing works and the paper size that has been configured gets printed correctly.
- If everything works, click OK.
If printing doesn't work or if the print result isn't correct, please check this guide again and see if any settings are missing. Also, have a look at the official user guide for the Brother QL-820NWB for additional assistance and troubleshooting.
Landscape mode for printing badges are currently not supported from Humly. There are plans to implement this in the future, but for now, only portrait mode is the supported format.
Next...
Learn how to configure a Humly Visitor screen by following the How to Configure a Humly Visitor Screen.
Download and install the Humly Print Service so that visitor badges will be printed automatically by following the How to Configure Humly Print Service guide.