Table of contents
- Overview
- Before you start
- Select Standalone
- Email delivery
- Extra Global Admin
- Build Your Structure
- Add Users
- Switching to a calendar booking system
- Next Steps
- Troubleshooting
- Best practices
1. Overview
Standalone is Humly's built-in booking system. It works without syncing to an external calendar backend — there is no dependency on Microsoft 365, Google Workspace, Exchange, or Nexudus. All meeting data is stored in the Humly Control Panel, and rooms are booked through Humly Reservations or directly on the Humly Room Display. Standalone is available both on-premise and in the cloud.
2. Before you start
You can start with Standalone and connect a calendar booking system (Microsoft 365, Google Workspace, or Exchange) later. That change is one-way, once you move to a calendar system you cannot return to Standalone without a full reset of the Control Panel. See Switching to a calendar booking system later before you continue.
3. Select Standalone
Install the Humly Control Panel on-premise, or order a cloud deployment through your reseller. Open the web interface and select Standalone as your booking system.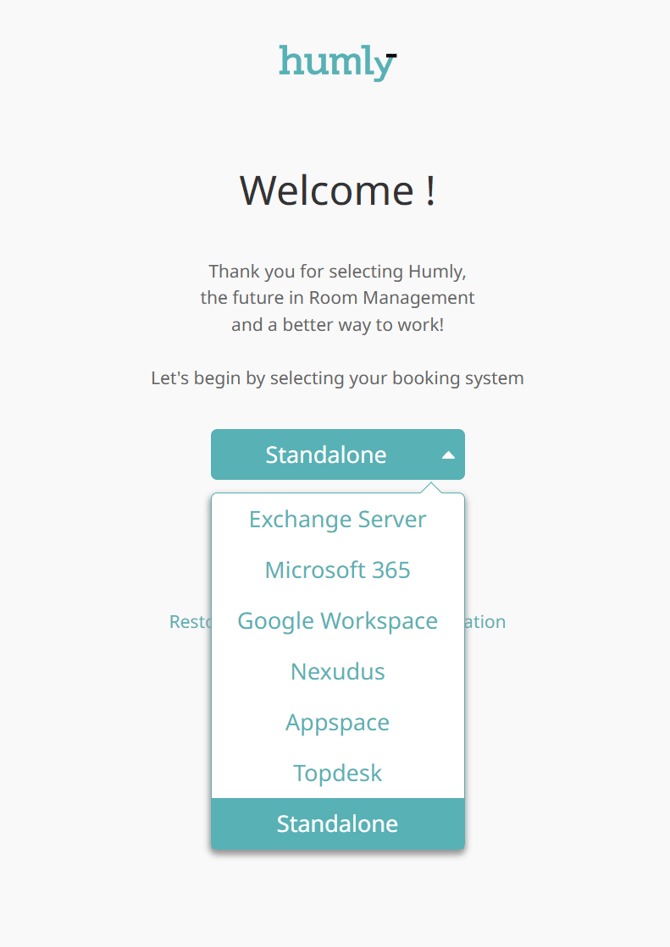
4. Email delivery
The Control Panel sends email for features such as check-in reminders, equipment reports, and user account credentials. You have two options.
Humly Cloud email (default, recommended)
New Standalone installations use the Humly Cloud email service by default. No SMTP setup is required. Leave Use Humly Cloud email service checked. Emails are sent from noreply@humly.com.
Humly Cloud email requires the Control Panel to reach the Humly Cloud service over the internet. On an isolated network with no outbound access, use custom SMTP instead.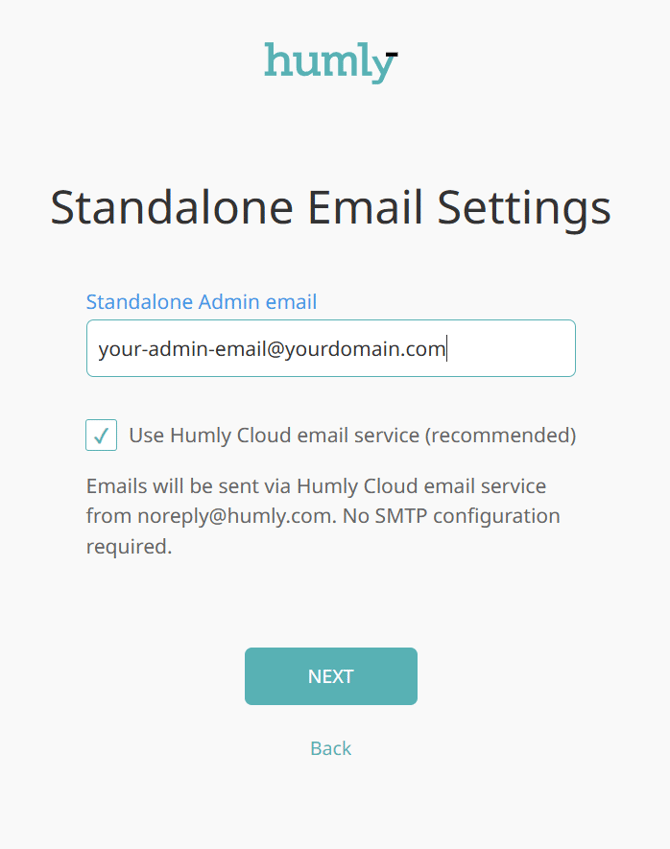
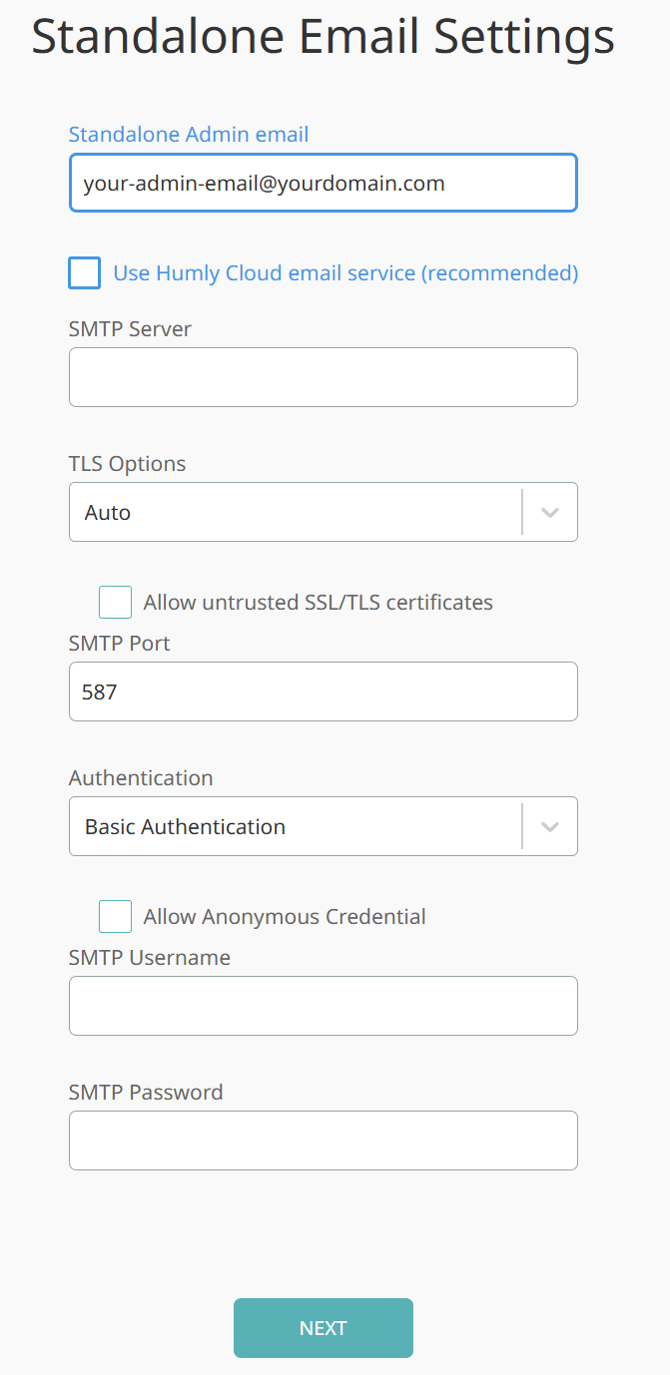
Custom SMTP (optional)
If your organization requires its own mail server, uncheck Use Humly Cloud email service to show the SMTP fields. The credentials are tested when you save.
- Admin email: global administrator account for the Control Panel
- SMTP server: service address
- TLS option: Auto (default), Force SSL/TLS, STARTTLS, or Unencrypted
- Allow anonymous credentials toggle (default: disabled)
- SMTP username: account used to send all Control Panel email; requires an existing mailbox
- SMTP password: account credentials
Multifactor Authentication(MFA) must be disabled for the SMTP user otherwise authentication with the SMTP server will fail
Using Microsoft 365 with modern authentication (OAuth 2.0)
If your mail server is Microsoft 365, we recommend modern authentication instead of basic SMTP credentials. Microsoft is deprecating Basic Authentication for Exchange Online SMTP, and it will be disabled by default by the end of 2026. To configure Microsoft 365 SMTP with OAuth 2.0, follow the dedicated guide: Standalone SMTP – Microsoft 365 (OAuth 2.0).
Already running Standalone with SMTP? Your existing SMTP configuration is preserved on upgrade and continues to work unchanged. You can switch to Humly Cloud email any time in Global Settings → Service Account.
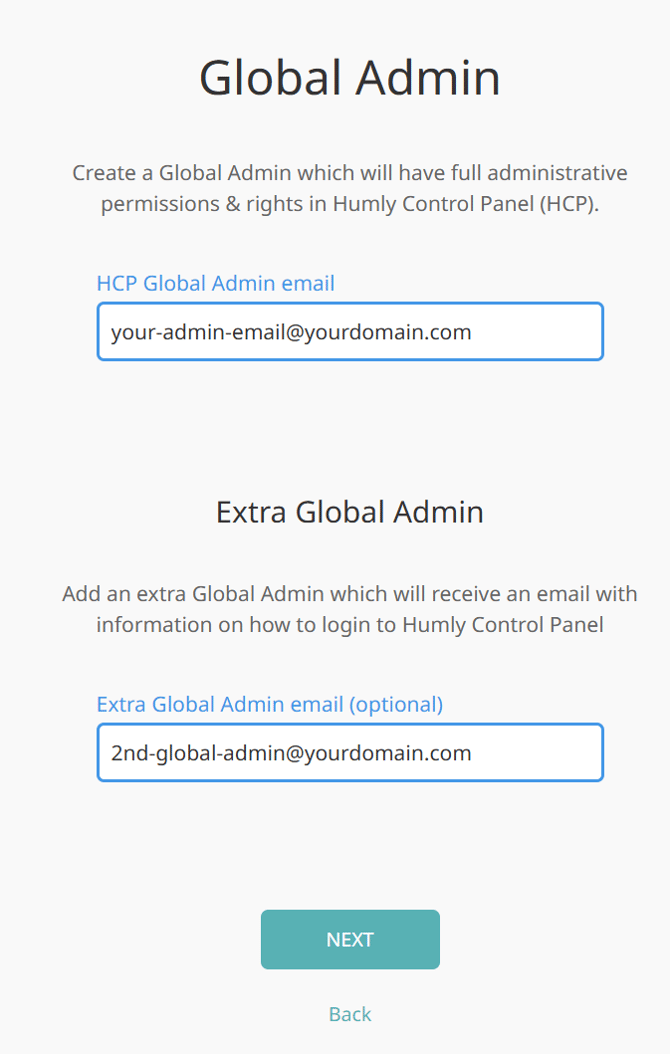
5. Extra Global Admin
You can configure Humly Control Panel with an extra global admin account (Optional).
6. Build your structure
Create your organizational structure by adding Country, City, Building, and Floor levels. Then assign rooms to the structure using drag-and-drop.
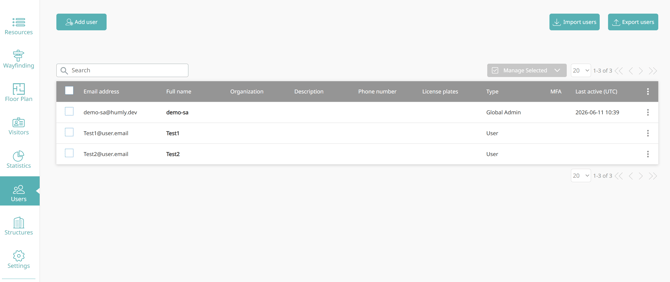
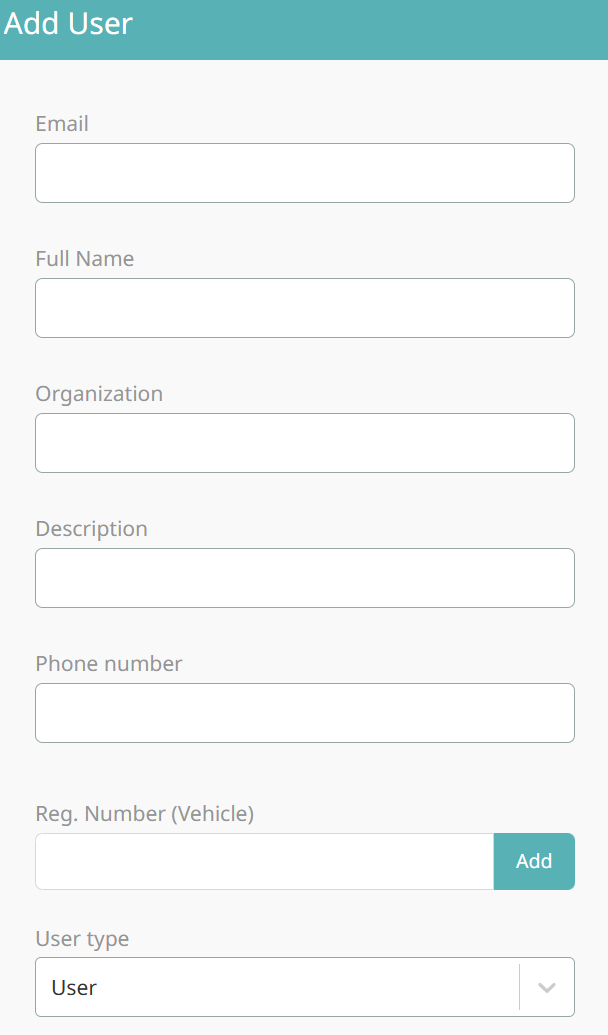
7. Add users
Go to the Users section and select Add user. Login credentials are generated automatically and sent to each new user by email.
8. Switching to a calendar booking system later
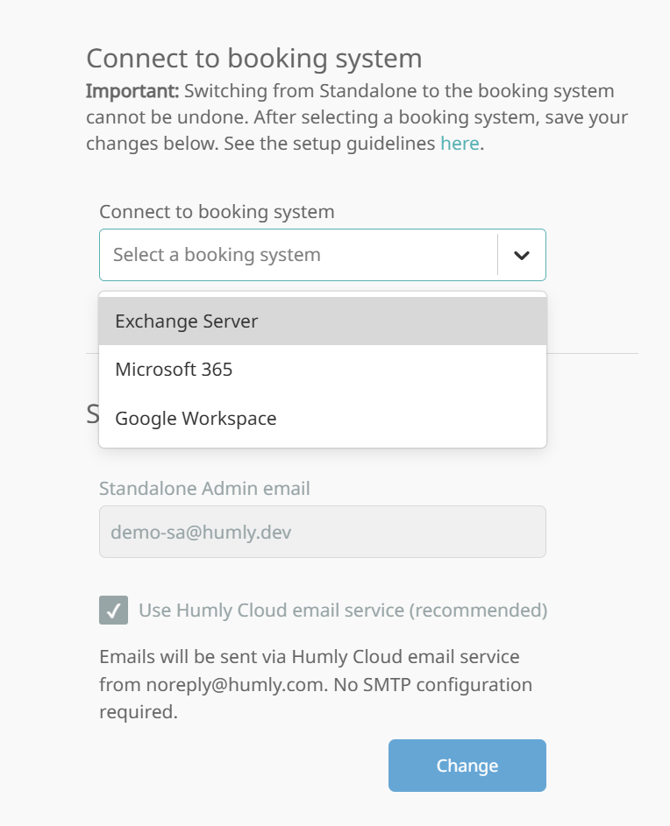
You can connect a calendar booking system after running on Standalone. Supported targets are Microsoft 365, Google Workspace, and Exchange. No reinstall is required.
To switch:
- Go to Global Settings and select Microsoft 365, Google, or Exchange.
- Enter the credentials for that system. See the setup guide for your chosen system.
- Save. Your rooms are then synced with the connected calendar system.
This change is one-way. Once a calendar system is connected, you cannot return to Standalone without a full reset of the Control Panel, which erases all data. Decide deliberately before switching.
What happens to your data: Existing bookings are kept. For Microsoft 365 resources, bookings are synced with the mailboxes in Microsoft 365, Standalone resources are synced only in Humly Systems and not pushed to any backend.
What happens to email: After switching, the Control Panel sends its email through the connected calendar system's account. The Humly Cloud email and Standalone SMTP settings no longer apply.
9. Next steps
The next step is to add users that should be able to book rooms. Head over to Users in the Humly control panel and Add user. When a user is added to Humly control panel then login credentials will be generated and sent out through email to the added user.
Everything is done and you can proceed with connecting the Humly devices and continue to Humly reservation - Users guide, to better understand how to book rooms and edit meetings
10. Troubleshooting
-
No emails are being received (Humly Cloud email). Confirm the Control Panel has outbound internet access to the Humly Cloud service. On isolated networks, switch to custom SMTP. Check that the recipient address is correct and review the Control Panel logs for email send errors.
-
Emails go to spam, or are sent from an unexpected address. Humly Cloud email is sent from noreply@humly.com. Ask recipients to allow this address. If you require email from your own domain, use custom SMTP.
-
Custom SMTP fails to verify when saving. Check the SMTP server address, port, and TLS option. Confirm the username has an existing mailbox and the password is correct. Make sure MFA is disabled for the SMTP user. For Microsoft 365, use the OAuth 2.0 method rather than basic credentials.
-
Users are not receiving their login credentials. This is an email delivery issue. Verify email delivery using the steps above, then re-send the credentials from the Users section.
-
Devices will not pair. Confirm you are using the current pairing key and that the device can reach the Control Panel. Regenerate the pairing key from Global Settings if needed.
-
I switched to a calendar system and want to go back to Standalone. Switching is one-way. Returning to Standalone requires a full reset of the Control Panel, which erases all data. Contact your reseller before performing a reset.
11. Best practices
- Keep the default Humly Cloud email unless your organization requires its own mail server. It needs no setup and avoids SMTP configuration issues.
- Use OAuth 2.0 for Microsoft 365 rather than basic SMTP credentials, as Basic Authentication is being phased out.
- Record the pairing key and admin password in a secure location during setup.
- Decide on your booking system before going live. Moving from Standalone to a calendar system is one-way, so plan it deliberately rather than as a trial.
- Plan the calendar switch during a maintenance window so room sync completes before users rely on bookings.
- Use a dedicated mailbox for custom SMTP rather than a personal account.