Humly Desk Booking is available in the Humly Control Panel and allows users to book desks from Humly Reservations. To use this feature in the Humly Control Panel a license key is needed.
For now, this version of Humly Desk Booking only supports booking system backend Exchange , Office 365 and Standalone (SMTP).
The preparation in the calendar system follows the same steps as described in the booking system preparation in the getting started section. Regarding Desk Booking the compatible booking system is Exchange, Office 365 and Google Workspace.
Office 365
To prepare the booking system for Desk Booking you can follow the first steps in Booking System Preparation - Office 365 to create a service account and create room/desk mailboxes. To create desk mailboxes you will follow the exact same steps as in creating room mailboxes.
Create Room/Desk mailboxes
A "Room or desk mailbox" can also be called resource mailbox. It is the calendar that is being used to book the room/desk, for example from Outlook.
Note that it is called "Room mailbox" in the admin center, but it is also used for desks.
Humly Control Panel will sync the data of the room/desk mailboxes calendars so the desk booking will be populated via HCP to the Desk Booking application.
To Create Room/Desk mailbox, follow the below steps.
- Go to https://admin.exchange.microsoft.com/#/homepage and login with your admin account
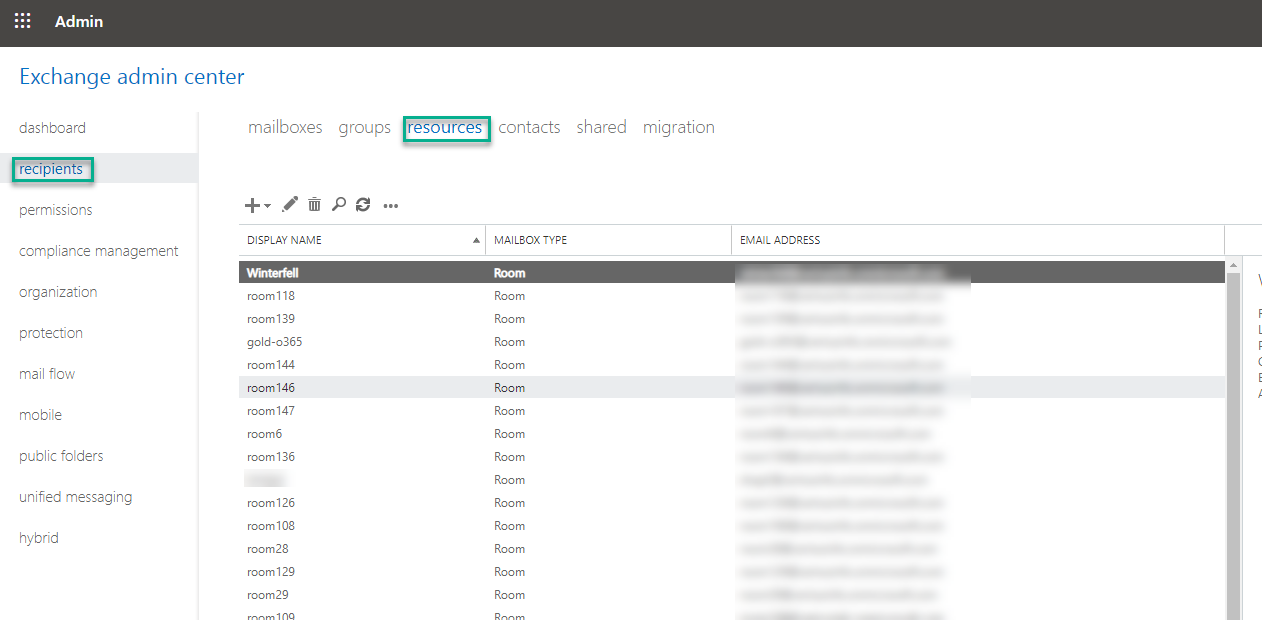
- From the Exchange admin center, navigate to Recipient and then click on Resources
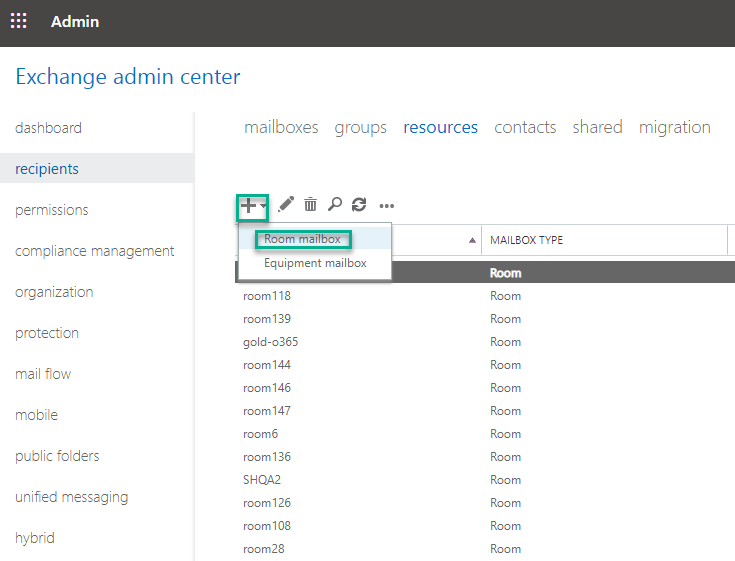
- Select Add and choose Room mailbox
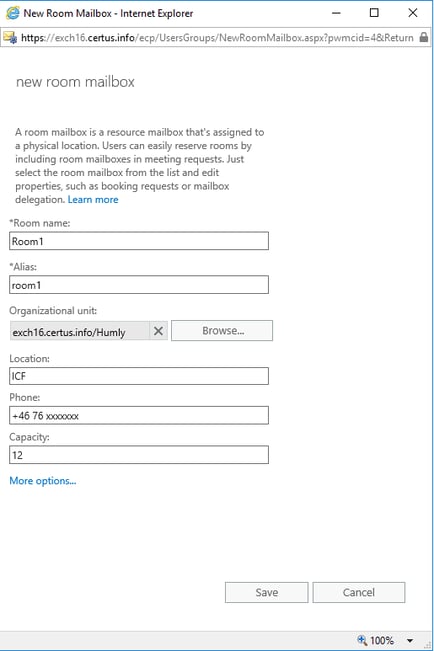
- Enter the "Desk Name" and specify the resource account's "Email address". Optionally add a "Location" and enter the "Capacity" (for a desk enter capacity one participant) and continue by clicking Save.

- It is highly recommended to configure the resource account with the below cmdlet using Windows PowerShell:
Set-CalendarProcessing room1@domain.com -AutomateProcessing AutoAccept -AddOrganizerToSubject $False -DeleteComments $False -DeleteSubject $False -RemovePrivateProperty $false - If you want to create more resources, repeat the above steps.
Create Room/Desk List Using PowerShell
Creating Room/Desk Lists is an optional step, however, it will enhance the experience for the outlook users and make it easier for them to find available rooms. In Addition, you can import a room list to HCP which might have many rooms.
The below commands will help you to create a single room list and then add rooms, or create a single room list that holds all existing rooms in one go in Office 365 using Windows PowerShell:
- Creates a new room list named “HCP Demo”:
New-DistributionGroup -Name "HCP Demo" -RoomList - Add the room mailbox we have created in the previous step “the-lab@certus.info” to the new room list “HCP Rooms”
Add-DistributionGroupMember -Identity "HCP Demo" -Member the-lab@certus.info - Steps one and two can be replaced based on the user need by one command to create the room list and add the members directly.
New-DistributionGroup -Name "Roomlist-name" -Members room1@domain.com,room2@domain.com,room3@domain.com - Now the Room mailbox is ready to be used, to get all room lists from PowerShell please use the below command.
Get-DistributionGroup | Where { $_.RecipientTypeDetails -eq "RoomList" } | Format-Table DisplayName, Identity, PrimarySmtpAddress
To prepare the Exchange Server booking system for Desk Booking you can follow the first steps in Booking System Preparation - Exchange Server to create a service account and create resource accounts (room/desk mailboxes). To create desk mailboxes you will follow the exact same steps as in creating room mailboxes.
Create resource accounts/desk accounts
A "resource account" or "room/desk mailbox" is the calendar used to book the room or desk via e.g. Outlook and the calendar which HCP will synchronize data with. One resource account per desk is necessary.
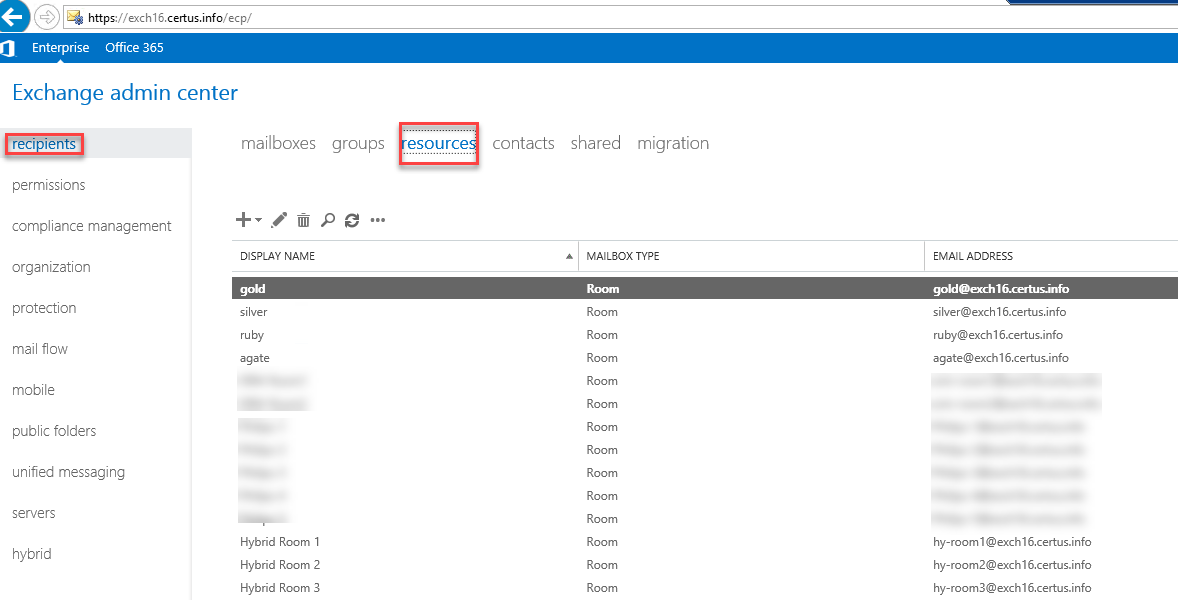
- Open Exchange admin center, and navigate to "Recipients" >, "Resources"
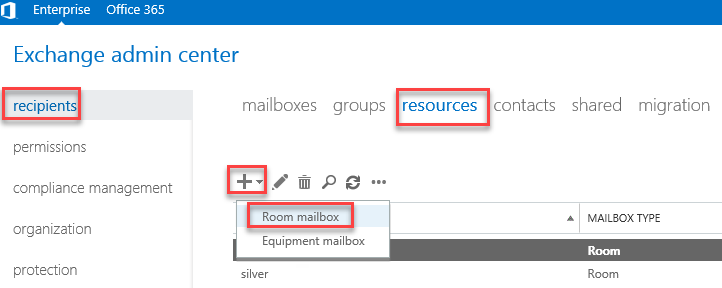
- Click the "+" and select "Room mailbox".
- Enter the "Room name" and specify the resource accounts "Email address". Optionally add a "Location" and enter the "Capacity" and continue by clicking "Save".
- The created resource account should now appear in the list of resources.

- We recommend you configure the resource account with the below cmdlet using the Exchange Management Shell:
Set-CalendarProcessing room1@domain.com -AutomateProcessing AutoAccept -AddOrganizerToSubject $False -DeleteComments $False -DeleteSubject $False -RemovePrivateProperty $false
Create Room Lists/Desk Lists using the Exchange Management Shell
Desk lists help you to organize your desks. If your company has several buildings with desks that can be booked, it might help to create a desk lists per building or even per floor.
Desk lists are specially marked distribution groups that you can use the same way you use distribution groups. In the Humly Control Panel you can import desk lists which makes it a convenient way to add your rooms.
The below commands will help you to create a single desk list and then add desks, or create a single desk list that holds all existing desks in one go using the Exchange Management Shell:
- Creates a new room list named “My Rooms”. (For desks follow the same procedure, but rename it).
New-DistributionGroup -Name "My Rooms" -RoomList - Add a resource account (room1@domain.com) to an existing room list (My Rooms).
Add-DistributionGroupMember -Identity "My Rooms" -Member room1@domain.com - Fetches all resources (room mailboxes) and puts them in a single new room list named My Rooms:
$RoomAlias = Get-Mailbox -RecipientTypeDetails RoomMailbox | select -ExpandProperty Alias New-DistributionGroup -RoomList -Name "My Rooms" -Members $RoomAlias - Displays a table of all room lists.
Get-DistributionGroup | Where { $_.RecipientTypeDetails -eq "RoomList" } | Format-Table DisplayName, Identity, PrimarySmtpAddress
Create &, Configure Resource/Desk Calendars
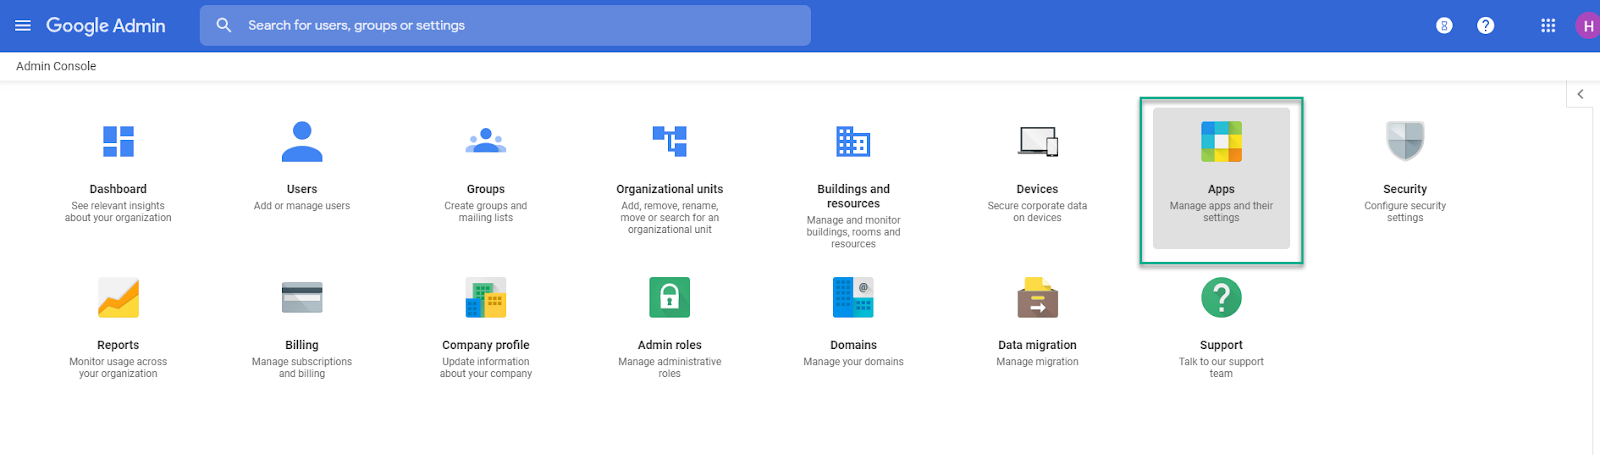
- To configure the global resource sharing and create a new resource, navigate to https://admin.google.com then select “Apps”
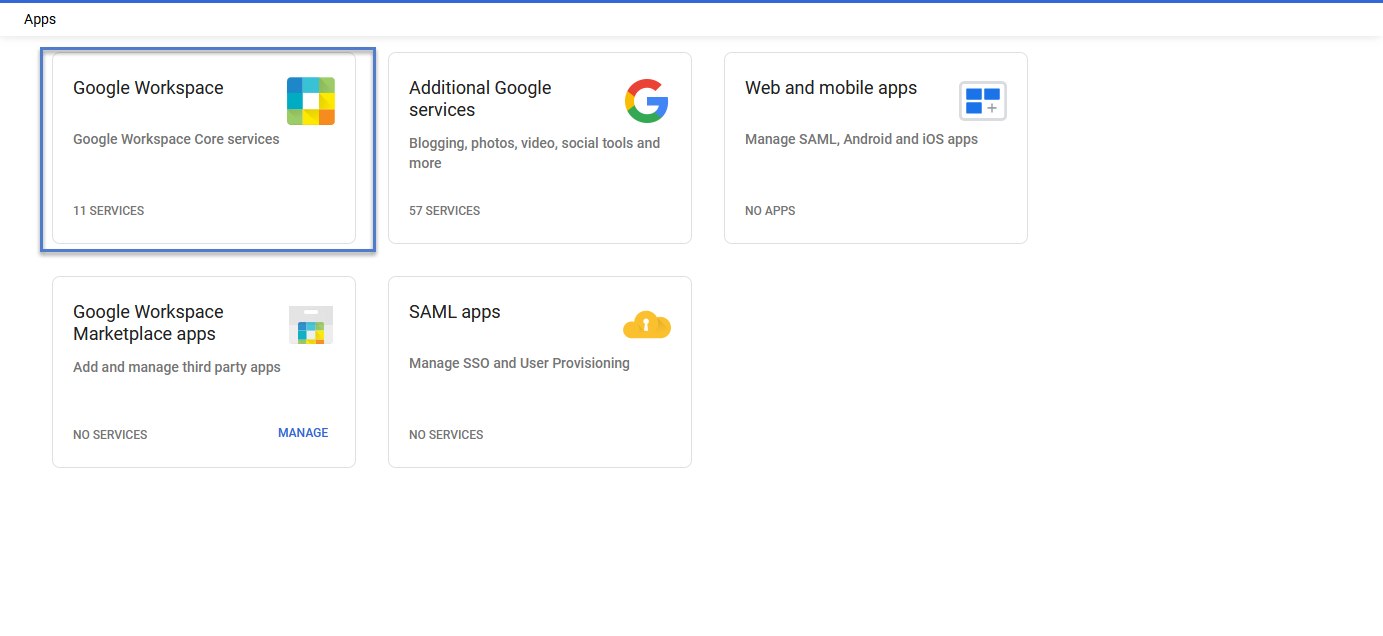
- From the Apps page, select Google Workspace then Calendar

- Select External Sharing option, set external sharing options for primary calendars to "only free/busy information"


- The next step is to Create one or more calendar resources, to do so, navigate to “Resources”.

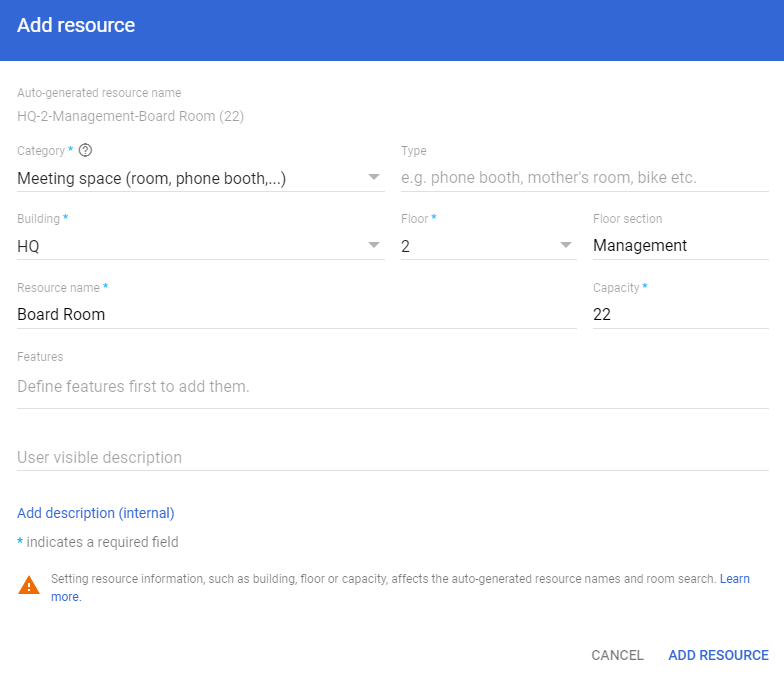
- Click “Create a new resource” create building then create desks.
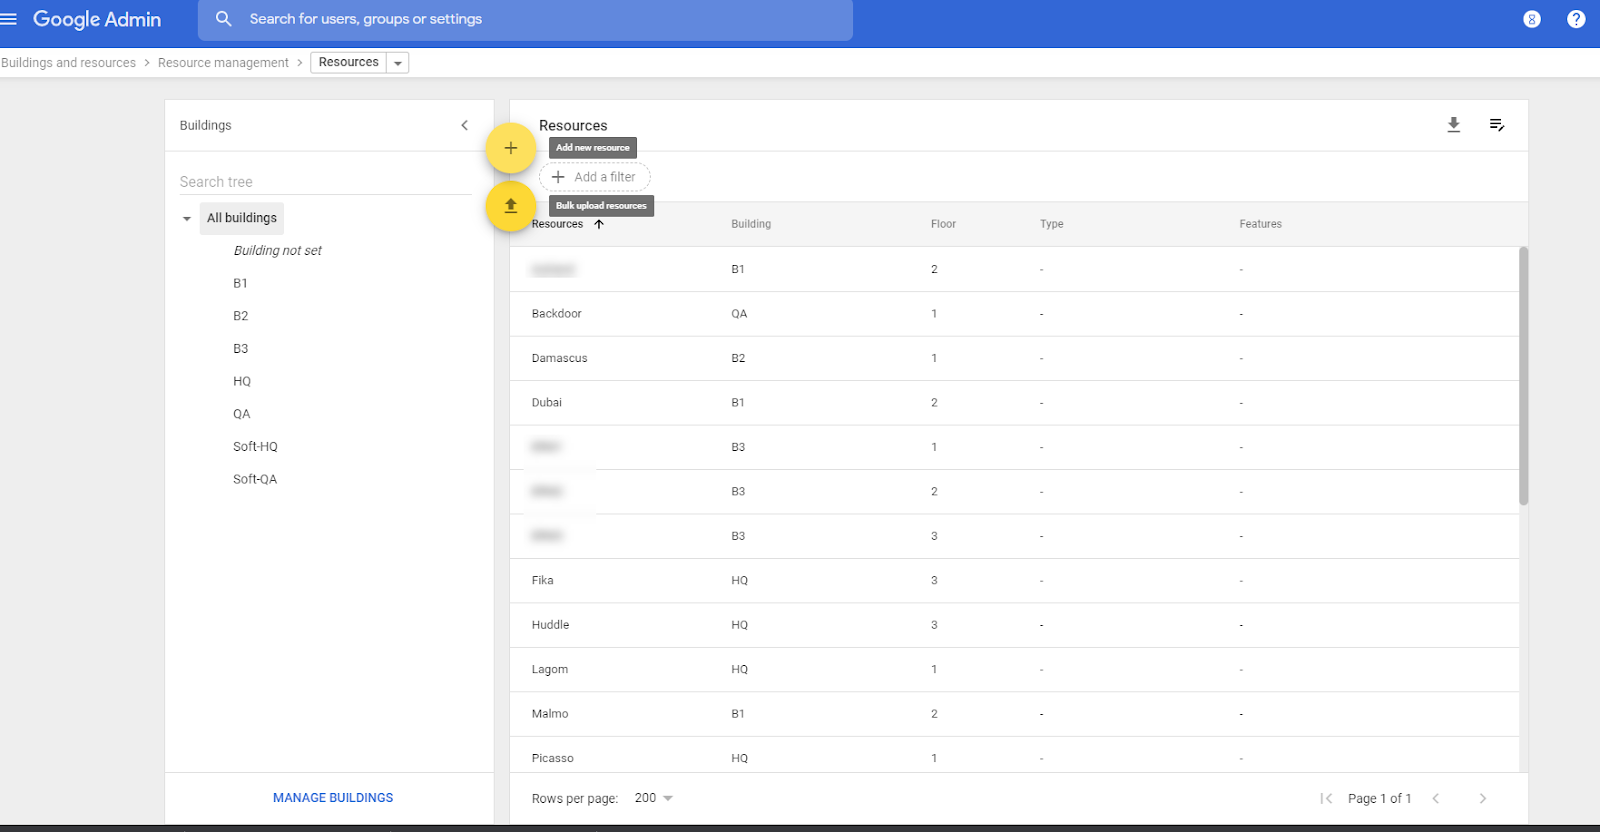
- Add the details for your resource and then "Add Resource".
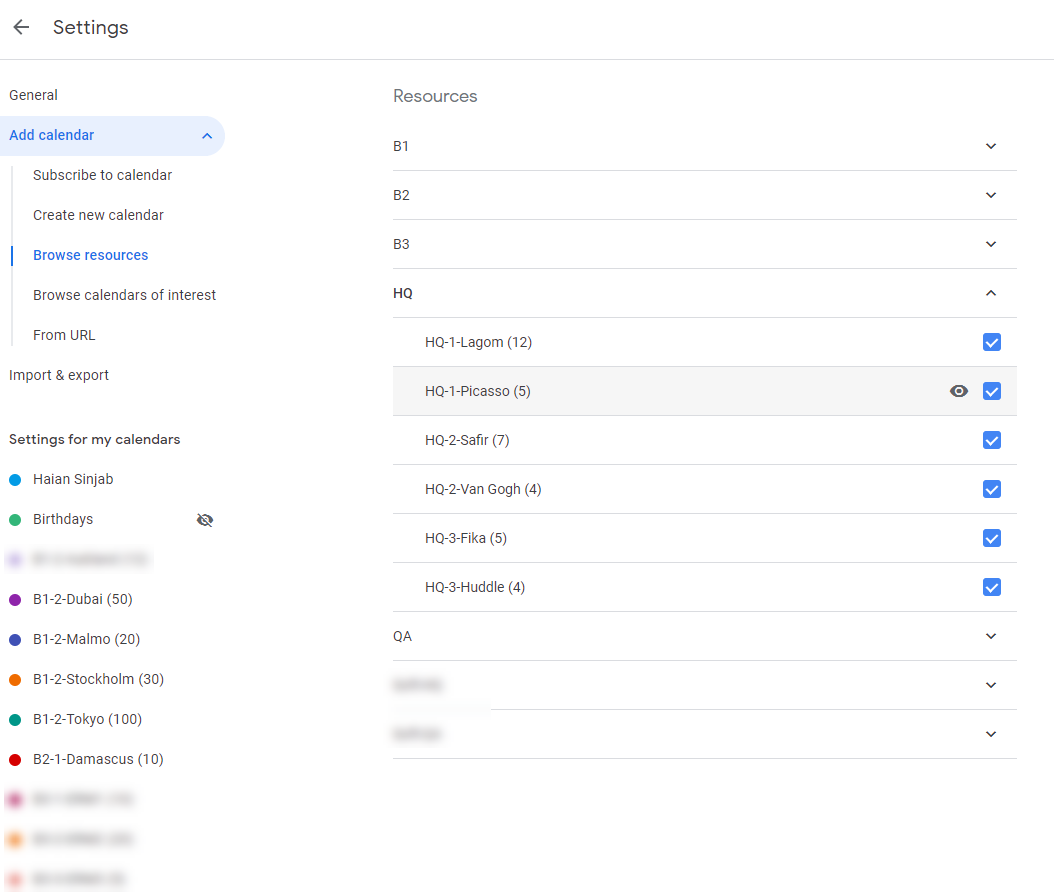
- Go to https://www.google.com/calendar and in the calendar side menu under "Other calendars" press the + icon and browse for your newly created Resource and click the check box icon.
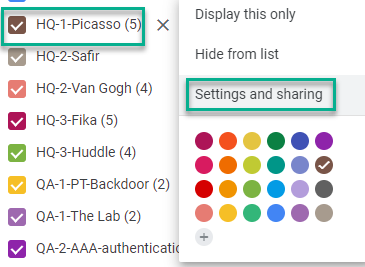
- Select the newly created resource calendar from the list and select the menu icon, then “Settings and Sharing”
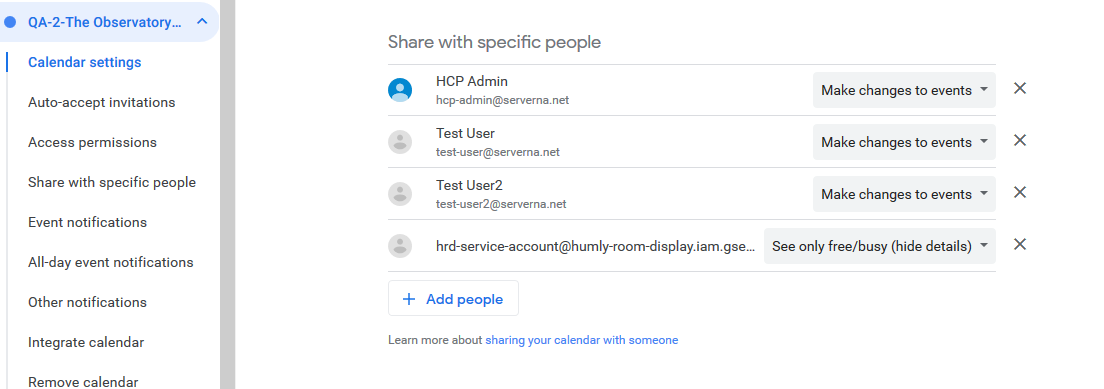
- Make sure to add the service account which will has settings of show free/busy, and the users “Make Changes to Events”.
- Repeat the previous step for all resources in the project.
It might take up to 72 hours for the changes to be applied on Google Workspace.
To learn more about Desk Booking visit Humly Desk Booking - User Guide, or Humly Control Panel - User Guide.
If you want to use Standalone instead of booking system as Exchange or Office 365 for Desk Booking visit Humly Reservations - Standalone.