Prerequisites for configuring the Outlook add-in in Microsoft Entra:
- Humly Cloud
A Humly Cloud account or an on-premise deployment running Humly Control Panel v2.2 or later, configured with Microsoft 365 and Single Sign-On (SSO).
Additional requirements (Not required for this step, but necessary when configuring the add-in in Humly Control Panel and for synchronization to function.)
- Humly Visitor Professional License
One license per visitor screen. - Humly Resource License
One license per resource in Humly Control Panel. For visitor synchronization to work, the same resources must exist in Outlook.
Configuring the Outlook Add-in in Microsoft Entra
To enable the Outlook add-in, you need to configure additional settings in the Humly Control Panel Application.
Authentication
-
In Microsoft Entra, in the left menu go to App registrations and click All applications.
-
Search and find your application that was registered for Humly Control Panel.
Note: If you don’t have an Humly Control Panel application configured, follow this guide to create the application with Single Sign-On Booking System Preparations - M365, and continue from here afterwards.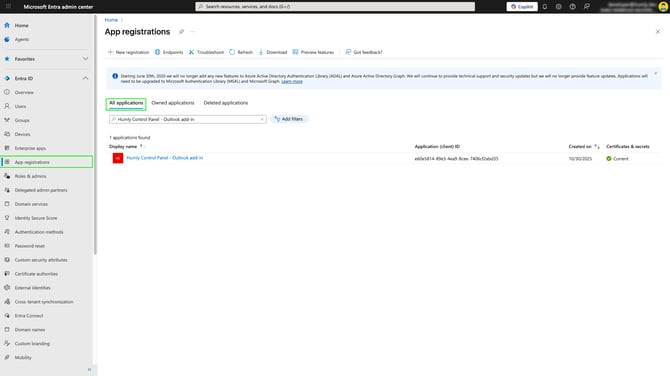
-
Click on your application.
-
Go to Authentication (Preview), click Add Redirect URI → Web under web applications.
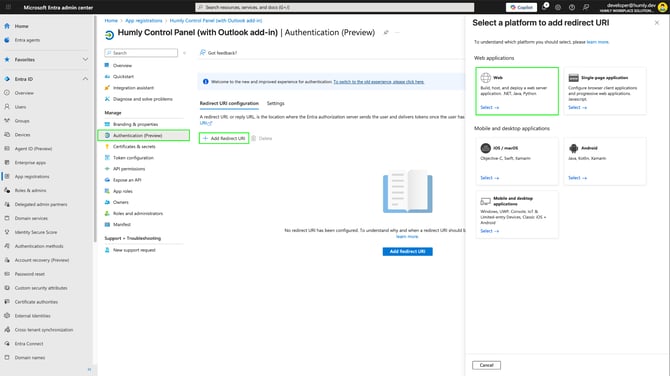
- In Configure Web, for Redirect URIs enter the URI for your Humly Control Panel, and click Configure.
Note: Must include https:// followed by the domain and /auth e.g. https://xxxxx.humly.cloud/auth where x is your cloud ID.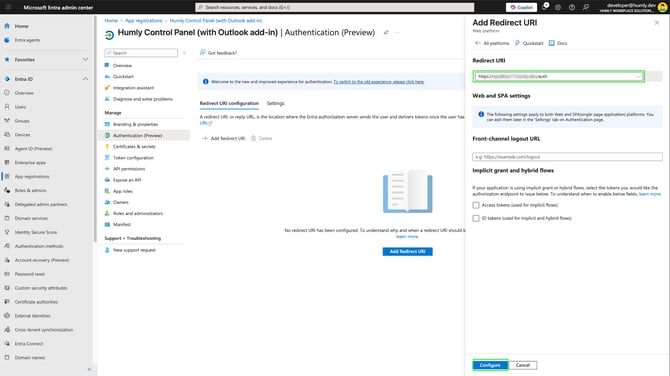
- URI Syntax (Humly Cloud (replace xxxxx with your cloud ID)):
https://xxxxx.humly.cloud/auth - URI Syntax (on-prem, local or self-hosting server):
https://yourdomain.com:3002/auth
- URI Syntax (Humly Cloud (replace xxxxx with your cloud ID)):
API Permissions
If you already have a Humly Control Panel application configured in Entra, you will already have some API permissions defined of type Application:
Calendars.ReadWrite, Group.Read.All, Mail.Send, and User.Read.All.
Keep these permissions.
If you don’t see them, follow this guide on how to prepare the Humly Control Panel application in Entra Booking System Preparation - M365.
-
Go to API permissions in your application, then click Add a permission → Microsoft Graph.
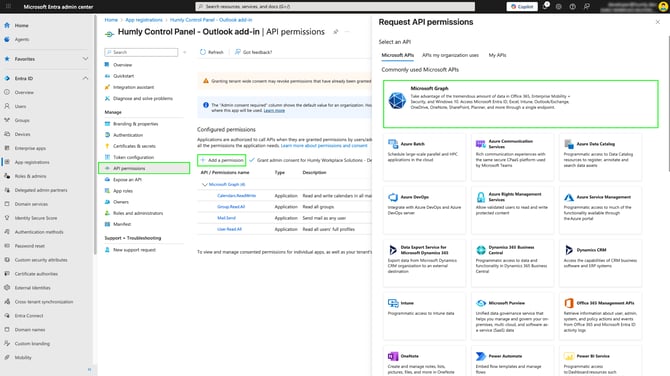
-
For Microsoft Graph select Delegated permissions.
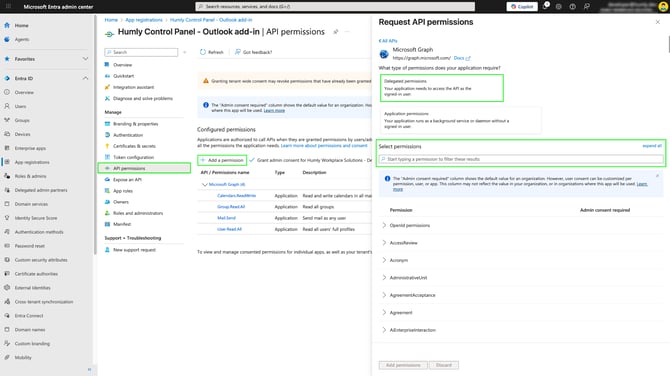
-
Search for and select the following permissions, and then add them.
-
Calendars.ReadWrite - Needed to fetch event details, create or update calendar events, and synchronize changes with backend APIs. Covers all calendar read and write operations.
-
User.Read - Enables user authentication and identity verification. Required for login and token generation.
-
offline_access - Allows the app to use refresh tokens so the user doesn’t need to reauthenticate frequently. Essential for long-running add-in sessions.
-
openid - Enables secure authentication using Microsoft identity platform. Required for modern OAuth 2.0 sign-in flows.
-
profile - Grants access to basic user information (e.g. name, preferred username) for personalization in the add-in user interface.
-
email - Required to associate calendar events with a user’s email. Useful for logging backend correlation, and displaying event ownership information.
-
-
In API permissions, you should now have something like this.
Important! Make sure you click Grant admin consent for… , so each API permission is granted, even the delegated permissions or else the add-in will not allow you to create an event with invited visitors.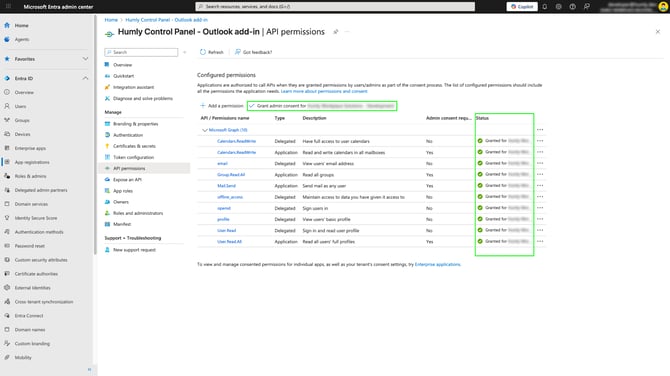
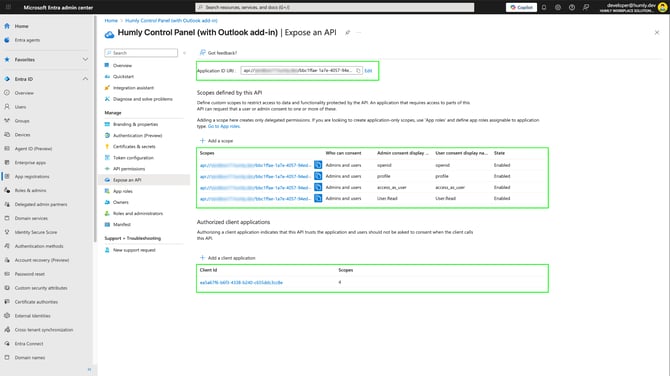
Expose an API
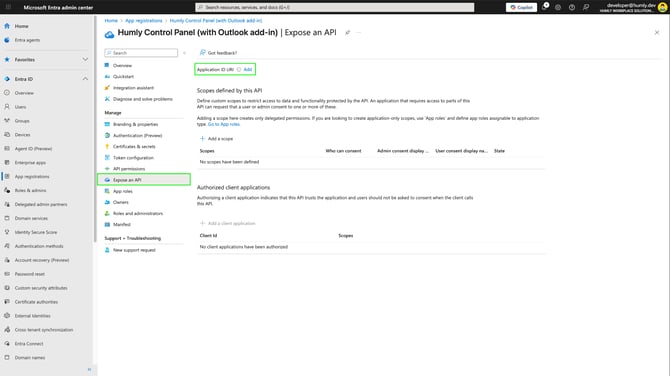
Under Expose an API we will need to add an application ID URI, scopes and a Client ID. Follow the below steps
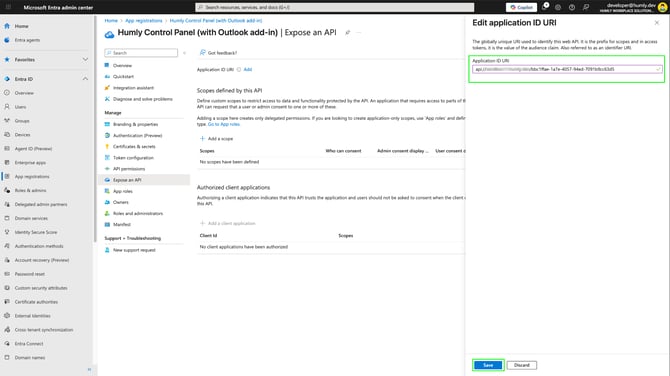
Application ID URI
-
Go to Expose an API in your application, and for Application ID URI click Add.
-
The application will provide the Application (client) ID to the API path, but for the outlook add-in to work we will need to modify the path using below syntax as a reference.
a. Application ID URI syntax for Humly Cloud (replace xxxxx with your cloud ID and yyyy with the Application (client) ID).api://xxxxx.humly.cloud/yyyyy
b. Application ID URI syntax for on-prem, local or self-hosting server installations (replace yyyyy with the Application (client) ID).api://yourdomain.com:3002/yyyyy -
When the Application ID URI has been provided, click Save to add it.
Scopes defined by this API
-
Under Scopes defined by this API click Add a scope.
-
4 custom scopes needs to be defined one by one, so let’s start with the first one, and click Add scope for each custom scope
Note: Scope name, Admin consent display name and Admin consent description are required input fields):- Scope name*: User.Read
Who can consent?: Admins and users
Admin consent display name*: User.Read
Admin consent description*: Standard Microsoft Graph permission used to identify and authenticate the current user.
User consent display name: User.Read
User consent description: Standard Microsoft Graph permission used to identify and authenticate the current user.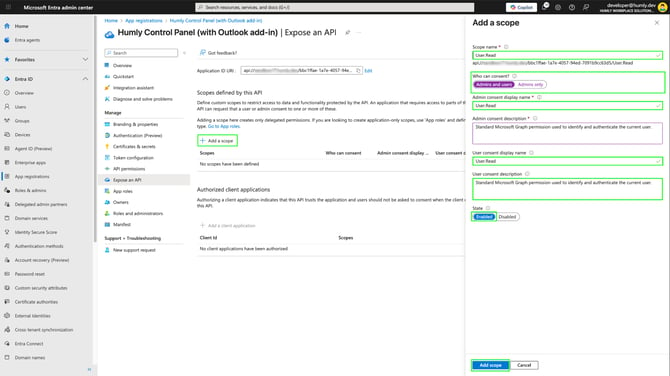
- Scope name*: access_as_user
Who can consent?: Admins and users
Admin consent display name*: access_as_user
Admin consent description*: Allows the add-in to act on behalf of the signed-in user when making API calls. Used to securely exchange user context and perform delegated operations.
User consent display name: access_as_user
User consent description: Allows the add-in to act on behalf of the signed-in user when making API calls. Used to securely exchange user context and perform delegated operations. - Scope name*: profile
Who can consent?: Admins and users
Admin consent display name*: profile
Admin consent description*: Grants access to user-specific profile information when interacting with the backend API.
User consent display name: profile
User consent description: Grants access to user-specific profile information when interacting with the backend API. - Scope name*: openid
Who can consent?: Admins and users
Admin consent display name*: openid
Admin consent description*: Enables secure authentication and identification of the signed-in user.
User consent display name: openid
User consent description: Enables secure authentication and identification of the signed-in user.
- Scope name*: User.Read
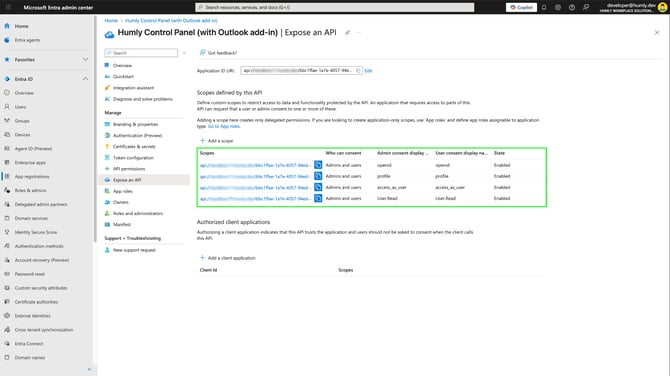
- When having added the necessary scopes you will have a list summarizing them under Scopes defined by this API.
Authorized client applications
-
Under Authorized client applications, click Add and enter the following Client ID which represents all Microsoft Office application endpoints.
ea5a67f6-b6f3-4338-b240-c655ddc3cc8e - Select all four authorized scopes, and click Add application.
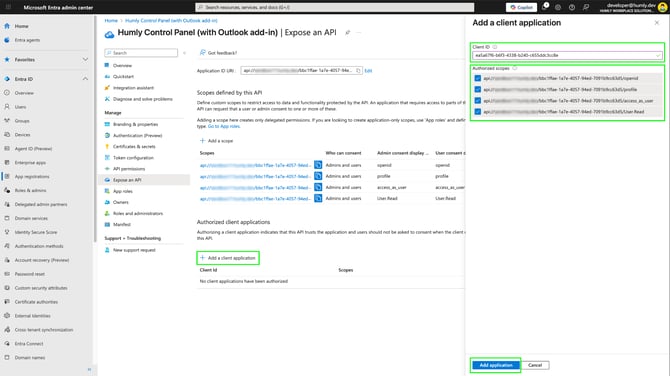
- With that we have everything needed for the add-in under Expose an API.