Important
The Outlook add-in can be used in Outlook on the web and in the Outlook client with the Modern UI enabled. The Classic UI is currently not supported as of Humly Control Panel 2.2. We're working on making it compatible - so please check back here for updates on the subject.
Create new event
-
Go to Calendar in your Outlook.
-
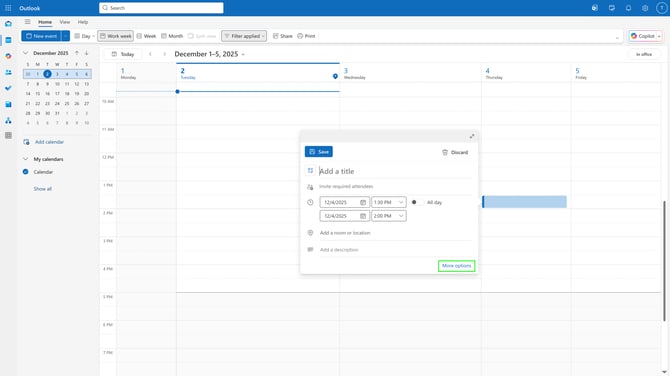
Click in the calendar to start creating an event.
-
Click More options in the event dialogue.
- In the Outlook form add your meeting subject, attendees, start and end time and which room (resource) the event will take place in.
Note: The resource selected must also exist in Humly Control Panel for the synchronization to work.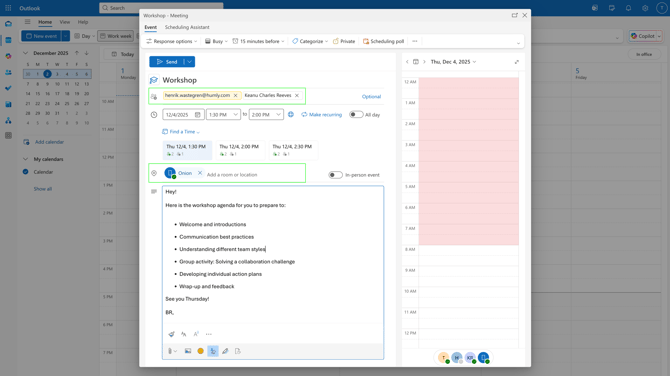
- If you don’t see the add-in in the ribbon, click the dotted menu to see more
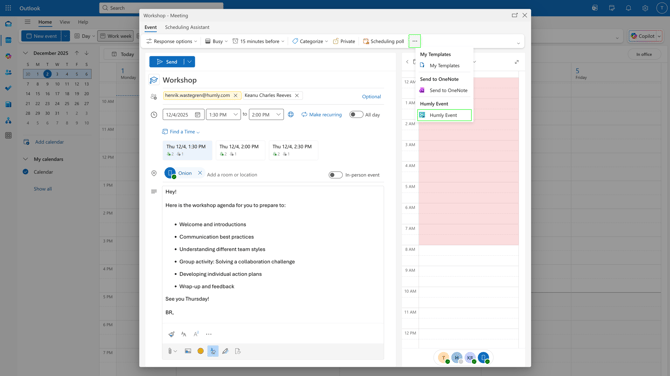
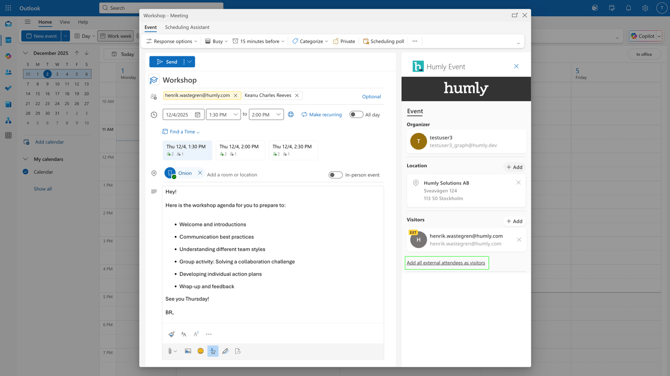
- Click the add-in, and it will be launched. Organizer will be the logged in user.

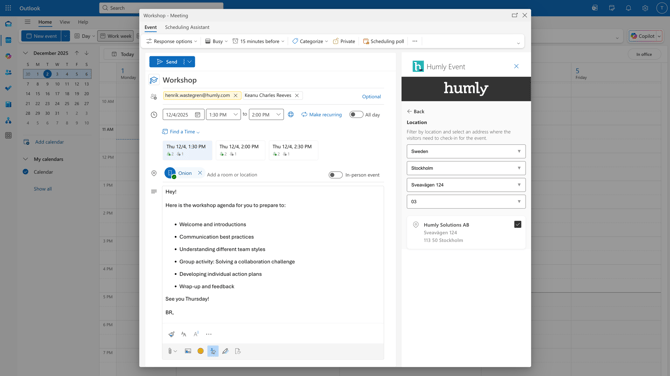
- For Location in the add-in, click +Add.
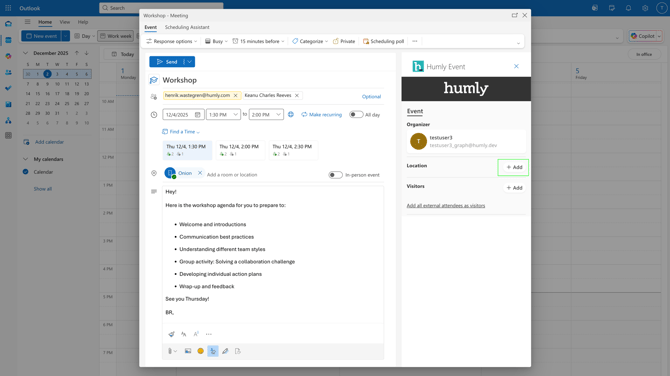
- You will get a filter where you can select an address which has been set for a visitor check-in screen. Only 1 location can be selected and if only one location exists it will be pre-selected.
-
Click ← Back to confirm your selection of location
-
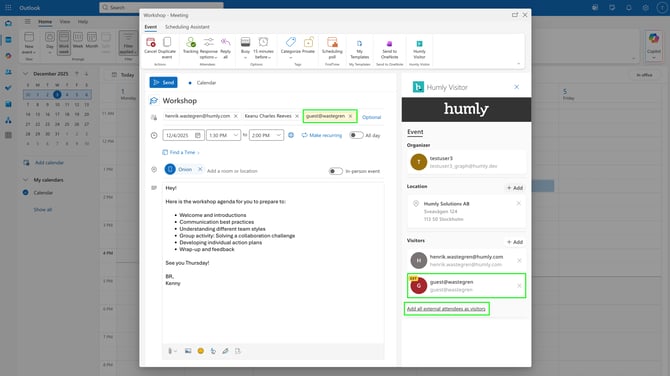
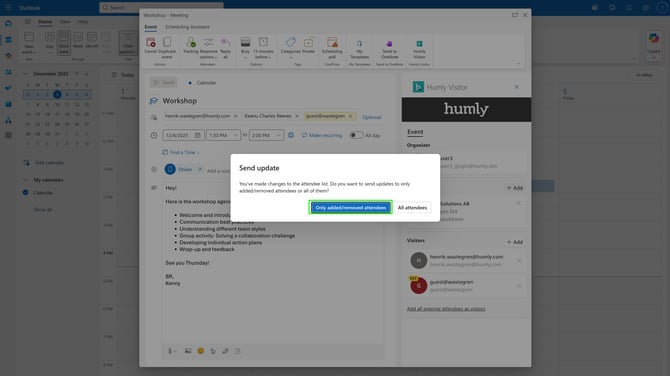
There are 2 ways you can select which attendees from the Outlook form, that you want to invite for a visit:
- + Add - Clicking the add button under Visitors will give you the option to select any attendees as a visitor (not only those by Outlook detected as external). For example, if your organization has different offices where visitor registration is required to be able to visit one of the other offices.
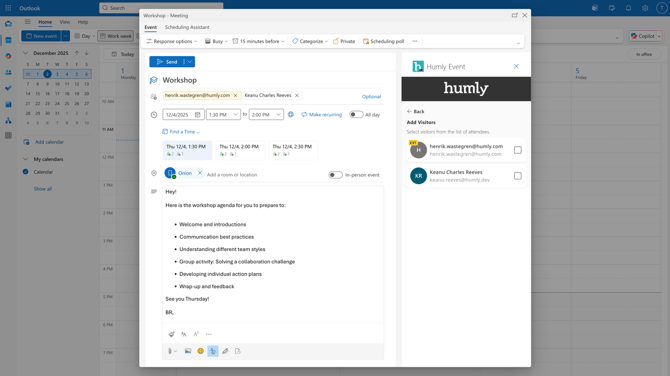
- Add all external attendees as visitors - Clicking this text button will only select those attendees in the Outlook form that has been detected as external (highlighted yellowish).
- + Add - Clicking the add button under Visitors will give you the option to select any attendees as a visitor (not only those by Outlook detected as external). For example, if your organization has different offices where visitor registration is required to be able to visit one of the other offices.
- To create the event and invite the selected visitors, click Send in the outlook form.
Note: If you close the add-in before clicking Send, no invites will be sent out. So keep the add-in open when clicking Send.
- An invitation email will be sent to the invited attendees who have been added as visitors in the add-in.
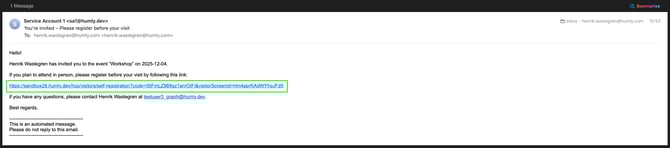
- Invited visitors can register themselves, by following the included link in the email. The link is active until the day of the visit has passed.
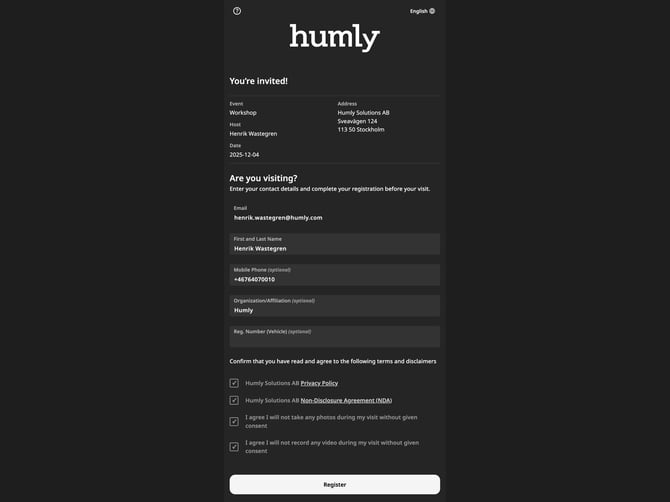
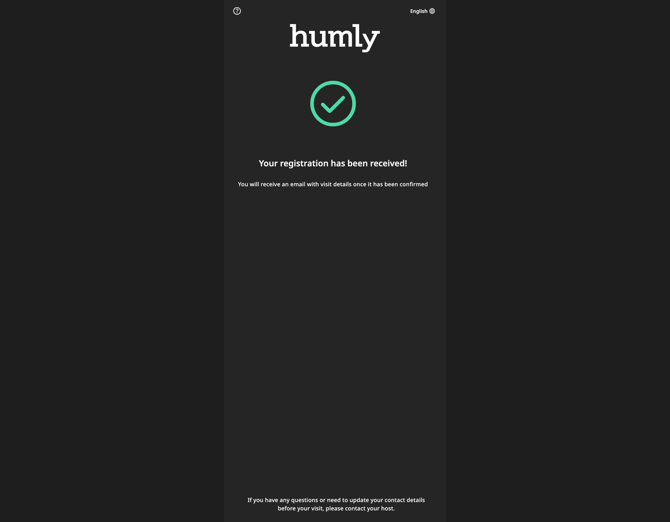
- When the invited visitor has filled in their required contact information and confirmed any terms and disclaimers and click Register, they will see a registration confirmation message and receive a registration mail.
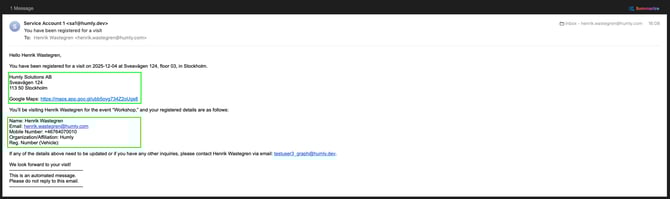
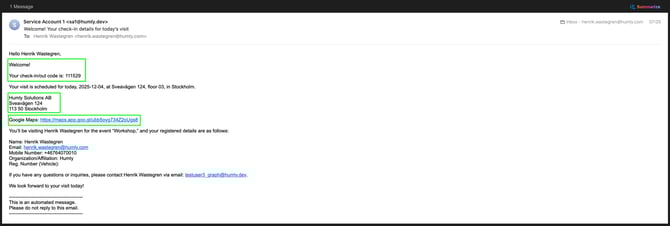
- A Registration confirmation email sent to the registered visitor after they have registered. It includes address and any map-links to help visitors plan their visit (if added in visitor screen configuration).
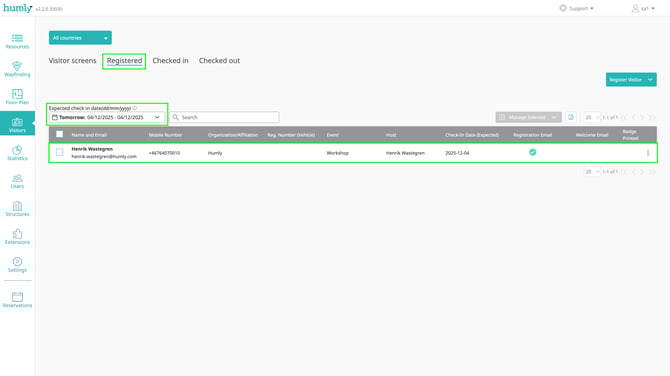
- In Humly Control Panel, under Registered for that date, the visitor will now be visible as a registered visitor.
- On the day of the visit the visitor will receive the Welcome-mail which includes the check-in/out code which will be accepted only for that day when checking in and out.
Edit an Event Created with the Add-in
Add another visitor
-
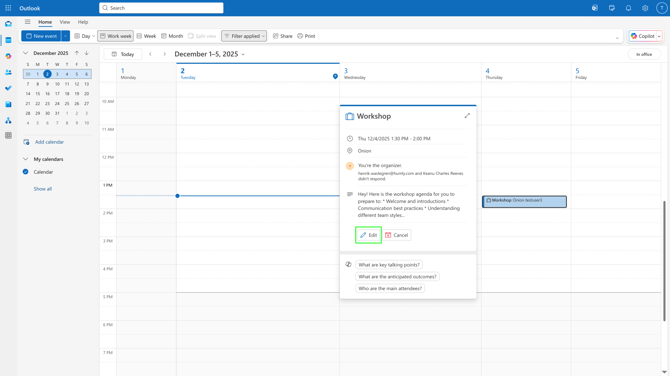
In Outlook, click on your event in your calendar and click Edit.
- Open the add-in for your event, and add the new attendee in the Outlook form, and click Add all external attendees as visitors.
- Click Send, in the Outlook form.
Important! Closing the add-in before clicking Send will loose the changes made; the add-in must be open when clicking Send.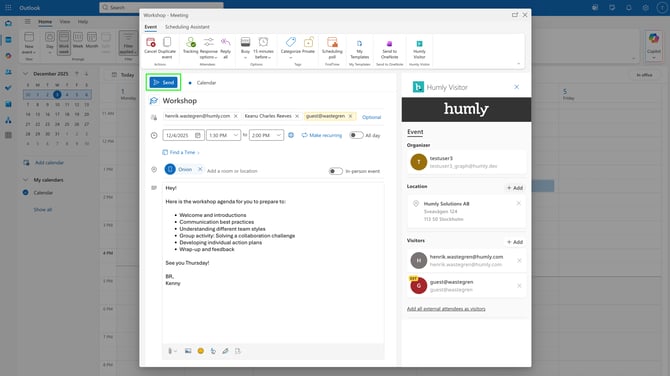
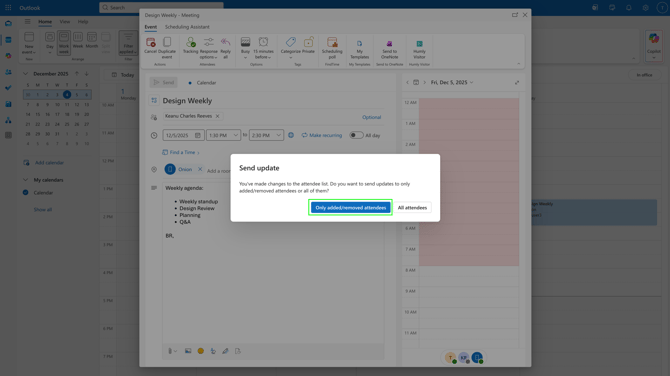
- In the popup dialogue choose the appropriate action based on the changes made. In this case Only added/removed attendees.
-
An invitation email will be sent to the newly added visitor
Remove a visitor
-
In Outlook, click on your event in your calendar and click Edit.

- Remove the attendee in the Outlook form and from the add-in.
Note: If you only want to "uninvite" the attendee - open the add-in and remove the visitor while keeping the attendee in the Outlook form.
Click Send to confirm.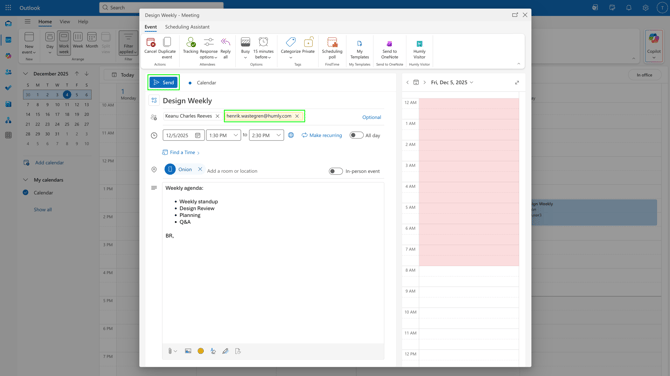
- In the popup dialogue choose the appropriate action based on the changes made. In this case Only added/removed attendees.
-
If the removed visitor has self-registered, a registration cancellation notification via email will be sent to the removed visitor.
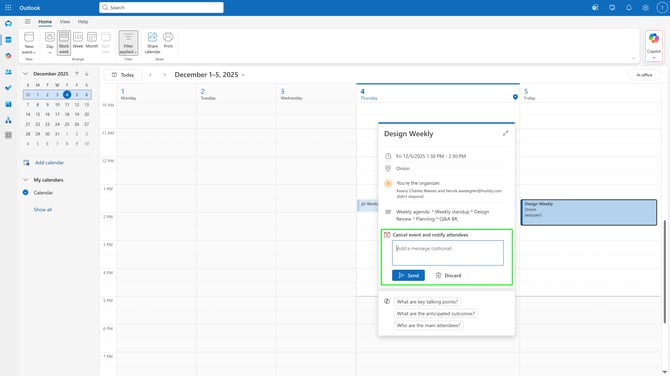
Cancel event
-
In Outlook, click on your event in your calendar and click Cancel.
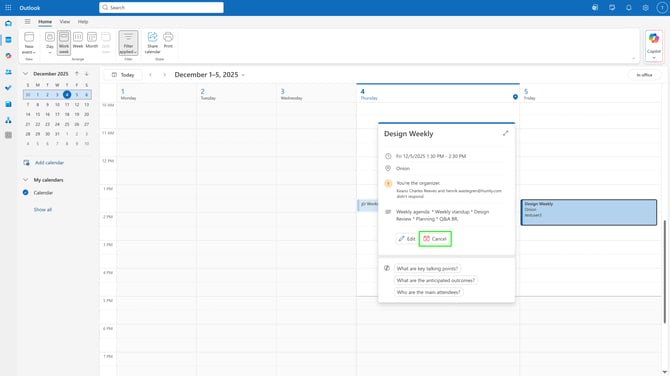
- Add an optional message and click Send to cancel the event and notify attendees.
-
Any visitor who has self-registered, will receive a registration cancellation notification via email.
Related articles
Humly Visitor - Outlook add-in overview
Step 1 - Configure the Outlook add-in in Microsoft Entra
Step 2 - Configure the Outlook add-in in Humly Control Panel