After the connection between the Humly Control Panel and your booking system it is time to configure it. In the basic setup of your Humly Control Panel you will be able to edit the global settings, and then set the structure for your rooms and buildings.
Global Settings
After the first sign in, you will have the option to edit the Global settings. Below you will find a description of what every setting does.
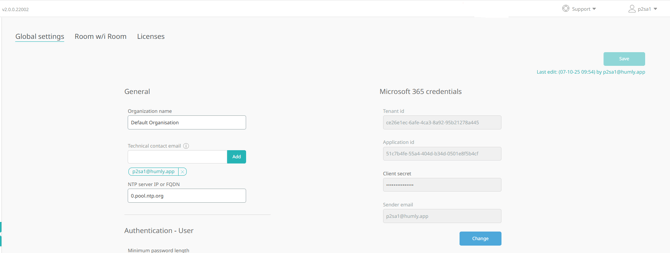
| Organization name | The name of your organization. |
| Technical contact email | Used for sending important notifications through email such as license expirations, HCP updates and warnings. |
| Commercial contact | The person we should contact through email for billing, licensing and other account matters. |
| NTP server IP or FQDN | The NTP server that will be used for time synchronization between the Humly Control Panel and the connected hardware's. Default is set to 0.pool.ntp.org. |
| Firmware search location (only for on-premise HCP) |
Check if there are any firmware updates available.
|
| Password length | Determines the length of user password and can be set to between 8 - 64 characters. |
| Authentication type | User authentication made on the HRD or HBD when trying to book a meeting. Can be either PIN or RFID, or both. |
| PIN length | Determines the length of user pin code and can be set to between 3 - 9 digits. |
| RFID enrollment |
|
| Invite authenticated user | Enable or disable a meeting booked on the screen to be synchronized to the organizers calendar. |
| User inactivity timeout | Set the user inactivity timeout for Humly Reservation. |
| Device registration | Start a timer for allowing new devices to be registered to your Humly Control Panel server. If pairing key is enabled the timer is not needed unless it's a legacy device. |
| Pairing key | Works as a password when connecting new devices to the Humly Control Panel. Minimum 8 characters. Can be numbers, characters and special characters. |
| Authentication 802.1x | Enable / disable 802.1x network authentication for your devices. You can read more on how it works here. |
| Enable strict TLS on the device. | Port based security for the devices. Default value for Humly cloud is enabled and can no be changed. |
| Device proximity | Enables/disables the proximity sensor on legacy devices. |
| Log level | What type of log level the Humly Control Panel should be logging. There are 4 different values. |
| Currency | Set what currency a meeting room should have. |
| Humly Reservation | Determines what resources users should be able to book from Humly Reservation. There is also a setting here which allows Humly Reservation to exist as a Teams application within your organization. You can read more about Teams integration here. |
| Reset HCP service | Reset the Humly Control Panel and all it's data. Nothing will be saved. |
| Service account | The credentials that you have used to connect Humly Control Panel to your booking system backend. |
| Active Directory Federation Service (AD FS) | An alternative way of single sign-on into Humly Control Panel. You can read more about it here. |
| M365 user group | Restrict which user group in Microsoft 365 that are allowed to login to Humly Control Panel or Humly Reservation using single sign-on. You can read more about it here. |
| Default API token | Your API token. Humly Control Panel API. |
| Default printer integration token | Default printer integration token you use when configurating Humly Print Service. |
| Synchronization | Synchronization duration in which Humly Control Panel will sync meetings scheduled within the next 7 days - 6 months. This setting will also apply for how long ahead of time users in Humly Reservation should be allowed to book meetings. |
| Email notifications |
How users should be notified through emails.
|
| Send report on unexpected behaviour after. | Send report email after unexpected behaviour after 10 - 60 minutes. |
| Recipient email | Which email the report email about unexpected behaviour should be sent to. |
| Security - Frame ancestors | This is for when using any of our software as an iFrame. Add FQDN under frame ancestors or simply disable the setting to allow iFrame. |
| Custom equipment | Add custom equipment which can be assigned to any Humly hardware. Maximum of 5 custom equipment can be added. |
| Logo images | Upload logo images which can then be assigned to all or specific devices. Recommended resolution is 390 x 64 pixel and max supported image size is 50kB. |
| Create backup | Create a backup file of Humly Control Panel with an encryption secret. The encryption secret is then required when restoring from this backup file. |
Once you finished the global settings click Next in the top right corner and move on to Configure Buildings and Structures