
If you already run ChirpStack, you connect it to Humly Sensor Gateway (HSG) with an HTTP integration. You need a webhook token from HSG, an application in ChirpStack that holds the sensors, and the integration itself. The screenshots show ChirpStack v4.
In this article
- Before you start
- Step 1: Create a webhook token in HSG
- Step 2: Create an application
- Step 3: Add your sensors to the application
- Step 4: Turn on the HTTP integration
- Step 5: Approve the sensors in HSG
- ChirpStack v3
Before you start
- HSG is set up and paired. See Humly Sensor Gateway - First-time setup.
- Your sensors already work in ChirpStack, with payload decoders that turn their data into readable values.
- The ChirpStack server can reach the HSG server on port 3100.
Step 1: Create a webhook token in HSG
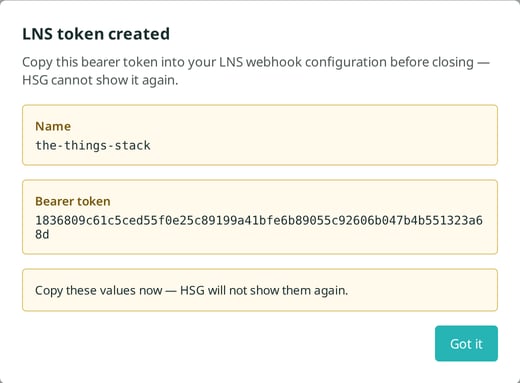
- In the HSG dashboard, go to Settings.
- Under LNS webhook tokens, click + Create LNS token.
- Name it after the ChirpStack server, for example
chirpstack-primary. Click Create. - Copy the Bearer token. HSG shows it only once.
Step 2: Create an application
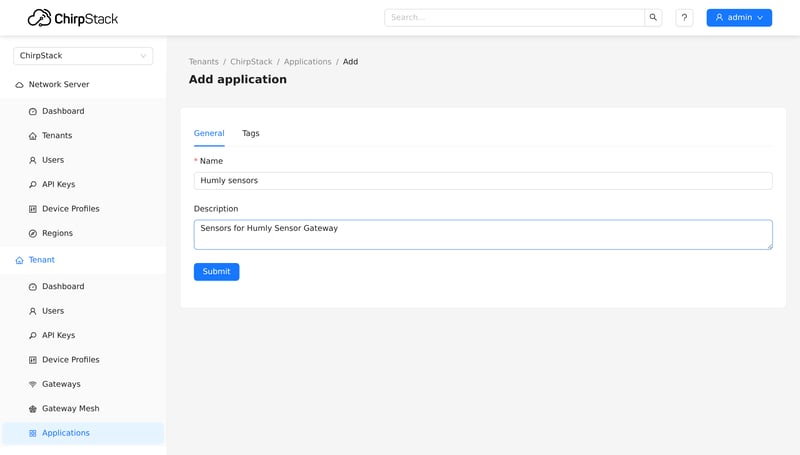
ChirpStack sends data per application. HSG receives every sensor in the application you connect. You can use an existing application, or create one for the sensors you want in Humly.
- Go to Applications and click Add application.
- Enter a name, for example
Humly sensors, and an optional description. - Click Submit.
Step 3: Add your sensors to the application
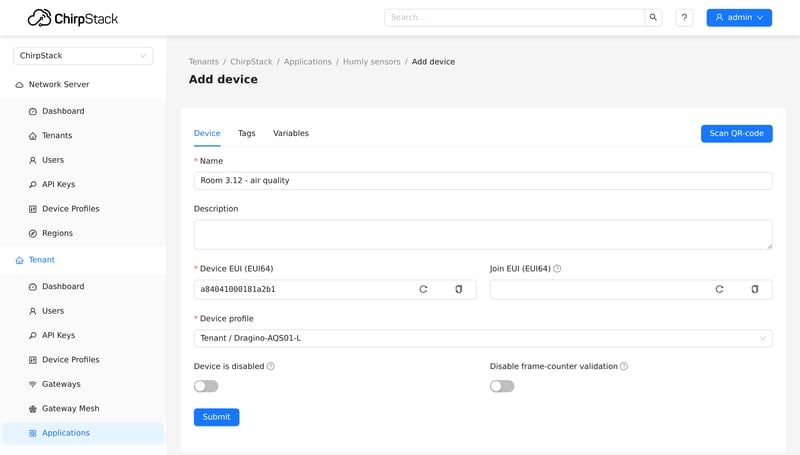
- Open the application. On the Devices tab, click Add device.
- Enter a Name, the sensor's Device EUI, and choose its Device profile.
- Click Submit, then enter the sensor's keys as you normally do.
- Repeat for each sensor.
The Devices tab then lists the sensors and when ChirpStack last heard from them.
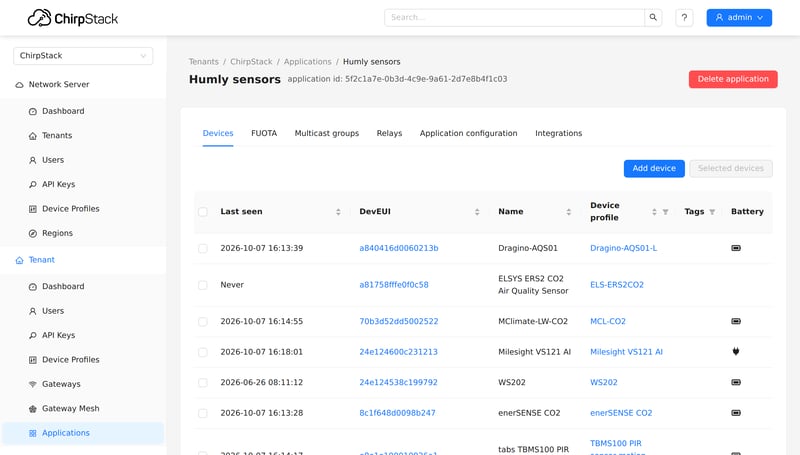
The name you enter in ChirpStack is what HSG shows first. You can give the sensor a new display name when you approve it in HSG.
Step 4: Turn on the HTTP integration
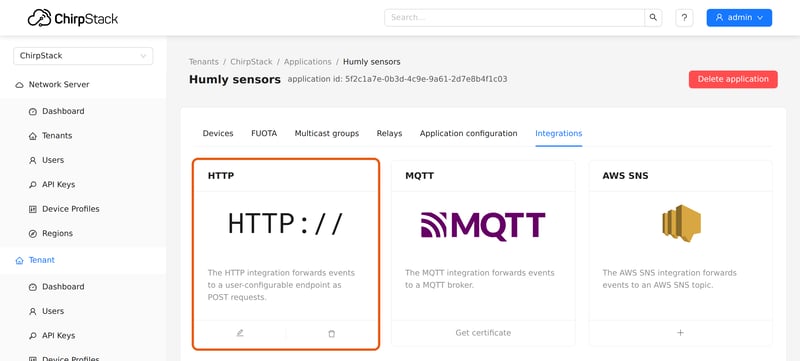
- In the application, open the Integrations tab.
- On the HTTP card, click +. If the card shows a pencil, an HTTP integration already exists. See the note below.
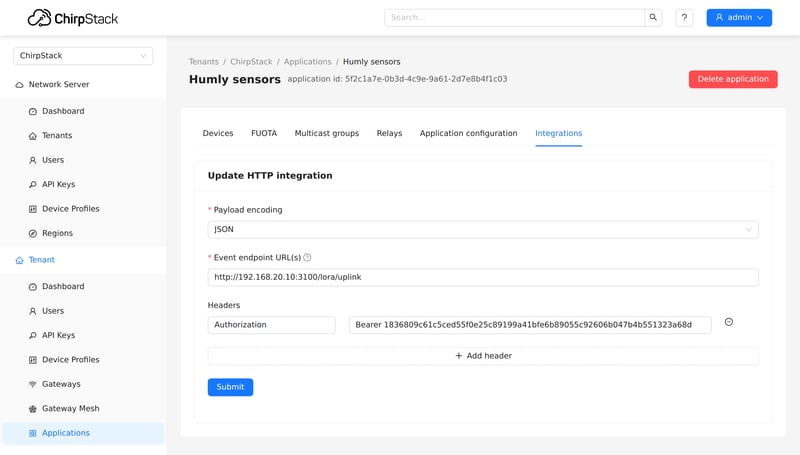
- Set Payload encoding to JSON.
- In Event endpoint URL(s), enter
http://<hsg-server>:3100/lora/uplink. Usehttps://if HSG has a certificate. - Click Add header. Enter
Authorizationas the key andBearer <token>as the value, with the token from step 1. - Click Submit.
Note
An application has one HTTP integration. If it already sends data to another system, add the HSG address to Event endpoint URL(s), separated by a comma. Check with the owner of the other system first, because both addresses receive the same headers.
Step 5: Approve the sensors in HSG
- Wait for each sensor's next uplink.
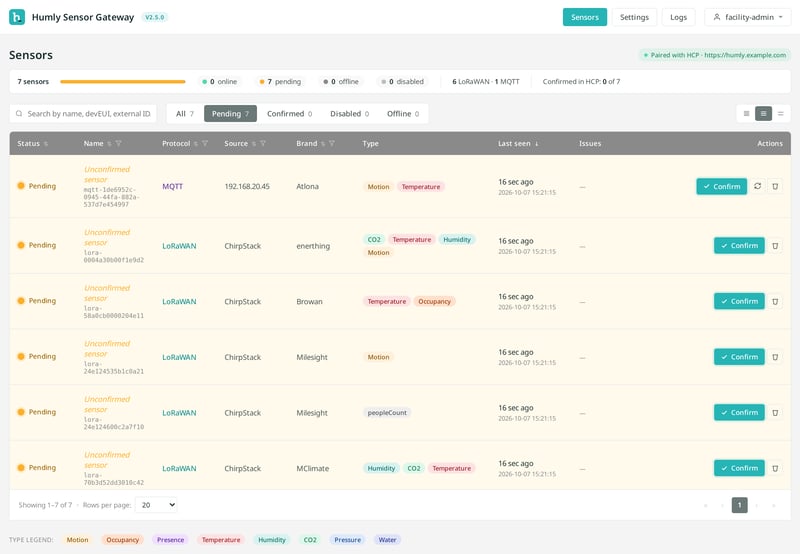
- In HSG, go to Sensors. The sensors appear as Pending, with the source ChirpStack.
- Click Confirm on each sensor you want in Humly, and give it a name.
If no sensor appears, see Connect LoRaWAN sensors for checks.
ChirpStack v3
The steps are the same, with different labels in step 4:
- Open the application and go to Integrations. Add the HTTP integration.
- Set Payload marshaler to JSON.
- Add the header
Authorizationwith the valueBearer <token>. - Enter
http://<hsg-server>:3100/lora/uplinkas the Uplink data URL. Leave the other event URLs empty. - Save.
Humly Sensor Gateway guide
Get started
- Humly Sensor Gateway - Overview
- Humly Sensor Gateway - Use cases
- Humly Sensor Gateway - Requirements
Install and set up
- Install Humly Sensor Gateway on Windows
- Install Humly Sensor Gateway on Linux
- Humly Sensor Gateway - First-time setup
Connect sensors
- Connect LoRaWAN sensors to Humly Sensor Gateway
- Connect ChirpStack to Humly Sensor Gateway
- Connect The Things Stack to Humly Sensor Gateway
- Connect MQTT sensors to Humly Sensor Gateway
Manage and troubleshoot